How to Test a Lawn Mower Solenoid: Step-by-Step Diagnostic Guide
Direct Answer: To test a lawn mower starter solenoid, first disconnect the battery for safety. Use a multimeter or test light to check for 12V power at the large input terminal when the key is turned to ‘start’. Then, check for power at the output terminal going to the starter. If power is present at the input but not the output, the solenoid is likely faulty. A bypass test can also be performed by carefully jumping the two large terminals to see if the starter engages.
Understanding the Lawn Mower Solenoid and Its Function
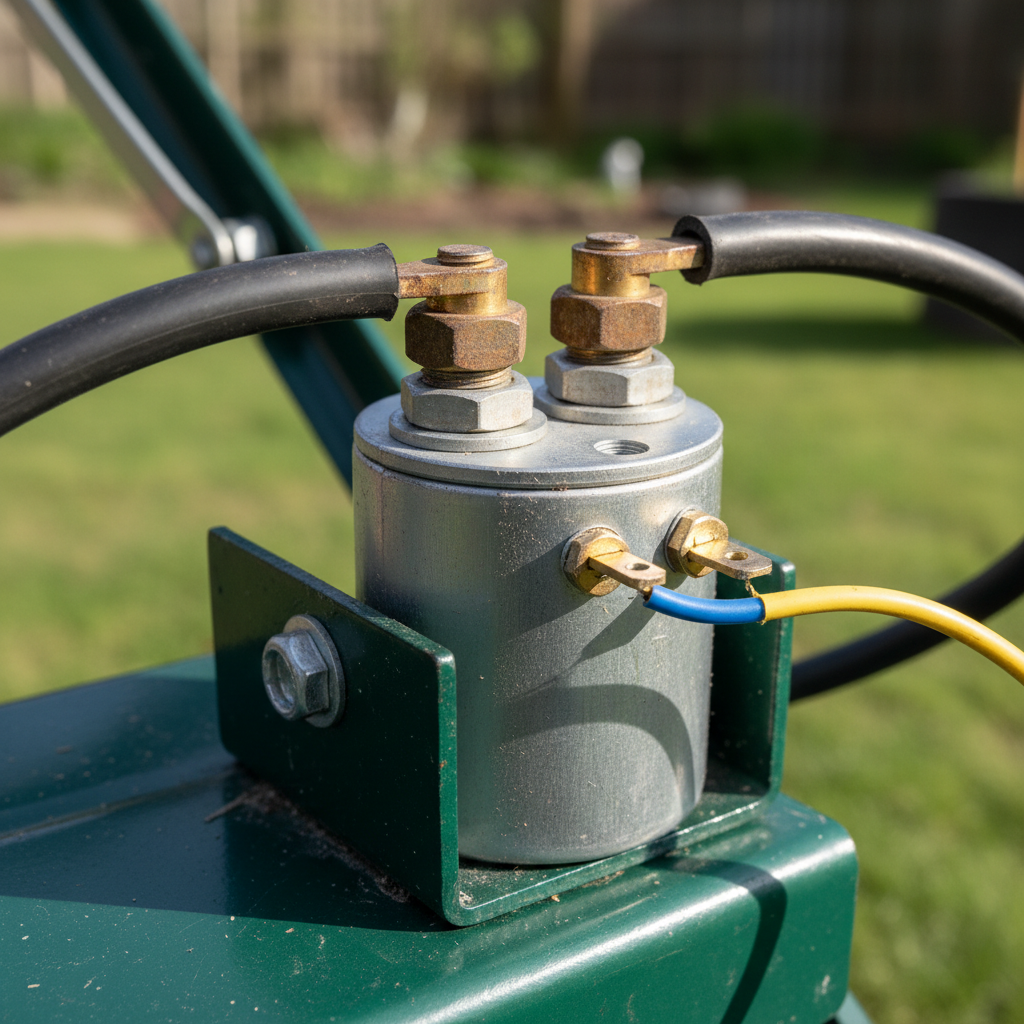
The starter solenoid on a lawn mower is a crucial electrical component that acts as a heavy-duty switch. When you turn the key to start the engine, a small electrical current energizes the solenoid’s electromagnet. This magnet pulls a plunger that closes a set of high-current contacts, allowing electricity from the battery to flow directly to the starter motor, which cranks the engine.
Symptoms of a bad solenoid typically include a single loud click when you turn the key (but the engine doesn’t crank), or no sound at all. Sometimes, the solenoid may stick, causing the starter to remain engaged after the key is released. While the testing procedure is similar for both riding and push mowers, accessing the solenoid on a push mower may require removing a cover or panel.
Safety Precautions and Tools Needed
The first and most important safety step is to disconnect the negative (-) battery terminal. This prevents accidental short circuits and ensures the starter cannot engage unexpectedly while you are working.
Tools Required:
- Multimeter: For checking voltage and continuity.
- Test Light: A simpler alternative for checking power.
- Wrenches or Socket Set: To disconnect the battery and potentially remove components for access.
- Safety Glasses: To protect your eyes.
- Insulated Jumper Wire: For performing a bypass test (use with extreme caution).
On most riding lawn mowers, the solenoid is located near the starter motor, often mounted on the frame or the starter itself. It’s typically a small cylindrical or rectangular device with two large terminals and two smaller terminals.
Step-by-Step Guide to Testing the Solenoid
1. Test for Power at the Input Terminal
After reconnecting the battery (for this test only), set your multimeter to DC Volts (20V range). Connect the black probe to a clean, unpainted metal ground on the mower’s frame. With the key in the ‘OFF’ position, touch the red probe to the large terminal that has a thick red wire connected directly to the battery. You should read approximately 12V. If not, check the main fuse or battery connections.
Now, turn the key to the ‘START’ position (or have someone do it). Check for 12V at the same large input terminal. Power should be present here when the key is in ‘start’. If there is no power here, the issue may be with the ignition switch, safety interlocks, or wiring, not the solenoid itself.
2. Test for Power at the Output Terminal
While the key is still held in the ‘START’ position, move the red probe to the other large terminal—the one with a thick wire leading to the starter motor. You should now read approximately 12V. If you have power at the input terminal but no power at the output terminal during cranking, the solenoid is failing to close its internal contacts and is faulty.
3. Perform a Continuity Test on the Solenoid Coil
Disconnect the battery again. Set your multimeter to the continuity setting (often symbolized by a sound wave). Locate the two smaller terminals on the solenoid (often marked ‘S’ for start and ‘I’ or ‘R’ for ignition). Touch one probe to each small terminal. You should hear a beep, indicating a complete circuit (low resistance). If there is no continuity (open circuit), the solenoid’s electromagnetic coil is burned out and the unit must be replaced.
4. Perform a Safe Bypass Test
Warning: This test bypasses all safety interlocks. Ensure the mower is in park, the parking brake is set, and the blades/PTO are disengaged. Disconnect the small control wires from the solenoid.
Using an insulated jumper wire, carefully bridge the two large terminals on the solenoid for a brief moment. If the starter motor engages and cranks the engine, it confirms that the starter motor and battery cables are good, and the fault lies within the solenoid itself (or its control circuit). If nothing happens, the problem may be the starter motor or a poor ground.
Interpreting Results and Next Steps
Test Results Meaning:
- Power at input, no power at output: Solenoid contacts are bad. Replace the solenoid.
- No continuity across small terminals: Solenoid coil is bad. Replace the solenoid.
- Bypass test works: Confirms solenoid failure. Replace it.
- No power at input terminal during start: Problem is upstream—check ignition switch, fuses, safety switches (seat, brake, blade), and wiring.
If the solenoid tests faulty, it is not typically repairable and should be replaced. Replacement is a straightforward process involving disconnecting the wires and unbolting the old unit. Always replace it with one that matches the original specifications.
If the solenoid tests good but the mower still won’t start, continue diagnosis by checking the starter motor itself, the battery condition, and the ground connections.
Frequently Asked Questions
Can I test a lawn mower solenoid without a multimeter?
Yes, you can use a simple 12V test light. The procedure is similar: check for light at the input terminal with the key in ‘start’, then check the output terminal. If the light is on at the input but not the output, the solenoid is faulty. A bypass test can also be performed as described.
What does it mean when I hear a rapid clicking sound when trying to start?
Rapid clicking usually indicates a weak battery or poor connections, not necessarily a bad solenoid. The solenoid is trying to engage but the voltage drops too low, causing it to release and re-engage quickly. First, check the battery charge and clean/tighten all cable connections at the battery, solenoid, and starter.
Is the starter solenoid the same on all lawn mowers?
While the function is the same, solenoids can vary in physical design, terminal configuration, and amperage rating between different mower models and types (riding vs. push). Always use a replacement solenoid specified for your exact make and model.
Can a bad solenoid drain my lawn mower battery?
A solenoid that is stuck in the ‘closed’ position can cause the starter to remain engaged, which will rapidly drain the battery. A solenoid with an internal short could also cause a drain, though this is less common. If you find a drained battery, testing the solenoid as described is a key diagnostic step.