What Does Wiring a Weed Wacker Mean? (Direct Answer)
Wiring a weed wacker refers to two distinct tasks. The first is repairing or replacing the electrical power cord on a corded electric trimmer — a task involving wire matching, terminal connections, and strain relief. The second — and far more common — is installing new nylon cutting line (often called “string” or colloquially “wire”) into the trimmer head spool, which involves removing the spool cap, threading line through the eyelets, and winding it in the direction marked by the arrow on the spool housing. Identify which task applies to your situation before reading further, as the tools, safety steps, and procedures are entirely different.
What Does ‘Wiring a Weed Wacker’ Actually Mean?
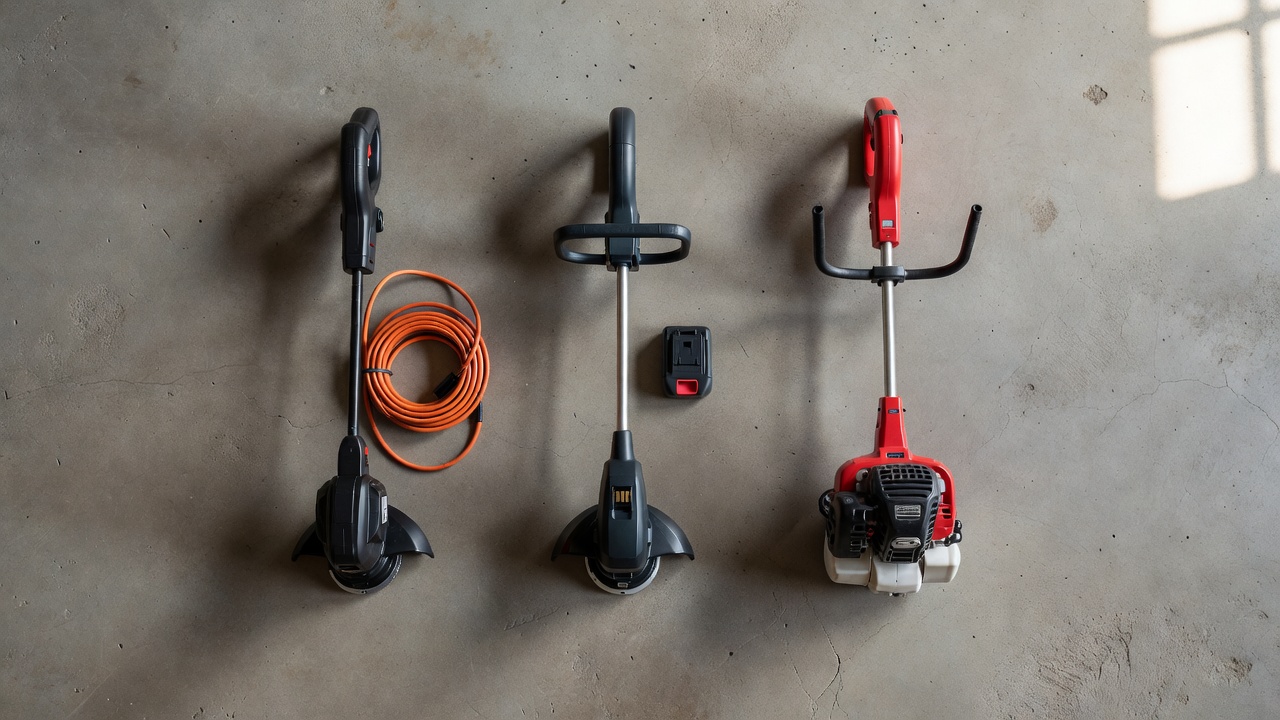
The word “wire” creates genuine ambiguity depending on who is using it. Homeowners replacing worn nylon string often call that line “wire.” Electricians or repair technicians use “wiring” to mean the copper conductors and power cord. Understanding which category your trimmer falls into is the essential first step.
Types of Weed Wackers and How They Relate to “Wiring”
- Corded electric trimmer: Plugs into a wall outlet. Wiring concerns include the power cord, internal switch wiring, and ground connection.
- Battery-powered (cordless) trimmer: No external power cord to repair. “Wiring” almost certainly refers to trimmer line replacement.
- Gas-powered trimmer: No electrical power cord at all. “Wiring” refers exclusively to nylon cutting line replacement.
Signs You Need Electrical Cord Repair vs. Line Replacement
- Cord repair signs: Trimmer does not power on, visible cuts or fraying on the power cord, sparking near the plug, tripped GFCI outlet that will not reset after unplugging the trimmer.
- Line replacement signs: Trimmer runs normally but cutting performance is poor, line is visibly short or missing from the spool, line breaks frequently during use, bump-feed mechanism produces no new line.
Safety Precautions Before You Begin Any Wiring Task
Skipping safety steps on either task creates serious injury risk. Follow these precautions before touching any part of the trimmer.
For Electrical Cord Repair (Corded Trimmers)
- Unplug the trimmer from the wall outlet completely before opening any housing or touching any wiring. Never work on a plugged-in tool.
- Plug the trimmer into a GFCI outlet once repair is complete and before full use. GFCI protection is required by the National Electrical Code (NEC) for outdoor power tools near wet areas.
- Do not attempt internal switch or motor wiring repairs if you are not familiar with residential electrical work. Outdoor power tool repairs involving internal wiring carry shock and fire risk.
- Inspect the replacement cord for a UL-listed rating before installation. Non-listed cords may not meet current safety standards for outdoor use.
For Trimmer Line Replacement (All Types)
- For gas-powered trimmers, remove the spark plug wire before working near the trimmer head. This prevents accidental engine startup.
- For battery-powered trimmers, remove the battery pack before accessing the spool.
- Wear cut-resistant gloves. New nylon line has sharp edges and can cut skin during handling and winding.
- Wear safety glasses. Line fragments can eject during reinstallation testing.
Personal Protective Equipment (PPE) for Both Tasks
- Safety glasses or goggles
- Cut-resistant work gloves
- For electrical work: insulated screwdrivers and insulated wire strippers rated for the voltage involved
Tools and Materials You Will Need
For Electrical Cord Repair
- Insulated wire strippers
- Insulated screwdrivers (flathead and Phillips)
- Wire nuts (appropriately sized for the wire gauge being joined)
- UL-listed replacement power cord — 16 AWG or 14 AWG depending on the trimmer’s amperage draw (see wire gauge section below)
- Strain relief clamp (to secure the cord where it enters the trimmer housing)
- Multimeter (for continuity testing before and after repair)
- Electrical tape
For Trimmer Line Replacement
- Replacement nylon cutting line in the correct diameter for your trimmer head (typically 0.065″ to 0.095″ for residential models; 0.095″ to 0.130″ for commercial-grade trimmers)
- Flathead screwdriver or coin (some spool caps use a coin-turn lock)
- Scissors or a line cutter to trim line to length
- Tape measure or ruler (to pre-cut line to the length specified in your owner’s manual — commonly 20–25 feet per strand for dual-line spools)
Trimmer Line Diameter Reference
| Trimmer Class | Typical Line Diameter | Use Case |
|---|---|---|
| Light-duty residential | 0.065″ – 0.080″ | Grass, thin weeds |
| Medium-duty residential | 0.080″ – 0.095″ | Thicker weeds, light brush |
| Commercial / heavy-duty | 0.095″ – 0.130″ | Dense brush, heavy vegetation |
Always verify the correct diameter in your trimmer’s owner’s manual or on the label printed on the spool housing. Using an incorrect diameter can jam the auto-feed mechanism or cause premature breakage.
How to Repair or Replace the Electrical Wiring on a Corded Weed Wacker
This section applies only to corded electric trimmers. If you have a battery or gas model, skip to the trimmer line section below.
Step 1: Diagnose the Cord Damage
Visually inspect the entire length of the cord from plug to trimmer housing. Look for cuts, kinks, melted insulation, or crushed sections. If damage is only at the plug end or near the housing entry point, cord replacement is straightforward. If damage is internal to the trimmer housing or involves the switch or motor leads, professional repair or unit replacement is recommended.
Step 2: Select the Correct Replacement Cord
Match the wire gauge to the trimmer’s amperage rating. As a general rule: trimmers drawing up to 7 amps use 16 AWG cord; trimmers drawing 7–15 amps require 14 AWG cord. The amperage rating is printed on the trimmer’s data label near the motor housing. Always select a UL-listed, outdoor-rated (Type SJTW or SJTOW) replacement cord with the same number of conductors as the original (typically 2-conductor for double-insulated tools, 3-conductor if the unit has a ground wire).
Step 3: Unplug and Open the Strain Relief
Unplug the trimmer. Locate the strain relief clamp where the cord enters the handle or motor housing. Loosen the clamp screws and slide the old cord out. Note or photograph how the cord is routed inside the housing before removing it.
Step 4: Document the Existing Wire Connections
Before disconnecting any wires, photograph the terminal connections. Standard color coding in North American tools:
- Black = hot wire (connects to the switch or trigger terminal)
- White = neutral wire (connects to the neutral terminal or motor lead)
- Green or bare copper = ground wire (connects to the grounding terminal on the housing, if present)
On double-insulated tools (marked with a double-square symbol), there is no ground wire — only black and white conductors.
Step 5: Disconnect the Old Cord and Connect the New
Remove the old wires from their terminals (unscrew terminal screws or untwist wire nuts). Strip the ends of the new cord’s conductors to approximately 3/4 inch using insulated wire strippers. Match each conductor to the same terminal the old wire occupied. Secure with terminal screws (tighten firmly) or wire nuts (twist clockwise until snug). Tug each connection gently to confirm it does not pull free.
Step 6: Secure the Strain Relief and Test
Route the new cord through the housing entry point and tighten the strain relief clamp so the cord cannot be pulled or twisted at the connection point. Reassemble the housing. Before full use, perform a multimeter continuity test on the assembled tool to confirm no short circuits exist, then plug into a GFCI outlet and test briefly at low load.
When to Replace the Trimmer Instead of Repairing the Cord
- Damage is inside the motor housing or involves switch internals
- Burn marks or melting on internal components
- Replacement cord cost plus labor approaches 50% or more of the unit’s replacement cost
- The unit is subject to an active manufacturer recall — check the CPSC recall database at cpsc.gov before beginning any repair
How to Install or Replace the Trimmer Line (String Wire) on a Weed Wacker
This is the most common task behind this search query and applies to corded electric, battery, and gas trimmers alike.
Step 1: Identify Your Spool Type
Trimmer heads use one of two feed systems:
- Bump-feed (semi-automatic): Tapping the spool head on the ground advances new line. Most common on residential trimmers.
- Auto-feed: Line advances automatically as it wears. No tapping required, but the mechanism is more sensitive to incorrect line diameter or winding direction.
Manual-feed spools exist on older or commercial units — line is manually pulled out by hand when needed.
Step 2: Remove the Spool Cap
Hold the trimmer head housing steady with one hand. Depending on the model, the spool cap either:
- Twists counterclockwise to release (most common — press and turn)
- Presses straight in, then twists
- Requires a coin or flathead screwdriver inserted into a slot and turned
Refer to the arrow labels on the cap — they indicate the direction to unlock. Lift off the cap and remove the spool from the head housing.
Step 3: Remove Old Line and Clean the Spool
Pull off any remaining old line from the spool. Check the spool and housing for debris, dirt, or melted nylon fragments. Wipe clean with a dry cloth. Inspect the eyelet holes on the housing — these are the small openings through which the line exits. Clear any blockages with a straightened paperclip.
Step 4: Cut the Correct Length of New Line
Check the owner’s manual for the recommended line length per strand. A common starting point for residential dual-line spools is 20–25 feet of line cut into two equal strands (one per side of the spool). Do not overload the spool — overfilling causes the line to jam under the spool cap and prevents the bump-feed from advancing correctly.
Step 5: Wind the Line in the Correct Direction
The winding direction arrow is printed or molded directly on the spool housing. Winding in the wrong direction causes the line to unravel during use instead of feeding correctly. To wind:
- Fold one strand in half (for single-slot spools) or insert one strand per side (for dual-slot spools).
- Anchor the line in the spool’s starting notch or eyelet slot.
- Wind in tight, even rows in the direction of the arrow. Keep tension on the line as you wind — loose winding causes tangles.
- Leave 6–8 inches of line free at the end of each strand.
- Secure the loose ends in the holding notches on the spool rim to prevent unwinding during reassembly.
Step 6: Reinstall the Spool and Thread the Eyelets
Place the wound spool back into the trimmer head housing, aligning any tabs on the spool with slots in the housing. Pull the free ends of the line through the eyelet holes in the housing. Replace the spool cap and twist to lock in the direction indicated by the arrow on the cap. Tug the line ends to confirm they move freely and are not pinched under the cap.
Step 7: Test the Bump-Feed Mechanism
For bump-feed models: hold the trimmer at operating height and briefly tap the spool head against a hard surface. The internal clutch should advance a short length of line. If no line advances, the line may be wound in the wrong direction, the spool is overfilled, or the line ends are not seated in the eyelets correctly. Disassemble and repeat Step 5.
Why Does Trimmer Line Keep Breaking After Replacement?
- Line diameter is too small for the trimmer’s power output
- Line is old, brittle, or has dried out — store replacement line coiled in a sealed bag with a small amount of water to maintain flexibility</n
- Cutting technique involves striking hard surfaces (curbing, fencing, rocks) rather than using the tip of the line to cut
- Line was wound too loosely and fused together in the spool from heat friction
Troubleshooting Common Wiring Problems on a Weed Wacker
Corded Trimmer Still Does Not Power On After Cord Replacement
- Verify the GFCI outlet has not tripped — press the reset button on the outlet.
- Use a multimeter to perform a continuity test on the new cord from plug prongs to internal terminals. No continuity indicates a missed or loose connection.
- Test the outlet itself with a known working device to rule out a dead circuit.
- Inspect the on/off switch with the multimeter — a failed switch reads no continuity when triggered and requires switch replacement, not cord replacement.
Trimmer Line Feeds Unevenly or Gets Stuck
- Spool is overfilled — remove some line to leave at least 1/8 inch of clearance below the spool rim.
- Line ends are not seated fully through both eyelets — reopen the head and reseat the line.
- Melted nylon debris is blocking the eyelet or spool channel — clean thoroughly before reloading.
- Wrong line diameter — use only the diameter specified for the trimmer model.
Trimmer Head Melts or Fuses the Nylon Line Together
This occurs when the trimmer is operated at high RPM with the line jammed in the spool, creating friction heat sufficient to melt nylon (which melts at approximately 420°F / 216°C). Causes include: overfilled spool, incorrect line diameter, or continued operation after the line has run out and the exposed plastic arbor is spinning against vegetation. Always stop the trimmer and check the spool if line feed stops during use.
How to Test an Electrical Connection Without a Multimeter
Without a multimeter, a basic visual inspection and continuity lamp tester (a simple two-lead bulb tester available at hardware stores for under $10) can confirm whether a circuit is complete. This is not a substitute for a multimeter when diagnosing internal wiring faults, but it confirms a completed cord repair before full-load testing. Plug the tester into the repaired cord’s terminals — the bulb lighting indicates continuity.
When to Call a Professional or Replace the Unit
DIY electrical repair on outdoor power tools is appropriate for power cord replacement on the exterior of the tool. It is not appropriate for:
- Internal motor winding repairs
- Switch replacement if the switch is soldered to a circuit board
- Any repair where burn marks, melted plastic, or arc damage is visible inside the motor housing
- Tools that have been submerged in water
Cost vs. Replace Analysis
A replacement 16 AWG outdoor-rated power cord costs $8–$20. If the repair requires a service technician, labor typically runs $40–$80 per hour. Entry-level corded electric trimmers retail for $30–$80. If repair cost exceeds 50–60% of replacement cost, purchasing a new unit is the more cost-effective decision in most cases.
Check for Recalls Before Any Repair
Before repairing any power tool, search the CPSC recall database (cpsc.gov/recalls) using your trimmer’s brand and model number. Active recalls may entitle you to a free repair or replacement from the manufacturer, making DIY repair unnecessary and potentially voiding the recall remedy.
Frequently Asked Questions
What wire gauge (AWG) should I use to replace a corded electric trimmer power cord?
For trimmers rated up to 7 amps, use 16 AWG outdoor-rated cord (Type SJTW or SJTOW). For trimmers rated 7–15 amps, use 14 AWG. Never use a lighter gauge than the original cord — undersized wire overheats under load and creates a fire hazard. The amperage rating is on the data label affixed to the trimmer motor housing.
Which direction do I wind trimmer line onto the spool?
Wind in the direction indicated by the arrow molded or printed on the spool housing — not the spool cap. The direction varies by brand and model. Winding in the wrong direction causes the line to feed outward in reverse, which either prevents feeding entirely or rapidly unspools all line during use.
How much trimmer line should I put on the spool?
Load the amount specified in the owner’s manual. For most residential bump-feed spools, this is 20–25 feet per strand. Stop winding when the wound line sits at least 1/8 inch below the rim of the spool. Overfilling causes the line to bind under the spool cap and prevents the bump-feed mechanism from advancing new line.
Is it safe to replace trimmer line without removing the spark plug on a gas trimmer?
It is strongly recommended to disconnect the spark plug wire before working near the trimmer head on any gas-powered model. Although the engine should not start without cranking, a hot engine can rotate parts unexpectedly if the unit is jostled. Removing the spark plug wire takes under 10 seconds and eliminates accidental-start risk entirely.