Quick Answer
To change a spark plug in a lawn mower, disconnect the fuel line and allow the engine to cool for at least 15 minutes. Locate the spark plug wire (a thick black cable on top of the engine), twist it gently to disconnect it, then use a spark plug socket to unscrew the old plug. Gap your replacement plug to the manufacturer’s specification (typically 0.025–0.030 inches), install it hand-tight, torque it to 15–20 ft-lbs, reconnect the wire, and test the engine. The entire job takes 10–20 minutes on most lawn mowers.
Why Lawn Mower Spark Plugs Need Replacing
Spark plugs are essential for igniting the fuel-air mixture in your mower’s engine. Over time, the electrode wears down, carbon deposits accumulate, and the gap widens, making it harder for the spark to jump across and ignite fuel. A failing spark plug causes hard starts, rough running, reduced power, and poor fuel efficiency.
Most lawn mower spark plugs should be replaced annually or every 50–100 hours of operation, whichever comes first. If you use your mower weekly during cutting season, annual replacement is a reasonable maintenance schedule. Seasonal use may allow for every 18–24 months, but annual inspection is always a good practice.
Safety Precautions Before You Start
- Disconnect the fuel line: Locate the fuel line running from the tank to the carburetor. Pinch it with a fuel line clamp or carefully disconnect it to prevent fuel spillage and ensure you’re working with a depressurized system.
- Let the engine cool: Wait at least 15 minutes after running the mower. The engine and spark plug can reach 400°F or higher during operation. Touching a hot plug or wire risks severe burns.
- Remove the spark plug wire before working: Never remove the plug with the wire still connected. This prevents accidental engine start if someone pulls the cord.
- Work on a stable, level surface: Place the mower on flat ground so it won’t shift or tip during your work.
- Keep the fuel tank below half-full: If fuel spills during work, less volume reduces fire risk.
Locating and Accessing the Spark Plug
On most push mowers and riding mowers, the spark plug is located on top of the engine block, typically near the center. Look for a thick black or brown rubber cable—this is the spark plug wire. It connects the ignition coil to the spark plug.
On push mowers: Tip the mower back slightly (or lay it on its side with the carburetor facing up to prevent oil leakage) to access the plug comfortably. The wire is usually easy to reach.
On riding mowers: The spark plug is often easier to access since you’re sitting on an elevated seat. You may need to remove a plastic engine cover or air filter housing. Check your owner’s manual for model-specific guidance on covers and fasteners.
Once you’ve located the wire, note the path it takes from the ignition coil to ensure you reconnect it correctly. Some mowers have multiple cylinders with multiple spark plugs—your manual will tell you how many your model has.
Removing the Old Spark Plug
Step 1: Disconnect the spark plug wire
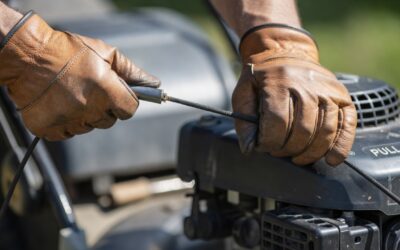
Grasp the wire by the boot (the rubber connector at the end) and twist it gently counterclockwise while pulling. Do not yank the wire itself, as the internal conductor can break. If it’s stuck, rock it side to side gently while pulling. You should feel it release with a light pop.
Step 2: Prepare your tools
You’ll need a spark plug socket (typically 5/8 inch or 13/16 inch for lawn mowers), a ratchet wrench, and ideally a spark plug gap tool or wire gauge. A small torque wrench set to 15–20 ft-lbs is helpful but not essential for many DIYers.
Step 3: Remove the old plug
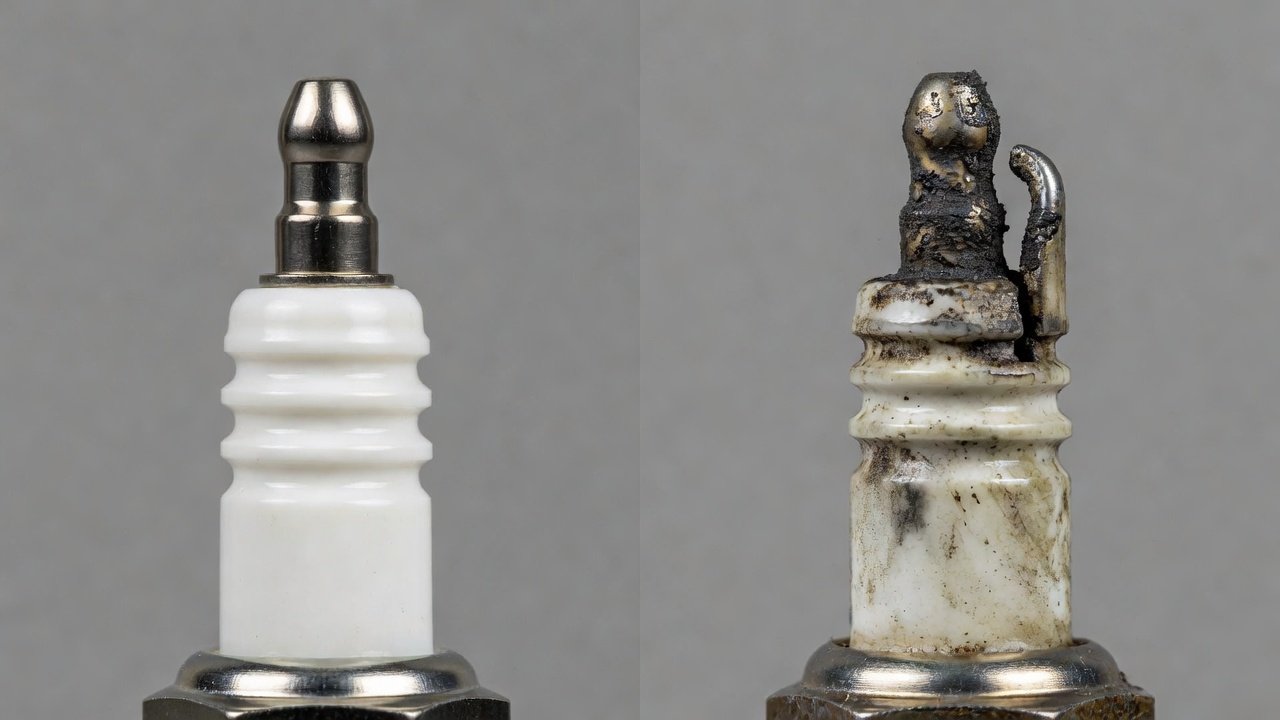
Insert the spark plug socket over the plug and attach it to your ratchet. Turn counterclockwise to unscrew. Once loose, finish removing it by hand if possible so you can inspect it. A fouled plug will be black with soot or oily deposits; a worn plug will show a rounded electrode. Either is a sign replacement was needed.
Identifying and Preparing the Correct Replacement Spark Plug
Using the wrong spark plug can cause starting problems, poor performance, or engine damage. Find your mower’s correct plug by checking:
- The owner’s manual: This is the most reliable source and typically lists the exact OEM part number and specifications.
- The engine block: Look for a manufacturer label (Briggs & Stratton, Honda, Kawasaki, Kohler, etc.) and note the engine model number. Write this down and cross-reference it on the manufacturer’s website or with a parts supplier.
- Common lawn mower plugs: AC Spark Plug Champion L82C, NGK Spark Plug BPM7A, and Briggs & Stratton 592599 are typical, but verify for your specific engine.
Understanding spark plug gap: The gap is the space between the center and side electrodes where the spark jumps. If the gap is too wide, the spark won’t reliably ignite fuel. If it’s too narrow, the spark may be weak. Most lawn mower engines require a gap of 0.025–0.030 inches (0.635–0.762 mm). Check your manual for your specific engine’s requirement.
Gapping the new plug: Use a spark plug gap tool or a wire gauge (available at any auto parts store for a few dollars). Measure the gap by inserting the gauge between the electrodes. If the gap is too large, carefully bend the side electrode closer to the center electrode using the tool. If too small, gently bend it away. Recheck with the gauge to confirm accuracy.
Installing the New Spark Plug
Step 1: Install by hand first
Carefully thread the new plug by hand into the spark plug hole. This prevents cross-threading, which can damage the hole or the plug. Turn clockwise until you feel resistance—do not force it.
Step 2: Torque to specification
Once hand-tight, use your spark plug socket and ratchet to tighten further. The recommended torque for most lawn mower spark plugs is 15–20 ft-lbs. If you have a torque wrench, set it to the middle of this range (17.5 ft-lbs) and tighten until it clicks. If you don’t have a torque wrench, tighten firmly—about a quarter turn past hand-tight—without over-tightening. Over-torquing can crack the ceramic insulator; under-torquing can cause the plug to loosen and vibrate out.
Step 3: Reconnect the spark plug wire
Push the wire boot back onto the spark plug with a firm, straight motion. You should hear or feel a click as it seats fully. Tug gently on the wire to confirm it’s connected securely. A loose connection will prevent the spark from reaching the plug, causing a no-start condition.
Testing and Troubleshooting
Starting the engine: Reconnect the fuel line (if you disconnected it) and attempt to start the mower. It should start readily. If it cranks slowly or doesn’t start, check that the spark plug wire is fully seated.
Listen for smooth operation: A newly installed spark plug should result in smooth, consistent running. If the engine still sounds rough or misfires, the new plug may have the wrong gap, or there may be another ignition issue unrelated to the plug.
If the mower won’t start after replacement:
- Verify the spark plug wire is fully connected by pushing it onto the plug again and tugging to confirm.
- Check that the fuel line is reconnected and fuel can reach the carburetor.
- Inspect the spark plug you removed—if it looked relatively clean, there may be a deeper ignition problem (bad coil, broken wire, etc.).
- Ensure the gap on your new plug is correct by measuring it again.
- If you have a spark plug tester (a small tool available at auto parts stores), use it to confirm the new plug is firing.
Key Differences: Push Mowers vs. Riding Mowers
Push mowers: Single-cylinder engines with one spark plug are the most common. Access is straightforward—the plug is typically visible on top of the engine. You may need to remove a spark plug cover or tilt the mower slightly for comfortable access. The entire procedure is identical to the steps above.
Riding mowers: Many have one or two cylinders; larger models may have three or four. Multi-cylinder mowers have multiple spark plugs, and you’ll need to replace each one individually. The process is the same for each plug. Some riding mower engines are mounted low and may require removing a plastic shroud or engine cover to access the plugs. Always check your manual for model-specific instructions. Access to the second plug (if present) is sometimes more cramped, so having a flexible ratchet extension can help.
Zero-turn mowers: These typically use the same spark plug replacement procedure as riding mowers, though engine location and access may vary. Consult your manual for guidance.
Frequently Asked Questions
How often should you change a lawn mower spark plug?
Most manufacturers recommend annual replacement or every 50–100 hours of operation, whichever comes first. If you use your mower weekly during the growing season, annual replacement is a practical schedule. For light, seasonal use (a few times per year), every 18–24 months may be acceptable. However, inspecting the plug annually and replacing it if fouled is always a good practice. A clean plug maintains engine performance and reliability.
What does a bad spark plug look like?
A fouled spark plug appears black or dark brown, coated with soot or oily residue. A worn plug shows a rounded or eroded center electrode instead of a sharp point. A plug with a gap that’s visibly too wide (you can see daylight between the electrodes) has drifted out of spec. Any of these signs warrant replacement. A healthy plug has a light tan to gray appearance and sharp electrodes.
Can you reuse an old spark plug after cleaning it?
While you can clean a fouled plug with a wire brush or specialized plug cleaner, the electrode has already worn and the gap has likely widened. Cleaning is a temporary fix at best. A new plug is inexpensive ($3–$8) compared to the cost of a mower that won’t start or runs poorly. Replacement is the proper solution and ensures reliable operation for the season.
What if you install the spark plug wire on the wrong cylinder (on a multi-cylinder mower)?
The mower will either not start or run very roughly on that cylinder. The wire routing is critical to the firing order. If you have multiple plugs, take a photo of the original wire configuration before disconnecting them, or label each wire with tape. When you reconnect, ensure each wire goes back to its original plug. If unsure, consult your owner’s manual, which should show the correct wire routing.
Final Tips for Success
- Buy the right plug the first time: Spend 5 minutes confirming the correct OEM part number or equivalent with your manual or manufacturer’s website. Ordering wrong plugs wastes time and money.
- Keep a spare: Store an extra spark plug (properly gapped) in your toolbox. If you’re out cutting and the mower suddenly dies, a spare plug can get you back in action quickly.
- Take a photo before disassembly: If your mower has multiple plugs or complex wire routing, photograph the configuration before you start. This eliminates confusion during reassembly.
- Mark your calendar: Set a reminder for annual spark plug inspection. A few minutes of prevention beats hours of troubleshooting later.
- Clean the engine area: Before and after working on the plug, wipe away grass, dirt, and debris from around the spark plug and wire. This prevents contamination and makes future service easier.