Quick Answer: How to Change a Lawn Mower Spark Plug
To change a spark plug in a lawn mower, disconnect the spark plug wire, allow the engine to cool for at least 5 minutes, locate the spark plug on the engine block, remove it with a spark plug socket, inspect the gap (typically 0.025–0.040 inches), install the new plug hand-tight then snug with a socket wrench, reconnect the wire, and test the mower. The entire process takes 10–15 minutes for most push mowers.
Safety First: Preparation Steps
Before you begin any work on your lawn mower, establish a safe working environment:
- Disconnect the spark plug wire. This is the single most important safety step. Grasp the boot (rubber connector) at the end of the wire and twist gently while pulling away from the spark plug. This prevents accidental engine ignition while you work.
- Allow the engine to cool. Wait at least 5–10 minutes after running the mower before touching the spark plug or engine block. The spark plug and surrounding metal can reach temperatures above 400°F during operation and cause severe burns.
- Work on a flat, level surface. Position your mower on level ground to prevent it from rolling or tipping during maintenance.
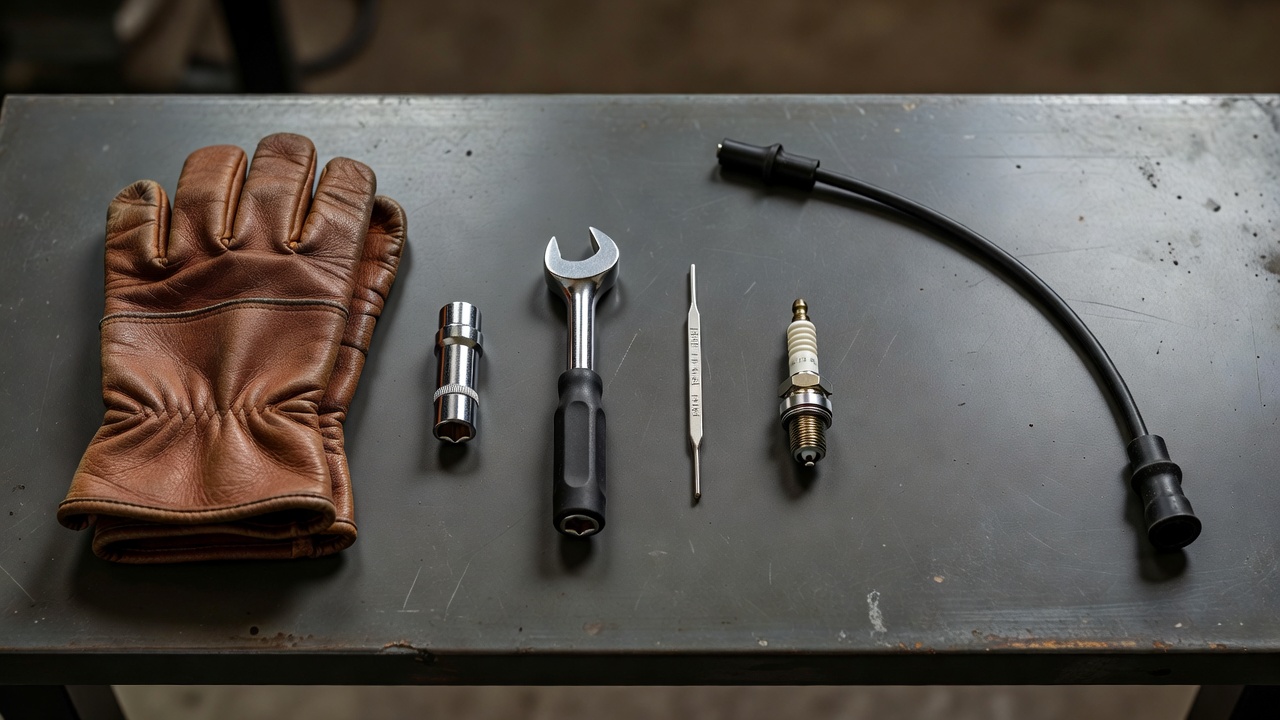
- Gather your tools in advance. You’ll need a spark plug socket (typically 5/8-inch or 3/4-inch), a socket wrench, a spark plug gap tool or feeler gauge, and the correct replacement spark plug for your mower model.
- Wear work gloves. Nitrile or leather gloves protect your hands from sharp edges and residual heat.
Locating and Accessing Your Spark Plug
The spark plug location varies depending on your mower type:
Push Mower Spark Plugs
On most single-cylinder push mowers, the spark plug sits on top of the engine block or slightly to the side. Look for a thick rubber wire (the spark plug wire) running from the ignition coil to a ceramic-topped metal component. The spark plug wire connects directly to the spark plug cap. On some models, you may need to remove a plastic shroud or engine cover to access the plug.
Riding Mower and Zero-Turn Spark Plugs
Riding mowers often have multiple cylinders, meaning they have one spark plug per cylinder. For two-cylinder engines, you’ll typically find one spark plug on each side of the engine. Access may require removing the engine cover, air filter housing, or fuel tank filler neck, depending on the model. Consult your owner’s manual for the exact location, as riding mower configurations vary widely by manufacturer.
Visual Identification Tips
The spark plug is always attached to a rubber wire leading to the ignition coil. The ceramic portion (insulator) is typically white, cream, or light brown in color. The metal portion threads into the engine block. If you cannot locate it, trace the spark plug wire from the ignition coil; it will lead directly to your spark plug.
Removing the Old Spark Plug
Once you’ve located the spark plug, removal is straightforward:
- Select the correct socket size. Most lawn mower spark plugs use either a 5/8-inch or 3/4-inch socket. Check your owner’s manual or measure if unsure. Using the wrong size can strip the spark plug or damage the socket.
- Use a spark plug socket with a rubber insert. This rubber sleeve grips the ceramic insulator and prevents the spark plug from dropping or breaking during removal. A standard deep socket without the rubber insert can crack the ceramic.
- Thread the socket onto the spark plug. Gently lower the socket over the spark plug until it seats fully on the hex nut portion (the metal top).
- Attach the socket wrench and rotate counterclockwise. Turn slowly and steadily. Do not force it; if you feel resistance, check that the socket is fully seated and aligned properly.
- Lift the spark plug straight up. Once loose, carefully remove the spark plug and set it aside. Inspect the old plug for carbon buildup, oil fouling, or unusual wear; these signs indicate potential engine problems that may need attention.
Checking and Adjusting Spark Plug Gap
The spark plug gap is the distance between the center electrode and the side electrode. This gap is critical for proper ignition and engine performance.
Why Gap Matters
The spark plug creates an electrical arc across this gap to ignite the fuel-air mixture in the cylinder. If the gap is too small, the spark may be weak or inconsistent. If the gap is too large, the ignition coil may struggle to create a spark, leading to hard starting or poor performance. Most lawn mower engines require a gap between 0.025 and 0.040 inches (0.635–1.016 mm).
Measuring the Gap
New spark plugs often come pre-gapped from the manufacturer, but always verify before installation. Use a spark plug gap tool (a small metal gauge with notched edges) or a wire feeler gauge:
- Slide the appropriate notch or wire between the center and side electrodes.
- The gauge should fit snugly with slight resistance when moved back and forth.
- If the gap is too small, carefully bend the side electrode away from the center using the adjuster on the gap tool.
- If the gap is too large, tap the electrode gently downward to close it.
- Recheck the gap to confirm accuracy.
Consult your owner’s manual for your mower’s exact specification, or check the spark plug packaging for the recommended gap distance.
Installing the New Spark Plug
Proper installation ensures a secure fit and reliable operation:
- Thread the spark plug by hand first. Carefully insert the spark plug into the engine block and rotate clockwise by hand until you feel it seat. This prevents cross-threading, which can damage the engine’s cylinder head and require professional repair.
- Snug the spark plug with the socket wrench. Once hand-tight, attach the socket wrench and tighten an additional quarter turn (approximately 90 degrees). For most lawn mower spark plugs, the recommended torque specification is 18–22 foot-pounds. Do not over-tighten, as this can damage the spark plug or strip the threads in the cylinder head.
- Reconnect the spark plug wire. Push the spark plug wire connector firmly onto the spark plug cap until you hear a click or feel a firm snap. The connector should slide on smoothly without forcing or twisting.
- Position the wire away from hot surfaces. Ensure the wire does not rest against the hot engine block or sharp edges that could damage its insulation.
Testing and Troubleshooting
After installation, verify that your replacement was successful:
Initial Test
Set the mower on a flat surface, ensure the fuel tank has gasoline, and engage the spark plug wire firmly. Pull the starter cord or press the electric start button. The mower should start within 1–3 pulls. If it starts but runs roughly or stalls, the spark plug may not be seated properly, the gap may be incorrect, or the wire connection may be loose. Shut down the mower and recheck each step.
Common Starting Issues
Mower won’t start at all: Verify the spark plug wire is fully connected by pressing it onto the cap firmly. Check that the gap measurement is within spec. Confirm the engine has fresh fuel and that the fuel valve (if present) is open.
Engine starts but runs rough: A rough-running engine shortly after spark plug replacement may indicate a loose wire connection or incorrect gap. Shut down the mower, disconnect the wire, and reconnect it firmly. If the problem persists, remove the spark plug and recheck the gap.
Engine stalls under load: If the mower starts but stalls when engaged under load, the spark plug may be fouled with carbon (indicating a rich fuel mixture) or the gap may have changed. Remove and inspect the spark plug for black carbon buildup. If the ceramic is black and wet, the engine may be running too rich, a separate issue requiring carburetor adjustment.
When to Call a Professional
If the mower still fails to start after correctly replacing the spark plug and verifying the connection, the ignition coil, magneto, or fuel system may be faulty. At this point, professional diagnosis is recommended.
Key Differences: Push Mowers vs. Riding Mowers
Push mowers: Single-cylinder engines with one spark plug. Access is typically direct and requires minimal disassembly. The procedure outlined above applies directly.
Riding mowers: Multi-cylinder engines (commonly 2 or 4 cylinders) require replacing a spark plug in each cylinder. Each replacement follows the same procedure, but access may require removing engine covers, fuel tanks, or air filter housings. Consult your mower’s service manual for the exact layout and access steps. Budget 30–45 minutes for a complete spark plug service on a riding mower, depending on engine configuration.
Spark Plug Types and Replacement Intervals
Standard spark plugs for lawn mowers typically last 100–300 operating hours before losing efficiency. Most homeowners replace them annually at the beginning of the mowing season or every 2–3 years, depending on usage. Premium spark plugs made from iridium or platinum alloys last longer (up to 500 hours or more) but cost 2–3 times more than standard plugs. For most residential mowers, a standard spark plug is sufficient and cost-effective.
Check your owner’s manual for the exact spark plug part number and type recommended for your mower. Using an incorrect spark plug can cause starting problems, poor performance, or engine damage.
Frequently Asked Questions
How often should I replace my lawn mower spark plug?
Replace the spark plug annually before the mowing season begins, or every 100–300 operating hours, whichever comes first. If you notice hard starting, rough running, or reduced power during the season, inspect and replace the spark plug immediately. More frequent replacement is not necessary unless the plug shows visible damage or fouling.
What is the correct spark plug gap for my lawn mower?
Most lawn mower engines use a spark plug gap between 0.025 and 0.040 inches. Consult your owner’s manual or the spark plug packaging for your specific mower model, as some engines may have different specifications. Always verify the gap before installation, even if the spark plug comes pre-gapped from the manufacturer.
Can I use a different brand or type of spark plug?
You should use the spark plug type and part number specified in your owner’s manual. Using an incorrect spark plug—such as a different heat range, gap size, or electrode type—can cause starting problems, poor performance, or engine damage. Stick with the manufacturer’s recommendation unless a professional technician advises otherwise.
What do I do if the spark plug breaks during removal?
If the ceramic insulator breaks or the spark plug becomes stuck, stop immediately and do not force it further. A broken spark plug can leave debris in the cylinder, damaging the engine. If the plug is stuck, apply penetrating oil around the threads, wait 15–20 minutes, and try again with gentle, steady pressure. If it remains stuck after two attempts, consult a professional mechanic.