Direct Answer: How to Change Oil on a Honda Lawn Mower
To change oil on a Honda lawn mower, warm the engine for 15–30 seconds, turn it off completely, locate the drain plug underneath the mower deck, drain the old oil into a container, and replace the oil filter if your model has one. Refill with the correct SAE grade oil (typically SAE 10W-30 for most climates) to the capacity listed in your owner’s manual, verify the level using the dipstick or sight glass, and dispose of old oil at a recycling center or auto parts store. The entire process takes 15–20 minutes and requires only basic tools: a wrench, oil drain pan, and fresh oil.
Before You Start: Safety and Preparation
Before draining oil, take these safety precautions to protect yourself and your mower:
- Turn off the engine and let it cool slightly. Never work on a mower with the engine running. A warm engine (not hot) drains oil more efficiently, so run it for 15–30 seconds before shutting down, then wait 2–3 minutes.
- Work on a level surface. Place your mower on flat, level ground. If you must tilt the mower to access the drain plug, always tilt it so the spark plug faces upward—tilting it the wrong way can flood the carburetor with oil and damage the engine.
- Disconnect the spark plug wire. Remove the wire from the spark plug to prevent accidental starting while you work.
- Wear gloves and eye protection. Old oil can be hot and irritating; gloves protect your skin.
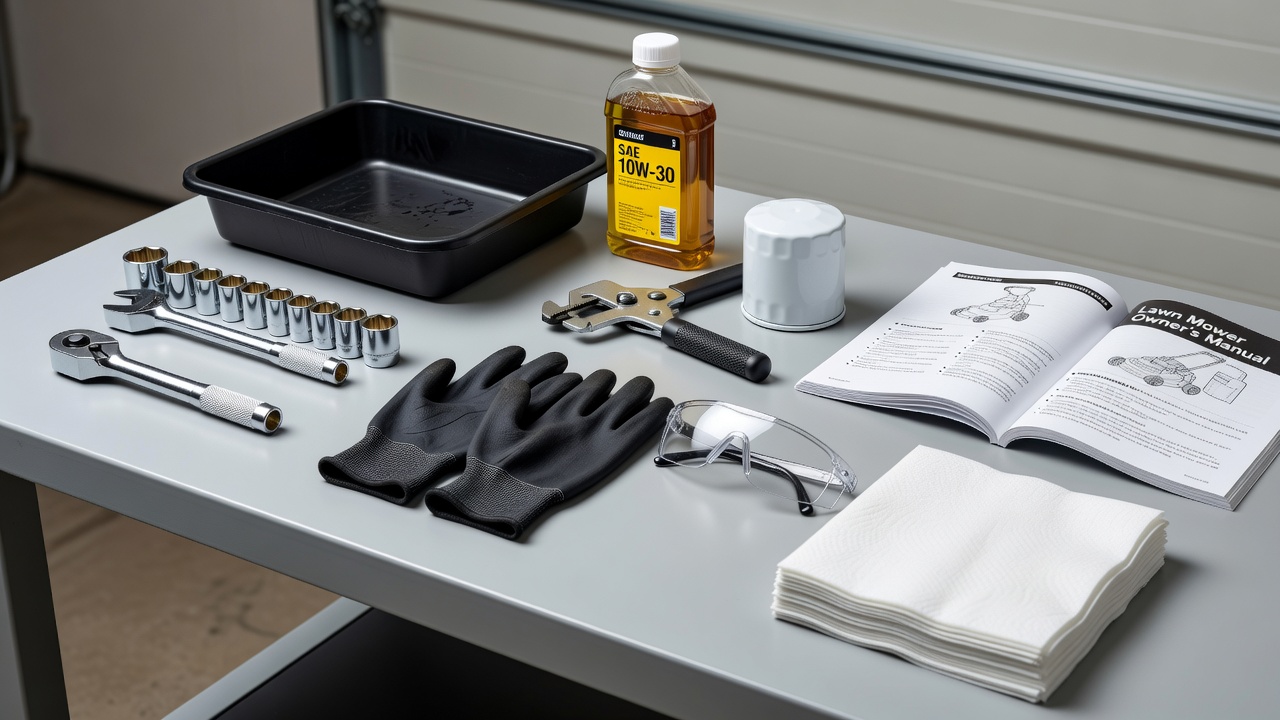
Tools and materials you’ll need:
- Socket wrench or open-end wrench (typically 10mm–17mm, depending on drain plug size)
- Oil drain pan (at least 2–3 quarts capacity)
- Fresh oil matching your mower’s specifications (SAE grade and capacity)
- Oil filter wrench (if your mower has a filter)
- New oil filter (if your mower has one; check your manual)
- Rags or paper towels
- Owner’s manual for your specific Honda mower model
Find your mower’s oil type and capacity: Consult your Honda lawn mower owner’s manual—this is the most reliable source. Most Honda push mowers hold 0.6–0.7 quarts, while riding mowers typically hold 1.5–2 quarts. The manual specifies the correct SAE grade (usually SAE 10W-30 for most climates; cold climates may require SAE 5W-20 or 0W-20). If you don’t have the manual, visit Honda’s website and search by model number, or contact a Honda dealer.
Locating the Drain Plug on Push vs. Riding Mowers
The drain plug location varies between mower types:
Push mowers: The drain plug is typically located on the underside of the mower deck, near the rear. You’ll need to tilt the mower to access it. Important: Always tilt the mower so the spark plug faces upward; tilting the carburetor side down can cause oil to enter the carburetor.
Riding mowers: The drain plug is usually on the side of the engine block or the bottom of the crankcase. You may not need to tilt the mower; simply locate the plug from underneath or the side.
Zero-turn mowers: Locate the drain plug on the engine block (often on the lower side). Consult your manual for the exact location, as designs vary.
Once you locate the drain plug, use the appropriate wrench size (usually 10mm–17mm) to loosen it by turning counterclockwise. If it’s stuck, apply penetrating oil and wait 5–10 minutes before trying again. Do not force it; excessive force can strip the threads.
Draining Old Oil Safely
Follow these steps to drain oil without spilling:
- Position your oil drain pan directly beneath the drain plug to catch all old oil.
- Loosen the drain plug by hand after using the wrench to break it free. Unscrew it slowly, allowing hot oil to drip into the pan. Be careful—warm oil can burn skin.
- Remove the plug completely once most oil has drained. Wipe it clean with a rag and set it aside.
- Let the oil drain fully for 5–10 minutes. Tilt the mower slightly if needed to encourage drainage, but remember to keep the spark plug facing upward.
- Wipe the drain plug opening with a clean rag to remove any debris or oil residue.
- Reinstall the drain plug by hand, then tighten it with your wrench. Do not overtighten; snug is sufficient. Overtightening can strip threads or crack the engine block.
Disposing of old oil: Never dump old oil down a drain, into soil, or in the trash. Old oil is a hazardous waste. Take it to a local recycling center, auto parts store (many accept old oil for free), or quick-lube shop. Some municipalities offer hazardous waste collection days. Check Earth911.com or your local environmental agency for disposal locations.
Replacing the Oil Filter (If Equipped)
Not all Honda lawn mowers have oil filters—many smaller push mowers use a sealed engine without one. Check your owner’s manual to confirm whether your model has a filter.
If your mower has an oil filter:
- Locate the filter. It’s typically a cylindrical canister on the side or top of the engine block.
- Use an oil filter wrench to loosen the filter by turning counterclockwise. If you don’t have the correct wrench size, wrap a rag around the filter for grip.
- Remove the old filter by hand once it’s loosened. Be prepared for a small amount of oil to drip out.
- Wipe the filter mounting surface with a clean rag to remove any debris or old gasket material.
- Install the new filter: Apply a thin layer of fresh oil to the rubber gasket on the new filter’s top. Screw the filter on by hand until the gasket contacts the mounting surface, then turn it an additional 3/4 turn. Do not use the wrench to tighten; hand-tightening is correct.
When to replace the filter: If your mower has a filter, replace it every other oil change or annually, whichever comes first. Some manufacturers recommend replacing it with every oil change. Follow your manual’s schedule.
Adding New Oil and Checking the Level
Now refill your mower with fresh oil:
- Locate the oil fill cap. It’s usually on top of the engine, labeled with an oil can symbol. Unscrew it by hand.
- Place a funnel in the opening to prevent spills.
- Pour oil slowly into the funnel. Add approximately 75% of the recommended capacity first (e.g., if your manual says 0.6 quarts, add about 0.45 quarts).
- Replace the oil fill cap and run the engine for 10–15 seconds to circulate the new oil, then turn it off immediately.
- Wait 1–2 minutes for the oil to settle in the pan.
- Check the oil level: Most mowers have either a dipstick or a sight glass.
- Dipstick: Remove the dipstick, wipe it clean, reinsert it fully, then remove it again to read the level. Oil should reach the “full” mark or line.
- Sight glass: Look at the transparent window on the side of the engine. Oil should be between the minimum and maximum marks.
- Add oil in small increments if the level is low. Add 1–2 ounces at a time, check again, and repeat until the level is correct.
- Do not overfill. Excess oil causes the engine to smoke, leak, and potentially seize. If you overfill, use a clean syringe or baster to remove excess oil until the level is correct.
- Reinstall the dipstick or replace the oil fill cap.
Choosing the correct oil type for your climate: SAE 10W-30 is the standard for most climates. However, the “W” refers to winter performance. If you live in a very cold climate (below 0°F), use SAE 5W-20 or 0W-20 for easier cold starting. In hot climates, SAE 30 may be recommended. Always consult your manual or contact Honda support if unsure.
Common Mistakes to Avoid
- Overfilling the oil: Excess oil causes smoke, leaks, and engine damage. Always check the level after adding oil and drain excess if needed.
- Using the wrong oil type: Using the wrong SAE grade can impair engine performance and longevity. Match your manual exactly.
- Draining oil while the engine is cold: Cold oil is thick and drains slowly. Warm the engine briefly (15–30 seconds) for better drainage.
- Tilting the mower the wrong way: Always tilt so the spark plug faces upward. Tilting the carburetor side down floods it with oil.
- Forgetting to check the level after refilling: Always verify the oil level with the dipstick or sight glass before operating the mower.
- Reusing the old drain plug without cleaning: Old plugs can have debris trapped in threads. Clean it thoroughly before reinstalling.
- Not disposing of old oil properly: Dumping old oil harms the environment. Use a recycling center or auto parts store.
Frequently Asked Questions
How often should I change the oil on my Honda lawn mower?
Honda recommends changing oil every 50 operating hours or annually, whichever comes first. For casual home use (mowing 1–2 times per week), this typically means once per mowing season. Check your owner’s manual for your specific model, as some older or specialty models may have different intervals. If you use your mower heavily (commercial or frequent use), change oil more often—every 25–30 hours.
Can I use synthetic oil in my Honda lawn mower?
Most modern Honda lawn mowers can use synthetic oil, and it offers benefits like better temperature stability and longer intervals between changes. However, check your manual first—some older models specify conventional oil only. If synthetic is approved, it will typically still be the same SAE grade (e.g., synthetic 10W-30 instead of conventional 10W-30).
What happens if I use the wrong SAE grade oil?
Using the wrong SAE grade can cause poor cold-weather starting, reduced engine efficiency, excessive smoke, or inadequate engine protection. Always use the grade specified in your manual. If you accidentally use the wrong grade, drain it and refill with the correct type as soon as possible.
Do I need to replace the air filter during an oil change?
No, the air filter is separate from an oil filter. Check and replace the air filter according to your manual’s schedule, typically every 100–300 operating hours depending on dust exposure. An oil change and air filter replacement are separate maintenance tasks, though you can do both at the same time for convenience.
Final Tips for Success
Keep records of each oil change—date, operating hours, and oil type used—to stay on schedule. Store extra oil of the correct type in a cool, dry place for quick refills if needed. If you’re unsure about any step, consult your owner’s manual or contact a Honda dealer. Changing oil regularly is one of the most important maintenance tasks for lawn mower longevity; a few minutes of work each season can add years to your mower’s life.