Quick Answer: How to Fix a Lawn Mower Pull Cord
A broken lawn mower pull cord is fixed by diagnosing the damage type (snapped, frayed, or stuck), then removing the recoil starter assembly cover. Remove the old or damaged cord from the pulley, thread new starter rope through, secure it with a proper knot, rewind the spring, and reassemble. Most cord replacements take 30–60 minutes and cost $10–20 in materials.
Identify Your Cord Problem Before You Start
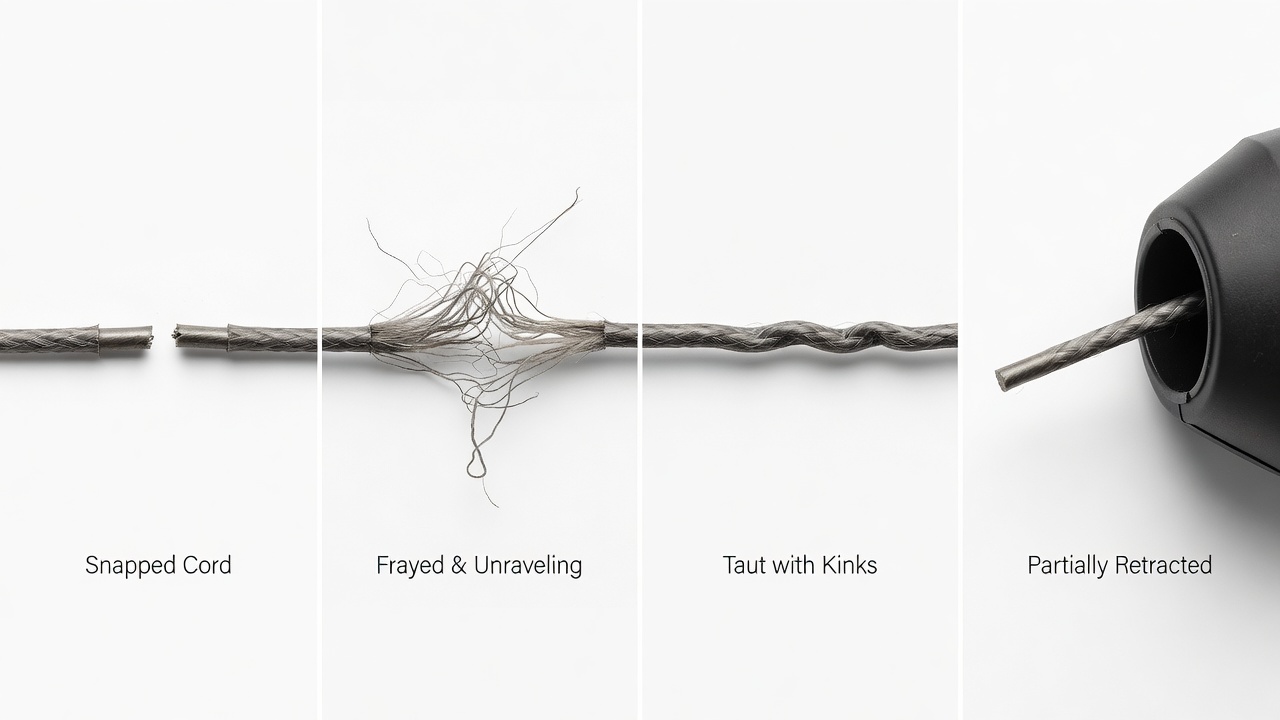
Not all pull cord issues require full replacement. Correctly diagnosing the problem saves time and helps you select the right fix.
- Completely snapped or broken cord: The cord has separated into two pieces or hangs loose in the housing. This requires full replacement.
- Frayed or partially unraveled cord: The rope is torn, shredded, or unraveling at the handle or inside the recoil housing. Rewinding or replacement is needed.
- Stuck or difficult-to-pull cord: The cord resists pulling, feels stiff, or doesn’t retract smoothly. This may indicate a stuck pulley, frozen spring, or debris in the housing—not always a cord failure.
- Cord won’t retract fully: After pulling, the cord doesn’t return to the housing. This suggests a broken recoil spring or misaligned pulley rather than a cord problem.
Tools and Materials You’ll Need
Gather these items before starting to keep the repair smooth and organized.
| Category | Items |
|---|---|
| Tools | Socket set or screwdriver set (Phillips and flathead), pliers, needle-nose pliers, wrench set (if needed), work gloves |
| Materials | Starter rope (typically 3–4 mm diameter; check your manual for exact length), electrical tape, lubricant (WD-40 or similar), cloth or rag |
| Safety | Safety glasses, work gloves, clean workspace |
Replacement rope note: Most lawn mower starter cords are 3 mm or 4 mm braided nylon rope, 10–15 feet in length. Check your mower’s manual or existing cord diameter to confirm. Starter rope is widely available at hardware stores and online for $5–15.
Safety Precautions Before You Begin
Working on a lawn mower’s recoil starter involves springs under tension and a running engine risk. Follow these precautions:
- Turn off the engine and let it cool. Never work on a hot engine. Allow at least 15–30 minutes of cool-down time.
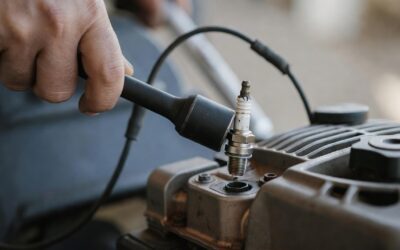
- Disconnect the spark plug wire. Remove or disconnect the wire from the spark plug to prevent accidental engine startup while you work.
- Work on a flat, stable surface. Place the mower on a level work bench or the ground to prevent tipping during disassembly.
- Be aware of spring tension. The recoil spring inside the housing is under significant tension. When you remove the cover, it may try to unwind suddenly. Keep hands clear and work deliberately.
- Wear safety glasses and gloves. Protect your eyes and hands from sharp rope fibers, spring edges, and fasteners.
How to Remove the Recoil Starter Assembly
The recoil starter is typically located on top of the engine. Disassembly requires patience to avoid losing small parts.
Step 1: Locate and Access the Recoil Assembly
The recoil starter is a plastic or metal housing mounted on the engine’s top or side. It’s usually held in place by 4–6 bolts or screws around its perimeter. Remove the spark plug wire first, then take a photo of the assembly before disassembly as a reference.
Step 2: Remove the Housing Cover
Using your screwdriver or socket set, carefully remove all bolts or screws holding the recoil cover. Place fasteners in a small cup or container so they don’t get lost. Gently lift the cover away from the housing. You’ll see the pulley (the spool the cord wraps around) and the recoil spring coiled inside.
Step 3: Inspect the Interior
Before proceeding, look for debris, dirt, or damage inside the housing. Wipe out dust with a clean cloth. Check if the spring appears bent, broken, or disconnected from the pulley. If the spring is visibly damaged or the pulley is cracked, the assembly may need replacement rather than just a cord fix.
Replacing a Snapped or Severely Damaged Cord
Full cord replacement is the most reliable fix for snapped, frayed, or severely damaged rope.
Step 1: Remove the Old Cord
Locate where the cord is attached to the pulley. It’s typically tied with a knot or secured with a clip. If knotted, carefully untie or cut the knot. If clipped, remove the clip with pliers. Gently pull the old cord out of the pulley and the housing. Dispose of it properly.
Step 2: Clean the Pulley
Wipe the pulley surface with a cloth to remove any fibers, dirt, or debris from the old cord. A clean pulley helps the new rope wind evenly and smoothly.
Step 3: Thread the New Starter Rope
Take your new starter rope and seal the cut end by briefly passing it over a flame or melting it slightly with a lighter to prevent fraying. Allow it to cool. Feed one end of the rope through the hole in the pulley. Pull it all the way through until roughly 6–12 inches hangs out on the pulling side (your manual specifies the exact length).
Step 4: Tie the Rope to the Pulley
On the inside of the pulley (not the pulling side), tie the rope with a strong knot. A figure-eight knot or double overhand knot is ideal—it’s secure and won’t slip. Pull the knot tight so it seats firmly in the pulley’s anchor point. Some pulleys have a dedicated slot or hole; align the knot with this feature.
Step 5: Wind the Rope on the Spool
This is the critical step for smooth operation. Hold the pulley steady. Slowly rotate it by hand in the direction the cord normally winds (usually clockwise when viewed from the top). Wind the rope tightly and evenly around the pulley in a spiral pattern, with each wrap sitting snugly against the previous one. Wind until all but 6–12 inches of rope is wrapped. The rope on the pulling end should not be knotted—it will attach to the handle separately.
Rewinding and Restoring Spring Tension
Proper spring tension is essential for the cord to retract smoothly.
Understanding the Recoil Spring
The recoil spring is a tightly coiled metal ribbon inside the housing. One end connects to the pulley’s center hub, and the other anchors to the housing. When you pull the cord, the pulley rotates and winds the spring tighter. When you release, the spring pushes back and retracts the cord. If this spring is broken or misaligned, the cord won’t retract.
Winding the Spring Correctly
Most recoil starters come pre-wound. If the spring has unwound or become disconnected, you’ll need to rewind it carefully:
- Ensure the spring’s outer end is anchored securely in the housing.
- Gently hold the pulley and rotate it slowly clockwise (or counterclockwise—check your manual) until the spring begins to tighten. You’ll feel resistance.
- Rotate another 2–3 full turns to create tension, then stop. Do not over-tighten, as excessive tension can break the spring or make the cord extremely hard to pull.
- Once tensioned, the pulley should want to rotate back toward its starting position. This confirms the spring is working.
Testing Spring Tension Before Reassembly
Gently pull the rope handle (or the rope end if the handle isn’t attached yet) by about 6 inches. You should feel moderate resistance, then the rope should smoothly extend. Release it—the rope should snap back quickly and retract fully into the housing. If it doesn’t retract or retracts slowly, the spring may need more tension or may be damaged.
Troubleshooting a Stuck or Hard-to-Pull Cord
If your cord is difficult to pull but not broken, try these fixes before full replacement.
Clean the Housing and Pulley
Dirt, dried grass, and debris can jam the pulley. Remove the recoil cover and vacuum or wipe out all debris. Check for grass clippings lodged around the pulley or spring. Clean thoroughly and test.
Check for a Frozen or Misaligned Pulley
If the pulley is hard to rotate by hand, it may be misaligned or rusted. Remove it carefully (if your design allows) and inspect for corrosion or damage. Lightly lubricate the pulley’s center bearing with WD-40 and work it back and forth gently until it moves smoothly.
Lubricate the Cord
A dry or frayed cord can resist pulling. If the cord itself is intact but stiff, apply a light coat of lubricant (silicone spray or WD-40) to the rope. Wipe away excess. Work the cord in and out a few times to distribute the lubricant. This is a temporary measure—if the cord is severely worn, replacement is still the best solution.
Inspect the Spring for Cracks or Breaks
If the pulley rotates freely but the cord won’t retract, the spring is likely broken or disconnected. Look inside the housing for a separated or cracked spring. A broken spring requires assembly replacement, not just a cord fix.
Reassembling and Testing the Mower
Once the cord is wound and the spring is tensioned, reassembly is straightforward.
Step 1: Position the Cover
Carefully lower the recoil cover back onto the housing, aligning the bolt holes. Do not force it; it should sit flush. Make sure no wires or springs are pinched under the cover.
Step 2: Reinstall Fasteners
Insert all bolts or screws and tighten them in a crisscross pattern (like tightening a car wheel) to ensure even pressure. Tighten firmly but do not over-tighten, as this can crack the plastic housing. A snug fit is all that’s needed.
Step 3: Attach the Cord Handle
If the cord handle was removed, now is the time to reattach it. Typically, the rope end is threaded through the handle and knotted or secured with a set screw. Tie a figure-eight or overhand knot in the rope inside the handle, or use the manufacturer’s clip system if provided. Test that the handle is secure and won’t slip.
Step 4: Reconnect the Spark Plug Wire
Reattach the spark plug wire to the spark plug, ensuring a firm connection.
Step 5: Test the Cord Without Starting the Engine
Pull the cord handle slowly and deliberately 3–5 times. Feel for smooth resistance and quick retraction. The cord should not jerk, hesitate, or feel stuck. Listen for any unusual sounds—grinding or clicking may indicate an internal problem. If the cord operates smoothly, you’re ready for engine start.
Step 6: Start the Engine
Prime the engine if required (consult your manual). Pull the cord with a firm, confident motion. The engine should start normally. If the cord feels harder to pull than before or exhibits unusual behavior, stop and inspect for reassembly errors.
When to Replace the Entire Recoil Starter Assembly
In some cases, cord repair alone won’t solve the problem. Consider full assembly replacement if:
- The recoil spring is visibly cracked, broken, or completely disconnected and cannot be reseated.
- The pulley is cracked, stripped, or severely damaged.
- The housing is cracked or broken, allowing the spring to slip out.
- You’ve replaced the cord and tensioned the spring, but the cord still won’t retract or operates erratically.
- The handle attachment point is broken or stripped.
Full assembly replacement typically costs $30–80 depending on the mower brand and model. Many DIY users find this more cost-effective than repeated repair attempts, and it guarantees long-term reliability.
Frequently Asked Questions
Q: How long does it take to replace a lawn mower pull cord?
A typical cord replacement takes 30–60 minutes for someone with basic mechanical skills. First-timers may take up to 90 minutes. The longest step is usually carefully winding the rope on the pulley and tensioning the spring. Experienced users can complete the job in 20–30 minutes.
Q: What size replacement rope do I need?
Most lawn mower starter cords are 3 mm or 4 mm diameter braided nylon rope. The length typically ranges from 10–15 feet, depending on the mower model. Check your mower’s manual or measure the old cord if it’s still intact. Starter rope is sold by the foot at hardware stores and online retailers.
Q: Can I fix a stuck pull cord without removing the entire assembly?
Sometimes. If the cord is stuck but the pulley rotates, try cleaning out debris and lubricating the cord lightly with WD-40. Work the cord in and out gently to free it. However, if the pulley itself is stuck or the spring is broken, you’ll need to remove the assembly cover for a proper fix.
Q: What should I do if the recoil spring breaks during repair?
If the spring breaks or won’t stay connected during your repair, the assembly likely needs replacement. A broken spring cannot be easily repaired and will cause the cord to fail to retract. Order a replacement recoil starter assembly for your mower model and swap it out entirely. This typically costs $30–80 and takes 45–90 minutes.
Final Tips for Long-Term Cord Health
After repair, keep your pull cord in good condition:
- Use smooth, firm pulls. Violent or jerky pulling stresses the cord and spring unnecessarily. A controlled pull is safest.
- Allow the cord to retract fully. Never hold or jam the handle in place after pulling. Let the spring retract the cord completely.
- Store the mower indoors. Prolonged sun exposure and moisture degrade the rope. A garage or shed keeps the mower and cord in better condition.
- Inspect the cord seasonally. Before each mowing season, visually check the cord for fraying, cracks, or wear. Early signs mean a replacement is coming—plan ahead.
- Clean the mower regularly. Remove grass clippings and debris from the recoil housing after each use to prevent jamming.