Safety First: Preparation Steps
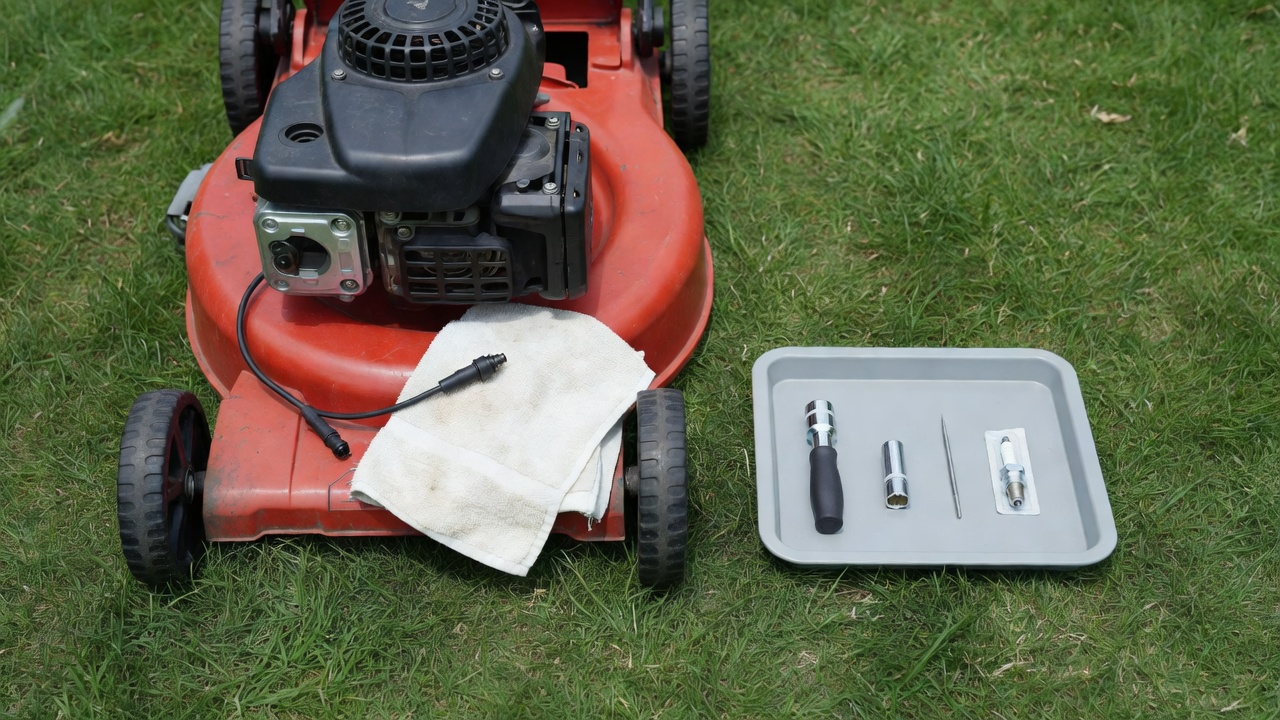
Before touching any part of your lawn mower’s engine, safety must come first. Engine startup or accidental ignition while you’re working can cause serious injury.
- Turn off the engine and allow it to cool for at least 5–10 minutes. A hot engine block can burn your hands, and a warm engine is safer to work on than one still radiating heat.
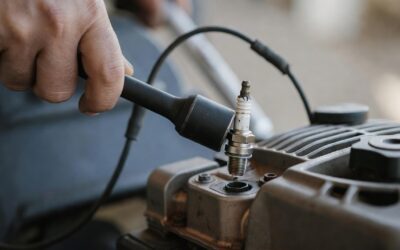
- Disconnect the spark plug wire or boot immediately. This rubber or plastic connector sits on top of the spark plug and carries the electrical current. Simply grasp the boot (not the wire itself) and twist or pull it straight off. This disconnection prevents accidental spark and engine ignition while you work.
- Place the mower on level ground and engage any parking brake or wheel locks if your mower has them. For push mowers, position the machine so it won’t roll.
- Gather your tools: a spark plug socket (sized to fit your spark plug), a ratchet wrench, a socket extension if needed, a gap tool or feeler gauge, and your new spark plug (purchase the correct model number for your mower before starting).
Never work on a mower in an enclosed space, and never attempt this task with the engine running or still hot.
Key Differences: Push Mowers vs. Riding Mowers
The spark plug replacement process is nearly identical across mower types, but access and tool requirements vary slightly.
Push Mowers
- The spark plug is typically located on top of or to the side of the engine block, easily visible once you look down from above.
- You’ll use a standard spark plug socket (usually 13/16 inch or 5/8 inch for most small engines).
- Access is straightforward; no seat, controls, or deck components block your path.
- Most push mower spark plugs can be reached and replaced in under 10 minutes once you’ve located the wire.
Riding Mowers
- The spark plug sits lower on the engine block, often tucked between the engine and the mower deck or frame.
- You may need to tilt the mower on its side or remove the engine cover panel to access it comfortably (check your manual).
- A socket extension on your ratchet wrench is often necessary to reach the plug from above.
- The spark plug wire may be longer and routed through the frame; take a photo before disconnecting it so you can reconnect it correctly.
- Replacement typically takes 15–20 minutes due to limited hand access.
Always consult your mower’s owner manual for the specific spark plug model number and exact location on your engine.
Locating and Removing the Old Spark Plug
Finding the Spark Plug
On most small-engine mowers, the spark plug is one of the most visible engine components. Look for a thick rubber or plastic boot (the spark plug wire connector) protruding from the top of the engine. The boot covers a ceramic insulator, and beneath that sits the spark plug itself threaded into the engine block.
If you’re having trouble locating it, trace the thick black wire from the ignition coil (mounted on the engine) downward—it leads directly to the spark plug.
Removal Steps
- Twist and pull the spark plug boot straight off the spark plug. Use a gentle but firm motion to avoid damaging the ceramic insulator underneath.
- Position your spark plug socket over the spark plug. The socket should slide down over the ceramic body until it makes contact with the hex nut (the metal ring at the base of the spark plug).
- Attach the ratchet wrench to the socket and turn counterclockwise. Most spark plugs use a 13/16-inch or 5/8-inch socket, but verify the size in your manual or by checking the old spark plug’s hex width.
- Loosen the spark plug with several counterclockwise turns, then carefully unscrew it the rest of the way by hand. Once it’s loose enough, you can grip the ceramic body lightly and thread it out.
- Inspect the spark plug gap on the old plug if you want a visual reference, but do not reinstall it. Set the old spark plug aside.
Tip: If the spark plug is stuck and won’t budge, apply a small amount of penetrating oil (like WD-40) around the base where it threads into the engine, wait 10 minutes, then try again. Do not force it, as you risk stripping the threads in the engine block.
Understanding and Checking the Spark Plug Gap
The spark plug gap is the small air space between the center electrode and the ground electrode at the tip of the spark plug. This gap is critical: it determines the distance the electrical current must jump to create the spark that ignites the fuel-air mixture in the engine cylinder.
Why Gap Matters
- If the gap is too narrow, the spark may be weak, causing poor ignition and rough running.
- If the gap is too wide, the spark plug may not fire at all, leaving your engine unable to start.
- Each engine type is designed to operate with a specific gap, typically between 0.025 and 0.040 inches for lawn mower engines. Your manual will specify the exact gap for your mower.
Measuring and Adjusting the Gap
- Purchase a spark plug gap tool (a feeler gauge or dedicated gap tool costs $5–$15 at any hardware or automotive store).
- Consult your mower manual to find the correct gap measurement. Write it down before you begin.
- Slide the gap tool between the center and ground electrodes. The tool should slide through with slight resistance—if it doesn’t fit, the gap is too narrow; if it slides in loose, the gap is too wide.
- If the gap is incorrect, use the adjustment tool (usually integrated into the gap tool) to carefully bend the ground electrode outward (to widen the gap) or inward (to narrow it). Make small adjustments—a fraction of a millimeter changes the measurement significantly.
- Re-check the gap with your tool after each adjustment until it matches the specification.
Note: Most new spark plugs arrive pre-gapped at 0.032 inches. If your manual specifies this gap, you can skip the adjustment step and install the plug as-is. Always verify against your manual rather than assuming.
Installing the New Spark Plug
Hand-Threading the Plug
Proper installation prevents cross-threading, a mistake that damages the threads inside the engine block and ruins the entire cylinder head.
- Lower the new spark plug into the engine hole by hand, holding it straight and perpendicular to the engine block.
- Thread it clockwise by hand until you feel resistance. The spark plug should turn freely for the first few rotations—if you feel grinding or strong resistance early on, stop immediately. The plug may be cross-threaded. Back it out counterclockwise and restart, ensuring you’re threading it straight.
- Once hand-threaded to snug, remove your hand and attach the spark plug socket and ratchet wrench.
Tightening with the Wrench
- Turn the ratchet clockwise to tighten the spark plug. Apply steady pressure—the plug only needs to be snug, not cranked down with maximum force.
- A properly installed spark plug has a small gasket (a thin ring at its base) that compresses to create a seal. Once the gasket makes contact and compresses slightly, the plug is tight enough. This typically requires only 10–20 foot-pounds of torque on a small engine.
- Stop tightening once you feel resistance increase noticeably. Overtightening can crack the ceramic insulator or strip the engine block threads, both expensive problems.
Rule of thumb: If the spark plug threads in smoothly and seats against the gasket, then a final quarter-turn clockwise is enough. You should not need to strain or use all your strength.
Reassembly and Testing
Reconnecting the Spark Plug Wire
- Push the spark plug boot straight down onto the spark plug’s ceramic insulator. It should slide down until it seats fully—you’ll often hear or feel a small click or snap.
- Tug the boot gently to confirm it’s secure. It should not pull off easily.
- Check the wire routing to ensure it’s not pinched between engine parts or caught in the mower deck.
Starting the Engine and Testing
- Ensure all tools are removed from the mower and the work area.
- Position the mower outdoors or in a well-ventilated area.
- Pull the starter cord or turn the ignition key to start the engine (depending on your mower type).
- Listen and observe: The engine should start cleanly and idle smoothly. If it cranks but doesn’t fire, stops and restarts, or runs rough, the spark plug may not be seated correctly or the gap may be wrong. Stop the engine, disconnect the spark plug wire, and recheck the plug and gap.
- Let the engine run for 1–2 minutes to warm up and confirm stable operation.
- Once satisfied, shut off the engine and allow it to cool. Your spark plug replacement is complete.
Tip: Write down the date and spark plug model number in your mower’s maintenance log so you know when the last replacement occurred. Most manufacturers recommend changing the spark plug annually or every 100–200 hours of operation, whichever comes first.
Frequently Asked Questions
How often should I change my lawn mower spark plug?
Most lawn mower manufacturers recommend replacing the spark plug annually (typically at the start of the mowing season) or every 100–200 hours of use. If you mow weekly during summer, this often means once per year. Check your owner manual for the specific interval for your mower model. A fouled or damaged spark plug should be replaced immediately, even if the interval hasn’t elapsed.
What happens if I install the spark plug upside down?
A spark plug has a specific orientation and cannot physically thread into the engine upside down—the hex nut and ceramic body are shaped to fit only one way. However, if you attempt to force it in backward, you’ll quickly feel resistance and cross-threading will occur. Simply back it out, turn it the correct direction, and restart. Modern spark plugs are engineered to prevent this mistake.
Can I reuse my old spark plug, or must I buy a new one?
Always install a new spark plug. Old spark plugs wear out as the electrodes erode from thousands of electrical sparks, widening the gap and weakening ignition. A used spark plug may seem to work for a few hours or days, but it will degrade performance and increase starting difficulty. Spark plugs are inexpensive ($3–$10) compared to potential engine damage or costly repairs from poor ignition.
My mower won’t start after I changed the spark plug. What did I go wrong?
Check these steps in order: (1) Verify the spark plug wire is firmly seated on the boot—a loose connection prevents spark. (2) Confirm the spark plug gap matches your manual’s specification; an incorrect gap won’t fire. (3) Ensure the spark plug is tightened to snug (not loose or overtightened). (4) Verify the correct spark plug model number for your mower; an incompatible plug won’t operate. (5) If the engine still won’t start, disconnect the wire, remove the spark plug, and examine it for damage or discoloration. If all else fails, consult your mower manual or contact a small-engine repair specialist.