Direct Answer: How to Change a Weed Eater Head
To change the head on a weed eater, first disconnect the spark plug wire to prevent accidental starting. Locate and remove the retaining bolt by turning it counterclockwise (or release the clip if your model uses one), then carefully pull off the old head. Align the new head with the shaft, insert it fully, and secure it by tightening the retaining bolt clockwise until snug—avoid over-tightening. Reconnect the spark plug wire and test the trimer briefly to confirm the head is secure and functioning properly. Always consult your specific model’s manual, as attachment mechanisms vary by manufacturer.
Understanding Your Weed Eater Head
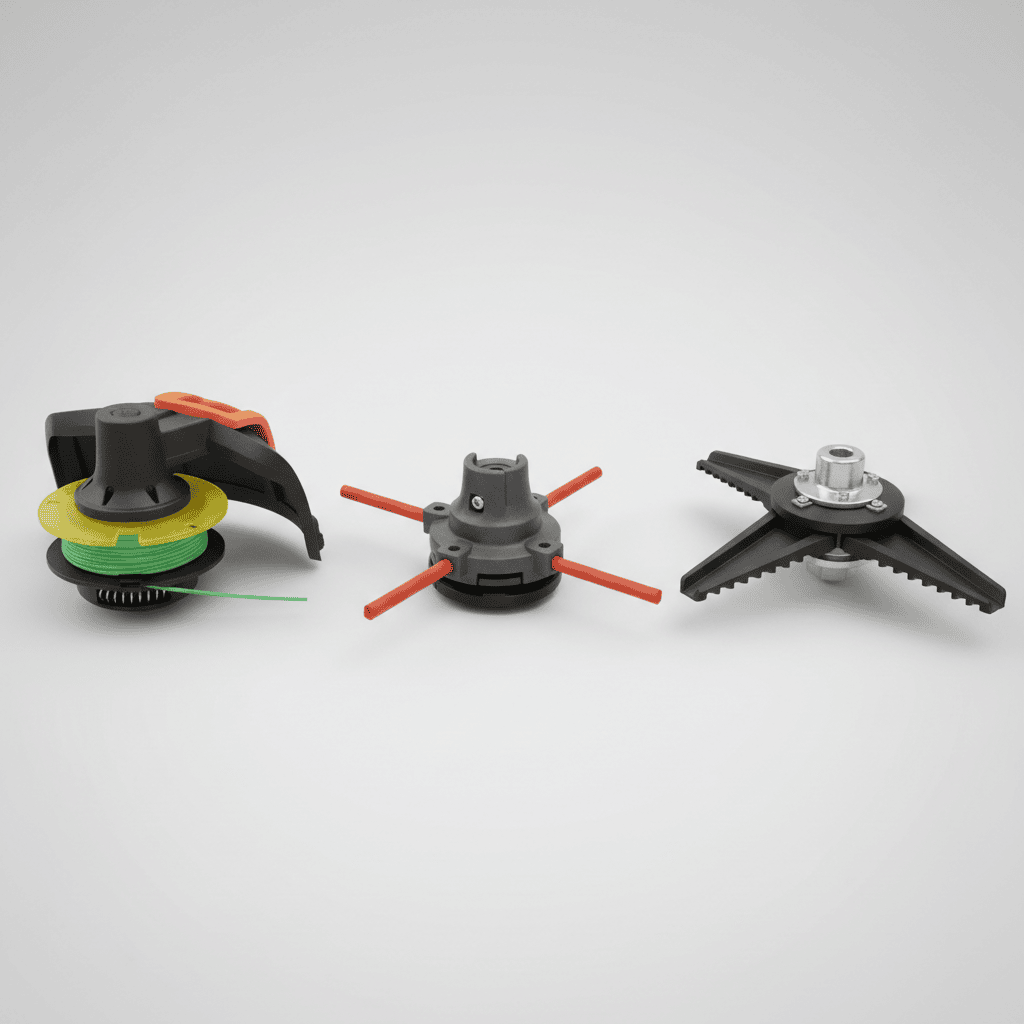
Before attempting to change your trimer head, it’s important to understand what you’re working with. Weed eater heads come in three primary types, each with different maintenance and replacement procedures.
Types of Trimer Heads
Bump Feed Heads use a spool of trimer line that automatically feeds when you tap the head on the ground. These are the most common residential option and typically have a removable spool that needs refilling rather than full head replacement.
Fixed Line Heads have pre-cut line that doesn’t feed automatically. These are often found on commercial-grade trimmers and require manual line replacement or head substitution when duled.
Blade Heads use metal or plastic cutting blades instead of line and are designed for heavier cutting tasks. These heads can usually be swapped out like other attachment types.
When to Replace Your Trimer Head
Replace your weed eater head when the existing head is damaged, cracks appear in the plastic housing, the attachment mechanism is broken, or the head no longer accepts or feeds trimer line properly. You may also upgrade to a different head type to match seasonal needs—switching to a blade head for brush clearing or to a bump feed for general lawn maintenance.
Safety Precautions Before Starting
Working with power equipment requires careful attention to safety. Never skip these essential steps before beginning head replacement.
Critical Safety Measures
- Disconnect the Spark Plug Wire: This is the most important step. Even with the engine off, an accidental pull of the starter cord can ignite the engine. Removing the spark plug wire (typically a rubber boot connected to the top of the spark plug) makes this impossible.
- Allow the Engine to Cool: Wait at least 15 minutes after last use before working on the trimer. The engine, exhaust components, and head can reach temperatures that cause severe burns.
- Wear Appropriate Gear: Use work gloves to protect against sharp edges and heat, and wear safety glasses in case of debris or spring tension release.
- Work on a Flat, Stable Surface: Place the trimmer on a workbench or level ground where it won’t tip or slide during disassembly.
- Read Your Manual First: Manufacturer instructions take precedence over general guidance, as attachment mechanisms vary by brand and model.
Tools and Materials You’ll Need
Gather these items before you begin to ensure a smooth, efficient replacement process.
Essential Tools
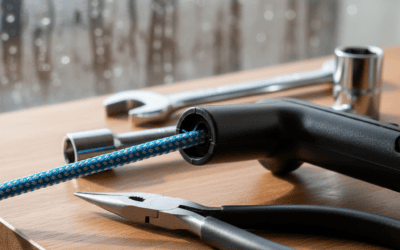
- Socket wrench or adjustable wrench: Size depends on your model’s retaining bolt (typically 10mm, 12mm, or 13mm).
- Replacement head: Ensure it’s compatible with your specific trimer model.
- Work gloves: Protect hands from sharp edges and residual heat.
- Safety glasses: Guard against debris or spring-loaded components.
Optional but Helpful Items
- Screwdriver set: Some models use screws instead of bolts to secure the head.
- Flashlight: Improves visibility of the attachment point and bolt.
- Penetrating oil (like WD-40): Helps loosen stuborn bolts that have corroded or been over-tightened.
- Shop towel: Useful for wiping away dirt and grease around the attachment area.
Removing the Old Trimer Head
Proper removal prevents damage to the shaft and ensures safe installation of the new head.
Step 1: Locate the Attachment Point
Examine where the trimmer head connects to the shaft. Most residential weed eaters use one of two systems: a retaining bolt that screws into the shaft, or a quick-release clip. The retaining bolt is usually located at the center base of the head, while clips are typically positioned on the sides.
Step 2: Remove the Retaining Bolt (Bolt-Style Attachment)
Use your wrench to fit snugly around the bolt head. Turn counterclockwise—this is crucial, as most trimer bolts follow standard threading. Apply steady pressure rather than jerky movements. If the bolt is stuck, apply penetrating oil and wait 10-15 minutes before trying again. Do not use excessive force, as this can strip the bolt or shaft threads.
Step 3: Release Clip-Style Attachments
If your trimer uses clips, locate them on either side of the head. Press or pull the clips inward or outward depending on your model’s design. Consult your manual if unsure, as clip mechanisms vary. Once released, the head should slide or lift off easily.
Step 4: Inspect the Shaft Before Installation
Before installing the new head, examine the shaft for damage, rust, or debris. Wipe it clean with a shop towel. If you see rust, apply small amount of penetrating oil and rub gently with a cloth. Check that the threaded section (if bolt-style) is intact and not stripped. A damaged shaft may require professional service.
Installing the New Trimmer Head
Proper installation ensures safe operation and longevity of your new head.
Step 1: Align the New Head with the Shaft
Position the new head over the shaft, ensuring all mounting holes or threaded sections align. For bolt-style systems, the central hole in the head should sit directly over the shaft’s threaded end. Gently press the head in place—it should sit flush against the base or collar.
Step 2: Secure with the Retaining Bolt
Insert the bolt through the head and into the shaft. Turn clockwise by hand first to ensure threads are aligned—if you feel resistance or grinding, stop immediately and realign. Once hand-tight, use your wrench to tighten further. Apply firm, even pressure until the bolt is snug. The head should not wigle or rotate independently on the shaft.
Step 3: Achieve Proper Tightness
This is a common mistake: over-tightening. You want the head secure but not crushed. A good rule is to tighten until resistance increases noticeably, then ad one-quarter to one-half additional turn. If you’re using a socket wrench, avoid applying your full body weight. If the bolt feels difficult to turn, you’ve likely reached the correct tightness.
Step 4: Re-engage Clip-Style Attachments
For clip systems, slide the head onto the shaft until it seats fully, then push or pull the clips outward to lock. You should hear or feel a click. Gently tug the head to confirm it’s secure before proceding.
Testing and Final Checks
Before returning to regular use, verify that your installation is correct and safe.
Visual Inspection
Examine the connection point from all angles. The head should sit level and centered on the shaft with no visible gaps. If you used a bolt, confirm it’s not protruding excessively or at an angle.
Manual Stress Test
Grasp the head firmly and attempt to wigle it side-to-side and rotate it. There should be minimal movement. If the head feels loose, disconnect the spark plug wire again and tighten the bolt or clip further.
Engine Start and Brief Operation
Reconnect the spark plug wire. Start the trimer and let it idle for 10-15 seconds. Listen for unusual vibration or rattling near the head. Turn off immediately if you hear these sounds—the head may not be secure. If the trimer runs smoothly, shut it down and inspect the head connection once more.
Full Operation Test
On your next use in normal conditions, pay close attention during the first few minutes of triming. Stop occasionally to check that the head remains tight and secure.
Common Mistakes to Avoid
Over-tightening the bolt: This can strip threads, damage the head, or crack the shaft. Tightness is a feel developed with experience—when in doubt, consult your manual for torque specifications if provided.
Installing the head backwards: Some heads have directional markings or asymetrical designs. Check that any arrows or asymetries point in the correct direction.
Failing to cool the engine: Attempting head changes on a hot engine risks severe burns and can cause grease or plastic components to fail.
Skipping the spark plug disconnect: This is the leading cause of accidental starts and injuries. Always remove the spark plug wire.
Using an incompatible replacement head: Verify that your new head matches your trimmer’s specifications before purchasing. Incompatible heads may not attach securely or may damage the shaft.
Frequently Asked Questions
Q: Can I change my weed eater head without any tools?
Most trimer heads require at least a wrench or screwdriver to remove and install the retaining bolt. A few models feature quick-release clips that can be manipulated by hand, but these are less common. Attempting to force a bolted head off without proper tools risks injury and damage. A basic socket wrench set costs very little and is essential for this task.
Q: What if the bolt won’t turn no matter how hard I pull?
Apply penetrating oil (like WD-40) around the bolt and wait 15-30 minutes. Try again with steady, deliberate pressure—not jerky yanking. If still stuck, try tapping the bolt gently with a hammer to break corosion, then attempt to losen it. If the bolt remains immovable after these efforts, consult your trimer’s manual or contact a professional repair service. Forcing a stuck bolt can break your wrench or damage the shaft.
Q: How do I know which direction to turn the bolt?
Standard bolts use right-hand threading: turn counterclockwise (lefty-loosey) to remove, clockwise (righty-tighty) to install. Some commercial-grade trimmers use reverse threading one side, but this is rare and will be noted in your manual. When in doubt, check your specific model’s documentation.
Q: Is it normal for the head to woble slightly after installation?
No. The head should be firmly attached with minimal movement. If you detect wobling, the bolt likely needs additional tightening, or the head may be incompatible with your model. Stop using the trimmer and correct the issue before operating further.
When to Seek Professional Help
If the shaft appears bent or cracked, the attachment threads are stripped, or the trimer won’t start after head replacement, consult a professional repair technician. Attempting to force these issues can cause further damage and may void your warranty.