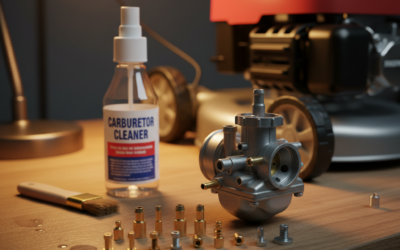
Direct Answer: How to Clean a Toro Carburetor
To clean a Toro lawn mower carburetor, shut off the fuel supply at the valve or tank, disconnect the fuel line, and unbolt the carburetor from the engine intake. Carefully disassemble the carburetor by removing the bowl, main jet, and needle seat. Soak small internal parts in carburetor cleaner for 15–30 minutes, then scrub jets and passages with a soft brass brush to remove varnish and debris. Rinse all parts in fresh cleaner, dry with compressed air, and reassemble in reverse order. Reinstall on the engine, reconnect fuel lines, and test. This process typically takes 1–2 hours and requires only basic hand tools, carburetor cleaner, and compressed air.
When to Clean vs. Replace Your Carburetor
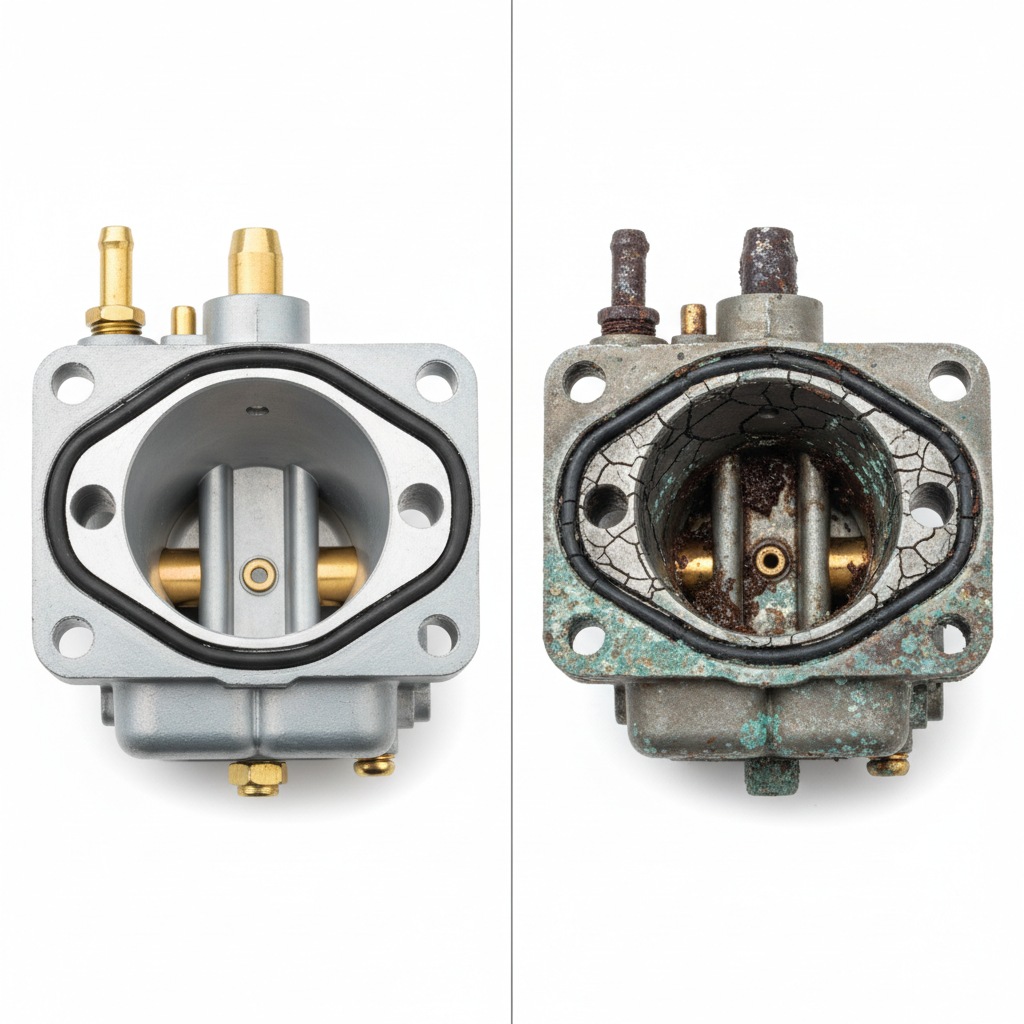
Before you disassemble your carburetor, determine whether cleaning will actually solve your problem. A carburetor that won’t respond to cleaning may be damaged beyond repair.
Signs Your Carburetor Needs Cleaning
- Mower won’t start – Clogged jets prevent fuel from reaching the engine.
- Rough idle or stalling – Varnish buildup disrupts the fuel-air mixture.
- Black smoke or uneven power – Excess fuel is burning incompletely.
- Engine sputters under load – Fuel flow is restricted through jets.
- Mower sat unused for several months – Stale fuel leaves deposits in the carburetor.
When Cleaning Won’t Help (Consider Replacement)
- Carburetor bowl or body has visible cracks or corrosion.
- Rubber gaskets and seals are hardened, cracked, or missing.
- Needle valve is damaged or worn and won’t seal properly.
- Internal passages are severely calcified or blocked beyond brush access.
- Mower still won’t start or run after a thorough cleaning.
Cost consideration: Professional carburetor replacement or ultrasonic cleaning typically costs $100–$300. If you’re uncertain about your skills or the carburetor’s condition, professional service may be the safer choice.
Role of Fuel Quality and Storage
Many carburetor problems stem from fuel issues, not mechanical failure. Gasoline older than 30 days begins to oxidize and leave varnish deposits. Ethanol-blended fuel (E10, E15) degrades even faster—sometimes in as little as 2–3 weeks—and absorbs moisture that accelerates corrosion. Toro mowers left in storage over winter without fuel drainage develop thick varnish buildup that clogs jets. If you suspect fuel is the culprit, drain the old fuel, clean the carburetor, and fill with fresh gas before testing.
Tools and Materials You’ll Need
Gather these items before you start disassembly. Having everything ready prevents frustration and lost parts.
Hand Tools
- Socket set or wrench set (typically 8mm–13mm for Toro carburetors)
- Screwdrivers (flathead and Phillips)
- Small brass or soft-bristle brush (toothbrush size)
- Small wire or paper clip (for clearing tiny jets)
- Pliers (needle-nose helpful for small springs)
- Clean rag or paper towels
Cleaning and Safety Supplies
- Carburetor cleaner: Spray cans or aerosol bottles work well for small parts. Avoid using gasoline, which is flammable and less effective.
- Compressed air: An air compressor (20–30 PSI) or canned compressed air to dry parts and clear jets. Do not use your mouth to blow—this introduces moisture.
- Work surface: Newspaper or cardboard to catch small parts and contain spills.
- Container: Small bowl or tray for soaking parts in cleaner.
- Safety: Wear gloves and eye protection. Work in a well-ventilated area; carburetor cleaner fumes are strong.
Step-by-Step Carburetor Cleaning Process
Step 1: Prepare the Mower and Fuel System
- Park the mower on a flat, level surface and let the engine cool completely.
- Locate the fuel shut-off valve (usually at the base of the fuel tank) and turn it to the OFF position. If your Toro model doesn’t have a shut-off valve, you’ll need to drain the fuel tank or disconnect the fuel line at the carburetor inlet.
- Disconnect the fuel line from the carburetor by pinching the line clamp or unbolting the connection. Have a small container ready to catch any remaining fuel.
- Label and disconnect the throttle cable and any electrical connections (like the solenoid, if present) before removing the carburetor.
Step 2: Remove the Carburetor from the Engine
- Locate the carburetor mounting bolts (typically 2–4 bolts) that secure it to the engine intake manifold.
- Unbolt the carburetor carefully. Some carburetors have an intake gasket underneath; note its position or take a photo so you can reinstall it correctly.
- Set the carburetor on your work surface with the bowl facing up.
Step 3: Disassemble the Carburetor
- Remove the float bowl: Unbolt the bowl (usually 1–2 bolts on the bottom or side). Drain any remaining fuel into a container. Note the position of the float arm and needle valve.
- Remove the main jet: The main jet is a small cylindrical brass part with a hole in the center. It typically screws into the bottom of the carburetor body. Use a small wrench or socket to turn it counterclockwise and remove it gently.
- Remove the needle seat: This brass part sits above the main jet. It unscrews in the same way.
- Remove the idle jet (if present): On Toro carburetors, a separate idle jet may be located on the side of the carburetor body. Unscrew it carefully.
- Note the float and needle valve: Do not remove these yet unless they are obviously damaged. They are delicate and easy to break.
- Take a photo: Before proceeding, photograph the disassembled parts so you remember the order and orientation for reassembly.
Step 4: Soak and Scrub Internal Parts
- Pour carburetor cleaner into a small bowl or container.
- Place all removable small parts (jets, needle seat, float, springs) into the cleaner and let them soak for 15–30 minutes. This softens varnish and deposits.
- Remove parts one at a time and scrub gently with a soft brass brush. Pay special attention to the jet orifices—the tiny holes where fuel flows through.
- Clear jet holes: If a jet hole is still blocked after brushing, carefully insert a small wire or paper clip into the hole to dislodge debris. Do not use force; if the blockage won’t budge, continue soaking.
- Rinse each part thoroughly in fresh carburetor cleaner and lay them on a clean rag to air dry.
- Clean the carburetor body: Spray the interior passages of the carburetor body with cleaner, scrub accessible areas with a brush, and rinse well. Use compressed air to blow out any remaining cleaner or debris from the passages.
Step 5: Dry All Parts Thoroughly
- Use compressed air at 20–30 PSI to blow out all cavities, jets, and passages. This removes moisture and cleaner residue that could interfere with fuel flow.
- Allow parts to air dry on a clean surface for at least 10–15 minutes.
- Do not reassemble while parts are wet; moisture can cause rust and poor engine performance.
Step 6: Reassemble the Carburetor
- Reinstall the needle seat by screwing it back into the carburetor body by hand, then tighten gently with a wrench. Do not overtighten.
- Reinstall the main jet, again tightening gently. These parts are easily stripped if over-torqued.
- Reinstall the idle jet (if applicable).
- Reinstall any springs, clips, and the float in their original positions. Refer to your photo from earlier.
- Reinstall the float bowl, ensuring the gasket is seated properly. Tighten the bowl bolts evenly in a criss-cross pattern, similar to tightening a car wheel. Do not overtighten.
Step 7: Reinstall the Carburetor on the Engine
- Position a new intake gasket on the engine manifold (or reuse the old one if it’s in good condition).
- Lower the carburetor onto the gasket and align the mounting holes.
- Reinstall the mounting bolts and tighten evenly in a criss-cross pattern.
- Reconnect the fuel line, making sure the clamp or fitting is tight.
- Reconnect the throttle cable and any electrical connections you disconnected earlier.
- Turn the fuel shut-off valve back to the ON position.
Step 8: Test the Mower
- Check that all connections are secure and no fuel is leaking.
- Prime the carburetor by turning the choke to the FULL position (if your mower has a choke).
- Attempt to start the mower. It may take several pulls before fuel reaches the engine if the carburetor was very dry.
- Once running, let the engine warm up and listen for smooth idle. Adjust the idle screw (if present) if the engine is running too fast or slow.
- Run the mower under light load to verify smooth power delivery.
Model-Specific Considerations for Toro Mowers
Walk-Behind vs. Riding Mower Differences
Walk-behind mowers (push models) typically use simpler fixed-jet carburetors mounted directly on small single-cylinder engines. Disassembly is straightforward and takes 1–2 hours for a first-timer. The carburetor is usually easy to access from the top of the mower deck.
Riding mowers may have more complex carburetors with additional jets, governors, and fuel regulators. Access is often tighter, requiring removal of the engine shroud or other components. Cleaning a riding mower carburetor may take 2–3 hours. If you’re uncomfortable with the extra complexity, professional service is recommended.
Single-Stage vs. Two-Stage Carburetors
Toro’s single-stage carburetors are straightforward and respond well to cleaning. Two-stage carburetors (used on some higher-powered mowers) have separate circuits for idle and high-speed operation, with additional jets and adjustment screws. Cleaning is similar, but reassembly requires careful attention to spring tension and needle positioning. Consult your Toro manual for specific guidance on two-stage models.
Finding Your Toro Model Number
Locate your mower’s model number on the identification plate, usually found on the frame near the engine or under the seat of a riding mower. Visit Toro’s parts website and search your model number to find a parts diagram and assembly manual specific to your carburetor. These manuals include torque specifications and part positions that make reassembly much easier.
Troubleshooting: Cleaning Didn’t Fix the Problem
Mower Still Won’t Start After Cleaning
- Check fuel delivery: Ensure fuel is reaching the carburetor bowl. Turn the choke full, loosen the main jet, and crank the engine. Fuel should spray out. If it doesn’t, the fuel pump, line, or tank shutoff may be the problem.
- Verify spark: Remove the spark plug and reinstall it into the plug wire. Hold it against the engine block and crank. A blue spark should jump the gap. If no spark appears, the ignition system may need service.
- Check compression: A mower that cranks but won’t catch may lack engine compression due to worn piston rings or a leaking head gasket—problems beyond the carburetor’s scope.
Engine Runs Rough or Stalls Under Load
- Re-clean the carburetor: If performance doesn’t improve after one cleaning, repeat the process with longer soak times (30–45 minutes) to fully dissolve stubborn varnish.
- Inspect the fuel filter: A clogged fuel filter prevents fuel from reaching the carburetor. Replace it if it’s discolored or blocked.
- Check fuel line integrity: Cracks or pinched fuel lines restrict flow. Inspect for damage and replace if necessary.
When to Seek Professional Repair
If cleaning doesn’t restore performance after two attempts, or if you discover internal damage during disassembly, contact a local small engine repair shop. Many shops offer ultrasonic carburetor cleaning, which uses sound waves to penetrate and dissolve deposits that manual cleaning misses. This service typically costs $75–$150 and is more thorough than DIY cleaning. Full carburetor replacement costs $150–$300 depending on the Toro model.
Preventing Future Carburetor Problems
Seasonal Storage Best Practices
Carburetor problems are often caused by improper storage, not mechanical wear. Before storing your Toro for winter or off-season:
- Drain the fuel tank completely or use a fuel stabilizer (like Sta-Bil) to keep gasoline fresh. Stale fuel leaves varnish that clogs jets within weeks.
- Run the mower for 5–10 minutes after adding stabilizer so treated fuel circulates through the carburetor.
- Store in a cool, dry place away from direct sunlight, which accelerates fuel degradation.
- Cover the mower to prevent dust and debris from entering the air filter and carburetor.
Fuel Quality Matters
Use fresh gasoline whenever possible. Ethanol-blended fuel (E10) is standard at most pumps and is safe for Toro mowers, but it deteriorates faster than pure gasoline. If you store your mower for more than 30 days between uses:
- Buy fuel specifically labeled for small engines if available, or use fuel stabilizer.
- Avoid gas with ethanol concentrations above 10% (E15, E85) unless your Toro manual explicitly permits it.
- Never use fuel older than 90 days, even with stabilizer.
Air Filter Maintenance
A clogged air filter forces the engine to run rich (too much fuel, not enough air), which accelerates carburetor varnish buildup. Check your air filter monthly during the mowing season. Clean foam filters with soap and water; replace paper filters when visibly dirty. A clean air filter reduces carburetor strain and extends the time between cleanings.
Frequently Asked Questions
How often should I clean my Toro carburetor?
Under normal conditions, a Toro carburetor rarely needs cleaning. If you mow regularly during the season, use fresh fuel, and store properly in winter, cleaning every 3–5 years is typical. If you notice performance issues, clean immediately. Mowers that sit unused for months should have their carburetors cleaned or fuel drained before storage to prevent varnish buildup.
Can I use regular gasoline cleaner instead of carburetor cleaner?
No. Regular gasoline or engine fuel injector cleaner is not effective for carburetors and may leave residue that clogs jets further. Carburetor cleaner is formulated to dissolve varnish and dry quickly without leaving deposits. It’s inexpensive ($5–$10 per can) and worth the investment for proper cleaning.
What if I lose a small spring or gasket during disassembly?
Springs and gaskets are essential to carburetor function. Do not start the mower without them. Most Toro dealers sell carburetor rebuild kits ($15–$40) that include replacement gaskets, seals, springs, and jets. If you can’t locate a lost part, order a rebuild kit or contact a Toro service center.
Is carburetor cleaning worth doing myself, or should I hire a professional?
DIY cleaning is worthwhile if you’re comfortable with basic mechanical work and have the necessary tools. You’ll save $100–$200 compared to professional service. However, if your carburetor is severely damaged, you’re uncertain about reassembly, or the mower still won’t run after cleaning, professional service is faster and safer. A technician can also diagnose if the real problem is elsewhere (fuel pump, ignition, compression).