The Short Answer: How to Replace a Pull Cord on a Lawn Mower
Disconnect the spark plug wire, remove the recoil starter housing (3–4 bolts), extract the old rope from the pulley, pre-tension the recoil spring by winding it the correct number of turns, thread a new rope of matching diameter and length through the pulley eyelet and housing hole, tie a stop knot at each end, then reassemble and test retraction before reconnecting the spark plug wire. The full repair takes 30–60 minutes with basic hand tools and a $5–$15 replacement rope.
Safety First: What to Do Before You Touch the Starter
Skipping safety steps on a lawn mower engine creates real ignition risk. The recoil starter sits directly on top of or beside the engine, and any accidental combustion while your hands are inside the housing causes serious injury.
Non-negotiable steps before you begin
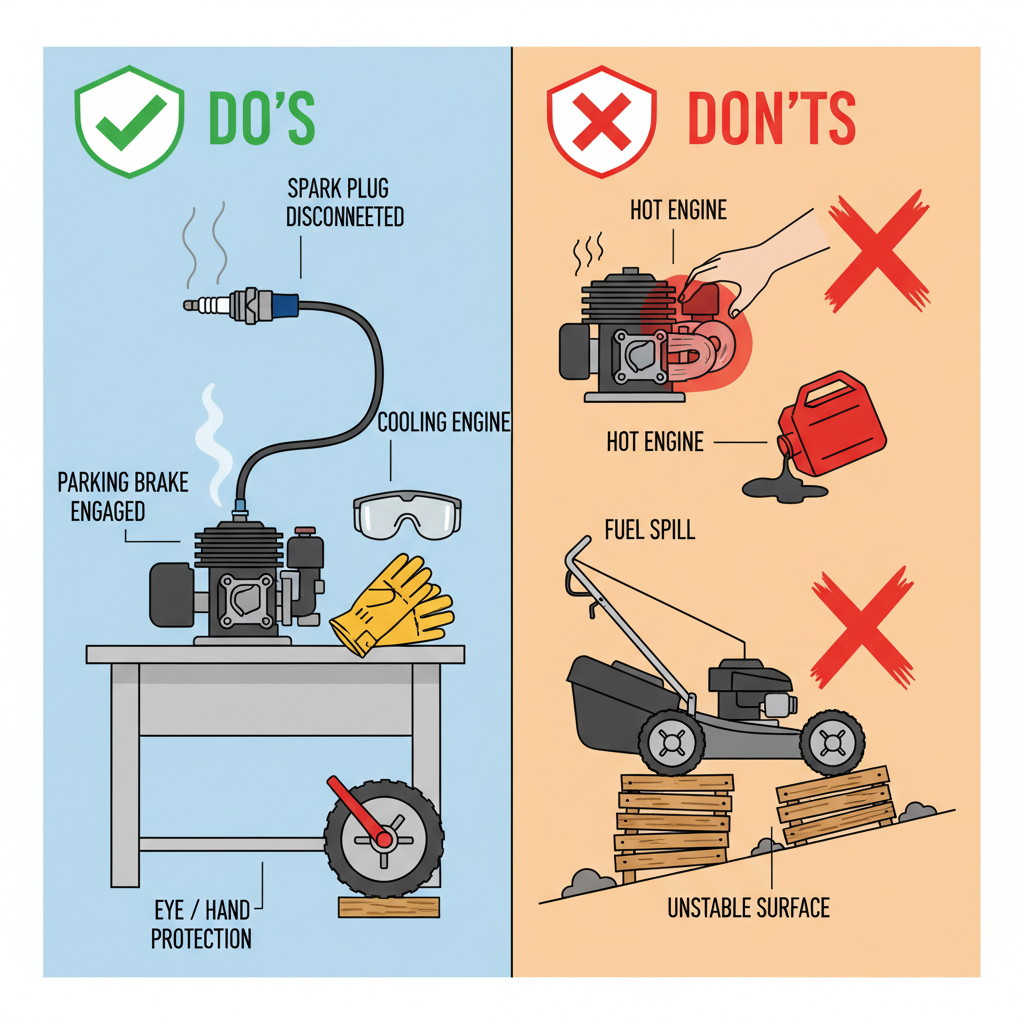
- Disconnect the spark plug wire. Pull the rubber boot off the spark plug tip and tuck it away from the plug. This is the single most important step — it physically prevents the engine from firing if the crankshaft rotates while you work.
- Let the engine cool completely. A hot engine block can cause burns. Wait at least 15 minutes after the last run.
- Work on a flat, stable surface. A driveway or workbench prevents the mower from rolling. Engage the parking brake on self-propelled models.
- Fuel management. You do not need to drain the fuel tank to replace a recoil starter — the housing sits above or beside the tank and is self-contained. However, if you plan to tip the mower at any point during the repair, drain or stabilize the fuel first to prevent carburetor flooding or spills.
- Wear work gloves. Recoil springs store significant tension and have sharp edges. Eye protection is recommended when removing the old rope, which can snap back unexpectedly.
Tools and Materials You Need
Gather everything before disassembly. Mid-repair parts searches waste time and risk losing spring tension.
Tools
- Socket wrench or nut driver (typically 5/16″ or 3/8″ for housing bolts)
- Flathead and Phillips screwdrivers
- Needle-nose pliers
- scissors or a utility knife
- Lighter or matches (to heat-seal the new rope end)
- Clamp or locking pliers (to hold pulley tension during threading)
Replacement rope specifications
| Engine Type / Brand | Typical Rope Diameter | Typical Rope Length |
|---|---|---|
| Briggs & Stratton (most push mowers) | 3mm (size #3) | 4.5–5 ft (54–60 in) |
| Honda GCV160 / GCV190 | 3mm (size #3) | 5–5.5 ft (60–66 in) |
| Kawasaki FJ / FR series | 3.5mm (size #3.5) | 5–6 ft (60–72 in) |
| Tecumseh / Troy-Bilt | 3mm or 3.5mm | 4.5–5.5 ft (54–66 in) |
| Self-propelled (larger deck) | 3.5mm (size #3.5) | 5.5–6 ft (66–72 in) |
How to measure the old cord: If the old rope is still in one piece (even frayed), lay it flat and measure its full length. Add 2 inches for knot allowance. Match its diameter against the table above or use calipers. Replacement starter rope is sold by the foot at hardware stores or as a pre-cut kit (rope + handle) for $5–$15. A professional repair shop charges $40–$80 in labor for the same job, making DIY replacement highly cost-effective.
Buy braided nylon or polyester starter rope — not cotton clothesline. Cotton degrades rapidly with heat and friction.
Understanding Your Recoil Starter Assembly
Knowing what each part does prevents reassembly errors and helps identify whether secondary components need replacement.
How a recoil starter works
Pulling the starter rope (pull cord) rotates the starter pulley, which engages a clutch mechanism that spins the engine crankshaft. The recoil spring — a flat, coiled metal spring seated beneath the pulley — stores the pulling energy and retracts the rope automatically after each pull. The rope threads through an eyelet in the recoil starter housing and terminates in the starter handle outside the housing.
Top-mount vs. side-mount starters
- Top-mount recoil starter: The most common design on push mowers. The housing sits on top of the engine deck, held by 3–4 bolts. Removal gives full access to the pulley from above.
- Side-mount recoil starter: Found on some older engines and certain self-propelled models. The housing attaches to the engine’s side shroud. Access requires removing a side panel first. The rope replacement procedure is identical once the housing is off.
Is the recoil spring damaged too?
Inspect the spring before installing a new rope. Signs of a damaged recoil spring:
- Rope retracts very slowly or not at all even with a new cord
- Spring is visibly broken, kinked, or uncoiled out of its housing cup
- Rope pulls out with no resistance whatsoever
A broken recoil spring requires replacing the entire spring or the full recoil starter assembly (sold as a unit for $15–$35). Attempting to recoil a broken spring by hand is hazardous — the spring can unwind violently.
How to Remove the Recoil Starter Housing
Push mower removal
- Confirm the spark plug wire is disconnected.
- Locate the 3–4 bolts securing the recoil starter housing to the top of the engine. They are typically arranged in a triangle or square pattern around the central pulley hub.
- Use the correct socket (5/16″ on most Briggs & Stratton engines; 8mm or 10mm on Honda engines) to remove all bolts. Place bolts in a small container — they are easy to lose.
- Lift the housing straight up and off the engine. On some models, a throttle cable bracket is zip-tied or clipped to the housing; release it before pulling the housing fully free.
- Set the housing pulley-side up on your workbench.
Self-propelled mower differences
Self-propelled mowers often have a larger upper shroud that must be partially disassembled before the recoil starter housing is accessible. Typical extra steps:
- Remove the air filter cover and air filter to expose upper shroud bolts
- Disconnect the choke or throttle cable from the carburetor bracket (note or photograph its routing before removal)
- Remove the upper engine shroud, then access the recoil starter housing bolts underneath
Seized or stripped housing bolts: Apply penetrating oil (PB Blaster or equivalent) and wait 10 minutes before re-attempting. For stripped bolts, use a bolt extractor kit. Do not force a rounded bolt — you risk cracking the plastic housing.
How to Remove the Old Pull Cord and Prepare the Pulley
- Relieve remaining spring tension. Hold the pulley firmly with one hand (or clamp locking pliers across the housing to block pulley rotation). Pull any remaining rope slack out through the housing eyelet. Cut or untie the knot at the pulley end and let the spring unwind slowly — do not release it suddenly.
- Remove the old rope. Pull the rope completely out through the housing eyelet. If a knot stub is stuck in the pulley slot, use needle-nose pliers to extract it.
- Detach the starter handle. Most handles have a simple slip knot or figure-eight knot inside a hollow cavity. Cut the knot, slide the rope out of the handle, and set the handle aside for reuse (or replace it if cracked).
- Inspect the pulley. Look for cracks, deep rope-groove wear, or a chipped center hub. A worn pulley frays ropes quickly and should be replaced ($8–$20) rather than reused.
- Inspect the housing and spring. Confirm the spring is seated in its cup and retains some coil shape. Clean debris and old rope fiber from the housing interior with a dry rag.
How to Wind the Recoil Spring and Thread the New Cord
This is the most technically demanding step. Moving too fast causes the spring to unwind uncontrollably.
Step 1 — Pre-tension the recoil spring
- Hold the housing pulley-side up on the workbench.
- Rotate the pulley clockwise (for most engines — confirm by checking which direction retracted the old rope) until the spring is fully wound and the pulley will not turn further.
- Back off 1–2 full turns to relieve binding tension. The pulley should feel firm but not locked.
- Align the pulley rope slot with the housing eyelet. This is the threading position. Use a clamp, locking pliers, or a large screwdriver inserted through the center hub to hold the pulley at this position while you thread the rope.
Recommended pre-tension turns by platform
- Briggs & Stratton (most models): Wind fully, then back off 1.5–2 turns
- Honda GCV series: Wind fully, then back off 2–2.5 turns
- Kawasaki small engines: Wind fully, then back off 1.5–2 turns
- General rule for any engine: Wind fully tight, then release enough turns so the rope slot aligns with the housing eyelet. This position inherently sets the correct pre-tension.
Step 2 — Prepare the new rope
- Cut the replacement rope to the measured length (old rope length plus 2 inches).
- Melt both cut ends briefly with a lighter to prevent fraying. Roll the melted end between fingers while hot to form a clean tip that passes easily through eyelets.
Step 3 — Thread the rope
- Insert one end of the rope through the housing eyelet from the outside in.
- Feed it through the pulley rope slot.
- Tie a figure-eight knot (stop knot) at the pulley end. Pull it tight into the slot recess so it seats flush and cannot slip through.
- Release the pulley slowly — the spring tension will begin winding the rope onto the pulley automatically. Guide the rope to wind evenly.
Step 4 — Attach the starter handle
- Feed the free end of the rope through the hole in the starter handle.
- Tie a figure-eight knot inside the handle cavity.
- Pull the handle outward firmly to seat the knot. The handle should sit snug against the housing with the rope fully retracted.
Video reference: The spring-tensioning and threading sequence is easier to follow visually. Search “recoil starter rope replacement [your engine brand]” on YouTube. Briggs & Stratton’s official channel and the channel “Jacks Small Engines” both publish reliable model-specific walkthroughs.
Reassembling the Starter Handle and Housing
- Confirm the rope retracts fully and the handle seats flush against the housing before reinstalling — correct any tension issues now, not after bolting the housing down.
- Lower the housing onto the engine, aligning the bolt holes. On top-mount designs, the housing typically seats over a center post on the engine flywheel.
- Reattach any throttle cable brackets or choke linkages that were disconnected during removal. Consult the photograph taken during disassembly for routing reference.
- Hand-thread all housing bolts before torquing any of them — this prevents cross-threading in plastic or aluminum housings.
- Tighten bolts in a cross pattern (opposite bolt first, not adjacent) to seat the housing evenly. Tighten to hand-tight plus a quarter turn. Over-torquing cracks plastic housings. Manufacturer torque specs for recoil housing bolts are typically 60–90 in-lb (7–10 Nm) on Briggs & Stratton engines and 7–11 Nm on Honda GCV engines — but hand-tight is sufficient for most plastic-housing designs.
- On self-propelled mowers, reinstall the upper shroud, reconnect throttle and choke cables, and replace the air filter before proceeding.
Testing the New Pull Cord and Troubleshooting Common Problems
How to test before reconnecting the spark plug wire
- With the spark plug wire still disconnected, pull the cord slowly to its full extension. It should pull smoothly without binding.
- Release the cord. It should retract fully and the handle should snap back to the housing.
- Repeat 3–5 times. Consistent, smooth retraction confirms correct spring tension and rope seating.
- Reconnect the spark plug wire. Start the mower normally.
Troubleshooting
| Problem | Likely Cause | Fix |
|---|---|---|
| Rope does not retract after release | Insufficient spring pre-tension; rope wound onto pulley in wrong direction | Remove housing, re-wind spring 1–2 additional turns; confirm rope winds clockwise (for most engines) |
| New rope breaks after a few pulls | Wrong rope diameter (too thin); pulley groove has sharp burr; knot slipping | Verify rope diameter matches spec; inspect pulley for burrs and smooth with fine file; re-tie figure-eight knot firmly |
| Rope pulls out fully but engine does not crank | Rope engages starter but clutch dogs or flywheel key are damaged | Recoil starter mechanism is functioning — engine issue is separate; inspect flywheel key and starter clutch |
| Rope retracts but handle sticks out | Rope too long; knot inside handle too large or mispositioned | Trim rope length by 1–2 inches; re-tie handle knot, seating it deeper into the cavity |
| Spring uncoils completely during assembly | Spring tension released accidentally | Rewind spring carefully using needle-nose pliers to guide the coil back into its cup; wear gloves |
Frequently Asked Questions
How do I know what size replacement pull cord to buy?
Measure the old rope’s diameter with calipers or match it against a known size: most push mowers use 3mm (size #3) rope; larger self-propelled and commercial mowers typically use 3.5mm (size #3.5). For length, measure the old rope and add 2 inches, or use the engine brand reference in the table above. When in doubt, bring the old rope to a hardware store for a side-by-side match.
Do I need to replace the entire recoil starter assembly or just the rope?
In most cases, only the rope needs replacement. Replace the full recoil starter assembly only if the recoil spring is broken (visible crack or fully unwound with no tension), the pulley is cracked or the hub is stripped, or the starter clutch dogs are worn. A complete replacement assembly costs $15–$35 and installs in the same time as a rope-only replacement.
Can I replace a pull cord on a riding mower using the same steps?
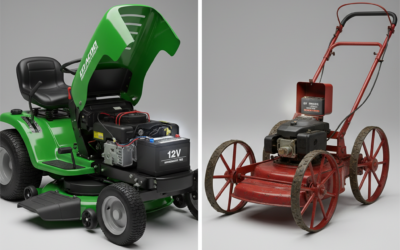
Many riding mowers have an electric start and no recoil starter. Those that do have a pull cord (typically smaller riding mowers or backup-start models) use the same recoil starter assembly as push mowers — the replacement procedure is identical once the engine shroud is accessed. However, riding mower engine access often requires removing a hood or top panel first, adding 10–20 minutes to disassembly time.
Why does the pull cord on my lawn mower keep breaking?
Repeated rope breakage has three common causes: using the wrong rope diameter (undersized rope wears out faster in the pulley groove), a damaged pulley with a sharp edge or burr that cuts into the rope during retraction, or aggressive pulling technique that stresses the knot anchor point. Inspect the pulley groove for burrs each time you replace the rope. A smooth groove and correctly sized rope should last multiple mowing seasons under normal use.