Quick Answer: How to Replace a Lawn Mower Carburetor
Disconnect the spark plug wire, shut off the fuel valve, remove the air filter housing, disconnect the fuel line and throttle/choke linkages, unbolt the old carburetor, bolt on the new matching carburetor, reconnect all linkages and the fuel line, reinstall the air filter housing, then reconnect the spark plug wire and test. The full process takes 30–90 minutes depending on mower type and experience level.
Signs Your Lawn Mower Carburetor Needs Replacing

Before purchasing a replacement, confirm the carburetor is actually the problem. Cleaning costs a fraction of replacement and resolves most issues caused by stale fuel or varnish buildup.
Replace (rather than clean) the carburetor when:
- The carburetor body is cracked, warped, or corroded through
- The throttle bore is visibly worn or out of round
- Internal threads are stripped and cannot hold jets or the bowl bolt
- A rebuild kit costs nearly as much as an aftermarket unit
- The float needle seat is permanently damaged and leaking persists after cleaning
Common symptoms of a failing carburetor:
- Engine will not start even after cleaning the air filter and replacing the spark plug
- Engine starts but dies at idle or under load
- Black smoke from the exhaust (running rich) or engine surging/hunting (running lean)
- Fuel leaking from the carburetor bowl or primer bulb area
- Engine requires the choke fully closed to run, even when warm
Stale gasoline left in the fuel system longer than 30 days without a fuel stabilizer is the leading cause of clogged carburetor jets in small engines. Ethanol-blended fuel (E10 or higher) accelerates this process by attracting moisture and degrading rubber fuel line and float needle components. If the mower sat over winter without stabilized fuel, expect carburetor-related problems at spring startup.
Clean first, replace second. Spray carburetor cleaner into the air intake with the engine running. If it briefly revs, fuel delivery is the issue—cleaning may be sufficient. If the engine does not respond or has physical damage, proceed with replacement.
Tools and Parts You Need Before You Start
Tools
- Socket set (metric and SAE, 8mm–14mm covers most small engines)
- Flathead and Phillips screwdrivers
- Needle-nose pliers (for throttle and choke linkage clips)
- Adjustable wrench or fuel line pliers
- Drain pan or rags for residual fuel
- Smartphone or camera (photograph linkage routing before disassembly)
- Torque wrench (optional but recommended; carburetor mounting bolts typically torque to 70–95 in-lb)
Parts
- Correct replacement carburetor (OEM or aftermarket — see below)
- New carburetor gasket (usually included with aftermarket units; confirm before ordering)
- Fuel line clamp or pinch-off pliers to prevent spills
- Fresh fuel and fuel stabilizer for the test run
Finding the Correct Replacement Carburetor
The engine model number — not the mower’s deck model number — determines carburetor compatibility. Locate it on a metal tag stamped or riveted to the engine block, typically on the top or side of the shroud.
- Briggs & Stratton: Three-part number (Model / Type / Code) stamped on the blower housing
- Kohler: Model and spec number on the valve cover or side of the block
- Tecumseh: Model number on a silver or white label on the blower housing
- Honda GCV series: Engine model on the side of the block below the air filter
Search the full engine model number on the manufacturer’s parts lookup or a supplier such as PartsTree, Jack’s Small Engines, or Amazon. Cross-reference the carburetor part number before purchasing.
OEM vs. Aftermarket Carburetors
Aftermarket carburetors from reputable suppliers are functionally adequate for most residential push and riding mowers. OEM units guarantee exact fitment and material quality but cost 2–5× more. For a mower under heavy commercial use or a high-hour engine near the end of service life, OEM is the better investment. For a standard homeowner mower, a quality aftermarket carburetor performs comparably.
How to Remove the Old Carburetor
Work on a level surface. Allow the engine to cool completely before starting. Take photos of linkage routing from multiple angles — this is the most important step many DIYers skip.
Steps for All Mower Types (Universal)
- Disconnect the spark plug wire. Pull the rubber boot off the spark plug and tuck it away from the plug. This prevents accidental starting during the repair.
- Shut off the fuel valve. The petcock or in-line fuel shut-off valve is located on the bottom of the fuel tank or along the fuel line. Turn it to the closed (off) position. If there is no valve, use fuel line pinch-off pliers.
- Photograph the linkage routing. Capture the throttle linkage, choke linkage, spring positions, and fuel line connections before touching anything.
- Remove the air filter cover and air filter. Usually secured by a single wing nut or two screws. Set the filter aside — inspect it; replace if dirty.
- Remove the air filter housing/carburetor backing plate. This is the plastic or metal housing that bolts to the carburetor inlet. One to four bolts or screws depending on the engine. On some Briggs & Stratton engines, the housing and carburetor unbolt together as an assembly.
Push Mower Carburetor Removal
- With the air filter housing removed, the carburetor is now accessible on the side of the engine block.
- Disconnect the throttle linkage wire or rod from the throttle lever on the carburetor. Use needle-nose pliers to unhook the Z-bend end of the wire.
- Disconnect the choke linkage in the same manner. Note the spring positions — these are easy to lose and critical for reassembly.
- Slide a rag under the carburetor. Disconnect the fuel line from the carburetor inlet by loosening the clamp and pulling the line free. Residual fuel will drain — have the rag or pan ready.
- Remove the two mounting bolts (typically 10mm or 5/16 in.) that secure the carburetor to the intake manifold or engine block.
- Pull the carburetor straight off. The carburetor gasket will either stay on the engine or come off with the carburetor — remove and discard it.
Riding Mower / Zero-Turn Carburetor Removal
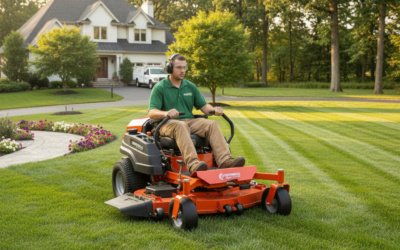
- On riding mowers, the engine is often enclosed by a hood or engine cover. Remove all panels needed to expose the engine fully before starting.
- Disconnect the battery negative (−) terminal as an additional safety step on riding and zero-turn units.
- Follow the universal steps 1–5 above, then locate the carburetor on the engine — on horizontal-shaft engines common to riding mowers, it typically mounts on the side of the engine facing the operator or to the rear of the engine block.
- Some Kohler Command and Briggs & Stratton Intek engines on riding mowers use a choke plate controlled by a separate choke cable rather than a wire linkage. Disconnect the cable end from the choke lever and note the cable routing.
- On V-twin engines (common on zero-turns and larger riders), each cylinder bank may have its own carburetor or the engine may use a single carburetor on an intake manifold. Confirm your configuration before ordering parts.
- Remove the mounting bolts (usually two, occasionally four), pull the carburetor free, and remove the gasket.
How to Install the New Carburetor
- Compare old and new carburetors side by side before installation. Confirm the throttle shaft, choke shaft, fuel inlet, bowl, and mounting hole positions all match. Differences in jet size or emulsion tube design can cause tuning problems even if the unit physically bolts on.
- Install the new carburetor gasket. Place it dry against the intake manifold face. Do not use gasket sealant unless the manufacturer specifically calls for it — sealant can block small air passages and cause lean-running conditions.
- Set the carburetor onto the mounting studs or bolt holes and hand-thread the mounting bolts. Do not fully tighten yet.
- Reconnect the throttle linkage first. Refer to your photos. The throttle wire Z-bend typically clips into a small hole in the throttle lever. The throttle return spring must be attached so it pulls the lever toward the closed (idle) position when released.
- Reconnect the choke linkage and choke spring. The choke spring usually connects between the choke lever and a fixed point on the carburetor or air filter housing. Incorrect spring routing is the most common cause of a choke that will not open fully, which causes a rich-running condition after warm-up.
- Torque the mounting bolts in a cross pattern to the engine manufacturer’s specification. For most small engines this is 70–95 in-lb (approximately 6–8 ft-lb). Over-tightening crushes the gasket and cracks the carburetor body; under-tightening causes air leaks and a lean-running condition.
- Reconnect the fuel line and slide the clamp back into position at least 1/4 inch from the end of the hose.
- Reinstall the air filter housing, then the air filter, then the cover.
- Reconnect the spark plug wire.
- Open the fuel shut-off valve. Check immediately for fuel leaks at the bowl and at the fuel line connection. A leaking bowl indicates the bowl gasket or float needle is not seating — do not start the engine until the leak is resolved.
How to Adjust and Test the New Carburetor
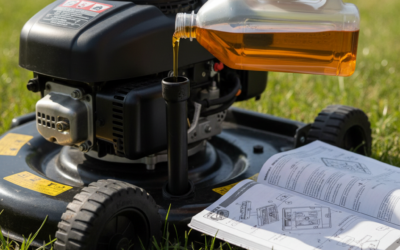
Most aftermarket carburetors ship with the mixture screws pre-set to a baseline factory position. This is a starting point, not a final tune. Confirm your engine model’s specific screw specifications from the manufacturer’s service manual before making adjustments.
Carburetor Adjustment Screws
- High-speed (main) mixture screw: Controls the air-fuel ratio at full throttle. Turning clockwise (in) leans the mixture; counterclockwise (out) richens it.
- Low-speed (pilot) mixture screw: Controls the mixture at idle. Same directional convention as the high-speed screw.
- Idle speed screw: A flat-blade screw that adjusts throttle plate position at idle. Turning in raises idle RPM; turning out lowers it.
A common baseline for many Briggs & Stratton and Tecumseh engines is 1.5 turns out from lightly seated for both mixture screws, but this varies by engine model. Always verify against the specific engine service manual — incorrect settings can cause lean operation and engine damage.
Test Procedure
- Start the engine and let it warm up for 3–5 minutes at half throttle.
- Move the throttle to full. Engine should run smoothly without surging or hunting.
- Move the throttle to idle. Engine should idle steadily without stalling.
- If the engine surges at full throttle, the high-speed mixture is lean — turn the high-speed screw out (counterclockwise) 1/8 turn at a time until the surge stops.
- If the engine stumbles or dies at idle, turn the low-speed screw out 1/8 turn at a time until idle stabilizes, then adjust the idle speed screw to achieve the manufacturer’s target idle RPM (typically 1,750–1,850 RPM for most walk-behind engines).
- Mow a small test area under load. Any hesitation, surging, or smoke under load indicates the mixture still needs adjustment.
Common Mistakes to Avoid When Replacing a Lawn Mower Carburetor
- Skipping the pre-disassembly photos. Throttle and choke linkage routing is engine-specific and difficult to reconstruct from memory. A 30-second photo takes minutes off reassembly and prevents an incorrectly routed linkage that causes running problems.
- Reusing the old carburetor gasket. Compressed gaskets leak. Always install a new gasket; most replacement carburetors include one.
- Over-tightening mounting bolts. Carburetor bodies are zinc alloy and crack under excess torque. Use a torque wrench or a firm hand-tight plus 1/4 turn maximum if no torque spec is available.
- Connecting the fuel line before checking for leaks at the bowl. A leaking float needle allows raw fuel to flood the engine, creating a fire hazard and potential hydro-lock.
- Using the wrong carburetor. A carburetor that physically mounts but has a different main jet size or emulsion tube will run incorrectly even if it bolts on. Always match by engine model number, not mower model number.
- Not replacing stale fuel. Installing a new carburetor and refilling from a can of old ethanol-blended gasoline will clog the new unit within one season. Use fresh fuel with a stabilizer if the mower will sit for more than 30 days.
- Ignoring the primer bulb. On engines with a primer bulb, the bulb and its check valves are part of the fuel delivery system. A cracked or hardened primer bulb causes hard starting regardless of carburetor condition. Replace it if it does not spring back firmly when pressed.
When to Call a Professional Instead of DIY
Carburetor replacement is a beginner-to-intermediate DIY task on most push mowers. Riding mowers and zero-turns add complexity due to engine enclosures and, on some models, dual carburetors or electronic governor systems.
Consider professional service when:
- The engine has compression or valve train issues mimicking carburetor symptoms — low compression, a bent pushrod, or a failed head gasket will not be resolved by carburetor replacement
- The engine is a V-twin over 25 HP with electronic fuel management or a choke solenoid system you are unfamiliar with
- The mower is under warranty and DIY repair could void coverage
- Multiple carburetor replacements have not resolved the symptom — the root cause is likely elsewhere (ignition, compression, fuel tank contamination)
Professional carburetor replacement at a small engine repair shop typically costs $80–$150 in labor plus the cost of parts, depending on region and mower type. A new aftermarket carburetor for a common push mower engine costs $15–$40, making DIY replacement cost-effective on any mower worth keeping. If the mower is over 10 years old with multiple failing systems, a repair-versus-replace cost analysis is worth doing before spending money on parts.
Frequently Asked Questions
Can a dirty carburetor cause a lawn mower not to start?
Yes. Varnish and gum deposits from stale or ethanol-blended fuel block the small jets and passages that meter fuel into the engine. Even partial blockage prevents the correct air-fuel mixture from forming, causing hard starting, no-start, or stalling under load. Cleaning resolves the problem in most cases; replacement is needed when the carburetor body or internal components are damaged.
Do I need to drain the gas tank before replacing the carburetor?
Draining the tank is not required but reduces spill risk. Closing the fuel shut-off valve and keeping rags under the work area is sufficient for most repairs. If there is no shut-off valve, pinch-off pliers on the fuel line prevent flow during disconnection. Drain the tank if you plan to tip the mower or work in an area near ignition sources.
How do I know if my carburetor is running lean or rich after replacement?
A lean condition produces a high-pitched, hunting/surging idle, possible backfiring, and the engine may run hotter than normal. A rich condition produces black exhaust smoke, a rough idle, fuel smell, and fouled spark plugs with black sooty deposits. Adjust the appropriate mixture screw — out (counterclockwise) to richen, in (clockwise) to lean — in 1/8-turn increments until the engine runs smoothly at both idle and full throttle.
Are aftermarket carburetors reliable for lawn mowers?
For residential push and riding mowers used under normal homeowner loads, quality aftermarket carburetors perform comparably to OEM units. The primary risk with very low-cost aftermarket units is inconsistent jet sizing and lower-grade float needle material, which can cause fuel metering problems or premature wear. Purchasing from established suppliers with a return policy and cross-referencing the part number against the engine model minimizes this risk.