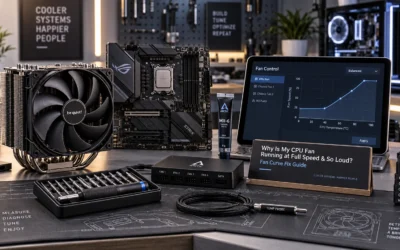
Why a Custom CPU Fan Curve Is the Highest-Impact Cooling Tweak You Can Make
Every modern desktop processor ships with a factory fan profile that prioritizes safety over silence, and the result is a machine that spins its cooler up and down in response to transient load spikes you will never feel. A custom CPU fan curve replaces that reactive default with a deliberate, temperature-mapped response that keeps your silicon cool under sustained load while eliminating the annoying “rev-up” behavior that plagues stock configurations. The engineering principle is straightforward: fan speed should be a function of coolant or core temperature, not a binary reaction to momentary package power. When implemented correctly, a well-tuned curve can drop idle noise by 10–15 dBA while shaving 5–8°C off sustained all-core loads, and it costs nothing but ten minutes of BIOS time.
Quick Answer
Set a custom CPU fan curve in BIOS by mapping fan speed to CPU package temperature: 30% at 40°C, 50% at 60°C, 75% at 75°C, 100% at 85°C. Use PWM fans with a 20% minimum duty cycle, enable a 3–5°C hysteresis window, and verify with a 10-minute stress test before calling it done.

Understanding the Physics: PWM vs. DC Fan Control

Before you touch a single BIOS setting, you need to know which control method your fans support, because it determines the entire tuning strategy. PWM (pulse-width modulation) fans use a dedicated fourth wire that carries a 25 kHz control signal, letting the motherboard modulate speed from roughly 20% to 100% duty cycle with fine granularity. DC (voltage) control regulates speed by varying the supply voltage on the power pin, which works but has a higher minimum threshold — most DC fans refuse to spin below about 5V, translating to roughly 40% of rated speed. This distinction matters because a DC fan simply cannot idle as low as a PWM unit, so your silent-idle target changes accordingly.
Check your fan’s connector: a 4-pin header means PWM, a 3-pin header means DC. On modern boards like the ASUS ROG Maximus Z890 Hero vs MSI MEG Z890 ACE, both platforms expose per-header control modes in the BIOS, letting you assign PWM or DC per fan. If you are building around a current-generation chip, cross-reference your cooling expectations against our AMD Ryzen 5 9600X vs Intel Core Ultra 5 245K analysis, since the two architectures report temperature and power differently — Intel exposes package power directly while AMD leans on Tctl/Tdie readings.
Reading the Right Temperature Source
The single most common mistake in fan-curve tuning is binding the fan to the wrong sensor. CPU fans should track CPU package temperature (Tctl/Tdie on AMD, package temp on Intel), never motherboard VRM or system temperature, because those lag the actual silicon state by seconds. For AIO pump fans, bind to coolant temperature if your board exposes it — coolant rises slowly and smoothly, which produces a far more stable curve than chasing spiky core temps. If your BIOS only offers CPU temp, use a longer response time (see the hysteresis section below) to compensate.
Building the Curve: Temperature Thresholds and Duty Cycles
A good custom CPU fan curve is a piecewise-linear function with four to five anchor points. The goal is a flat, low-speed plateau at idle, a gentle ramp through normal operating range, and a steep climb only as you approach thermal limits. Below is the reference template I use for air coolers and AIOs, tuned for a 65–105W TDP processor.
| CPU Temp (°C) | Fan Duty (%) | Approx. dBA (120mm) | Use Case |
|---|---|---|---|
| 30–40 | 20–30% | 15–20 | Idle, desktop, web browsing |
| 40–55 | 30–45% | 20–28 | Light load, video, office |
| 55–70 | 45–65% | 28–36 | Gaming, moderate all-core |
| 70–80 | 65–85% | 36–42 | Heavy rendering, encoding |
| 80–90 | 85–100% | 42–48 | Stress tests, thermal limit |
Notice the deliberate plateau between 30–40°C: most CPUs idle in the low 30s, so keeping the fan at its minimum duty cycle through that entire band prevents the constant on-off cycling that wears bearings and annoys users. The ramp accelerates only past 55°C, which is where sustained workloads actually live. This is the core of any serious custom-cpu-fan-curve methodology — flatten the idle, steepen the load response.
Zero-RPM Mode: When It Makes Sense
Many 2026-era boards and fans support a zero-RPM or “fan stop” feature that halts the fan entirely below a set temperature. This is excellent for silent builds but carries a real caveat: a stopped fan means zero airflow over the heatsink, so the CPU relies entirely on passive dissipation until the threshold is crossed. Set the zero-RPM cutoff at 40°C for air coolers and 35°C for AIOs, and always pair it with a fast ramp once the fan restarts — otherwise you get a sudden, jarring spin-up. If your CPU idles above 45°C (common with high-TDP chips or poor ambient airflow), skip zero-RPM entirely; the constant restarting is worse than a low idle speed.
BIOS Configuration: Step-by-Step Setup
Your motherboard’s UEFI is the most reliable place to build a custom CPU fan curve, because it works at the firmware level regardless of operating system. The exact menu names vary by vendor, but the workflow is consistent across modern boards, including the flagship platforms covered in our ASUS ROG Maximus Z890 Hero vs MSI MEG Z890 ACE comparison.
- Enter BIOS (usually Del or F2 during POST) and switch to Advanced or Expert mode.
- Navigate to the fan control section — typically under Hardware Monitor, Q-Fan Control (ASUS), or Smart Fan Mode (MSI).
- Select the CPU fan header and set the control mode to PWM (or DC for 3-pin fans).
- Choose “Manual” or “Custom” curve mode rather than a preset like “Standard” or “Silent.”
- Define your anchor points using the temperature/duty table above as a starting template.
- Set the response time or hysteresis to 3–5 seconds to smooth transient spikes.
- Enable zero-RPM if supported and desired, with the cutoff at 35–40°C.
- Save and exit, then verify with a stress test.
Hysteresis and Response Time: The Anti-Spike Secret
Hysteresis is the temperature dead-band that prevents the fan from reacting to every momentary fluctuation. Without it, a single background process can spike your CPU to 60°C for half a second, spin the fan to 50%, then drop back — producing the classic “breathing” noise pattern. Set a 3–5°C hysteresis so the fan only changes speed when temperature moves meaningfully. Combined with a 3-second response time, this makes the curve feel smooth and stable while still reacting fast enough to catch real sustained loads. This single setting is what separates a professional custom CPU fan curve guide from a naive temperature-to-speed mapping.
Software-Based Curves: Fan Control and Vendor Utilities
While BIOS curves are the foundation, software gives you finer control and live adjustment. The open-source Fan Control application is the gold standard — it can mix multiple temperature sources, apply smoothing, and even bind fan speed to GPU temperature for a unified system curve. Vendor utilities like ASUS Fan Xpert and MSI Center offer similar functionality with a friendlier interface, though they add background overhead. For a pure CPU curve, BIOS is sufficient; reach for software when you want to coordinate CPU and case fans into a single system-wide response.
One important note: software curves only apply once the OS loads, so your BIOS curve remains the safety net during POST and boot. Build both — BIOS for reliability, software for fine-tuning. If you are pairing a new CPU with an older cooler, check our AMD Ryzen 5 9600X vs Intel Core Ultra 5 245K comparison to understand the thermal headroom you are working with before committing to an aggressive silent curve.
Coordinating Case Fans with the CPU Curve
Case fans should not mirror the CPU curve exactly — they move air for the whole chassis, including the GPU and VRM. Bind front intake fans to a blend of CPU and GPU temperature, and rear/top exhaust to system temperature. A common mistake is running case fans at full speed while the CPU fan idles, which wastes noise for no thermal benefit. In practice, set intake fans 10% higher duty than the CPU fan at the same temperature to maintain positive case pressure, which keeps dust out and airflow directed. For GPU-specific tuning, our graphics card tests & GPU guides cover the analogous curve setup for your graphics card.
Diagnostic Symptom Matrix: Fixing a Bad Curve
If your machine is too loud, too hot, or both, the table below maps common symptoms to their root causes and fixes. This is the troubleshooting core of any serious custom-cpu-fan-curve workflow.
| Symptom | Likely Cause | Fix |
|---|---|---|
| Fan constantly revs up/down at idle | No hysteresis, low idle plateau | Add 3–5°C hysteresis, extend 30–40°C plateau |
| CPU hits 90°C+ under load | Curve too flat, fan stuck low | Steepen ramp past 70°C, verify 100% at 85°C |
| Fan never spins up under gaming load | Bound to wrong sensor (system temp) | Rebind to CPU package temp |
| Loud at idle despite low duty | DC fan minimum too high | Switch to PWM fan, or accept 40% floor |
| Sudden spin-up after zero-RPM stop | Zero-RPM cutoff too high, fast ramp | Lower cutoff to 35°C, soften restart ramp |
Final Diagnostic Verdict & Maintenance Checklist
A properly tuned custom CPU fan curve is the single highest-value cooling upgrade available to any PC builder, delivering measurable noise reduction and stable temperatures without a single dollar of new hardware. The verdict is unambiguous: if you are still running a stock fan profile, you are leaving both silence and thermal headroom on the table.
Before you call the job complete, run this verification checklist:
- Confirm the fan is bound to CPU package temperature, not system or VRM temp.
- Verify the idle plateau keeps the fan at minimum duty between 30–40°C.
- Confirm 100% duty is reached by 85–90°C so you never throttle under load.
- Run a 10-minute stress test (Cinebench or Prime95) and log peak temperature and fan RPM.
- Check that hysteresis (3–5°C) and response time (3s) are enabled to kill transient spikes.
- Re-verify the curve after any BIOS update, since updates can reset fan profiles.
- Clean the heatsink and fans every 6 months — dust accumulation shifts the entire temperature baseline and invalidates your curve.
For ongoing hardware decisions, keep our desktop CPU benchmarks & reviews bookmarked to cross-reference thermal behavior across processors, and check graphics card tests & GPU guides when you extend your curve strategy to the rest of the system. For deeper background on how modern processors manage thermal and power states, Intel Architecture Technical Documentation remains the authoritative reference on package temperature reporting and thermal design. A well-tuned curve, verified against real load, is the difference between a PC that sounds like a server and one that disappears into the background — and it costs you nothing but a few minutes of careful configuration.