Quick Answer
To change the oil on a riding lawn mower, warm the engine briefly and turn it off, then locate and remove the oil drain plug to let old oil drain into a container. Replace the oil filter if your mower has one, reinstall the drain plug, add the manufacturer-recommended oil (typically 1.5–2 quarts of SAE 10W-30 or 10W-40), and check the level with the dipstick before running the engine to verify proper operation.
Tools and Materials You’ll Need
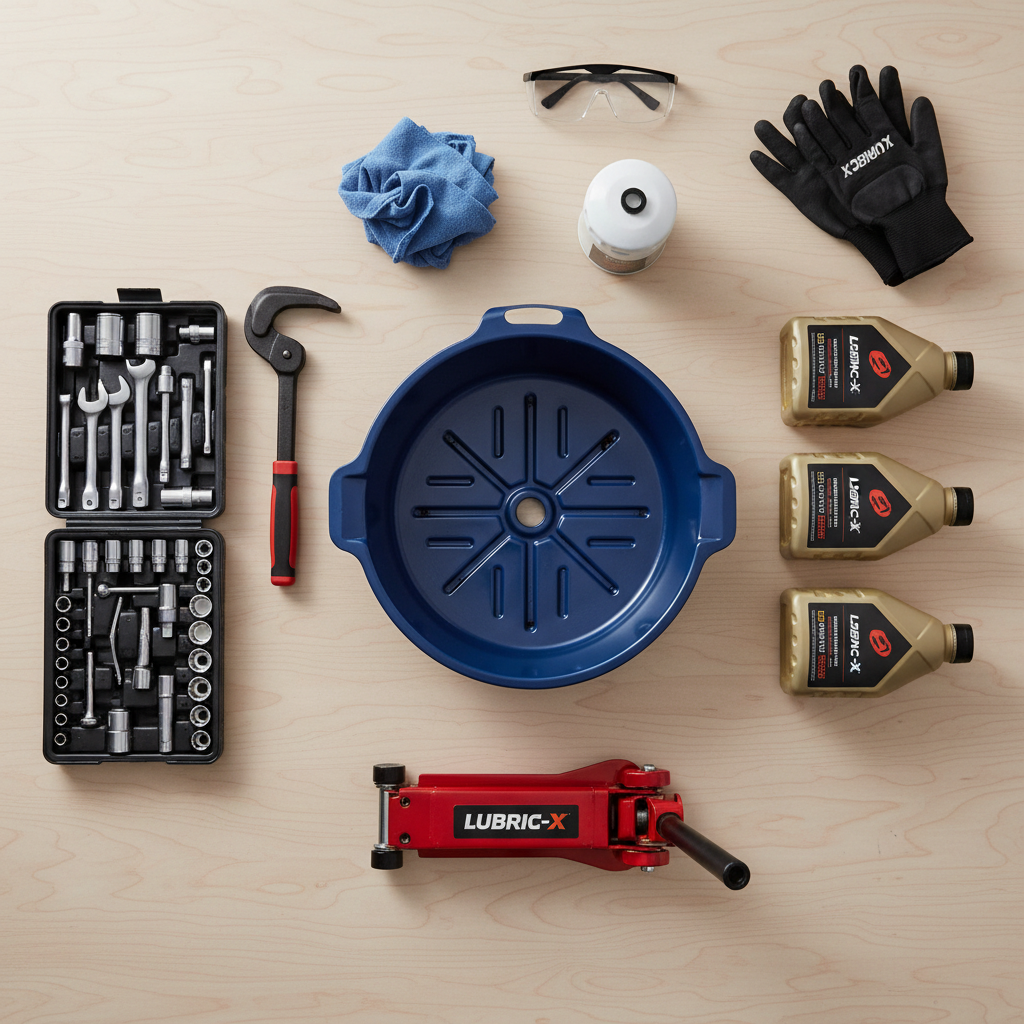
Before starting your oil change, gather these essential items to make the job easier and safer:
- Socket wrench set or adjustable wrench — to remove the oil drain plug (typically 15mm or 17mm)
- Oil drain pan — a shallow container to catch used oil; a 5-gallon capacity is ideal
- Oil filter wrench — a specialized tool to remove spin-on filters without damaging them
- New oil — the correct grade and quantity specified in your mower’s manual (check your owner’s manual for exact requirements)
- Replacement oil filter — if your mower model uses one; consult your manual for the correct part number
- Rags or paper towels — for cleanup and checking oil levels
- Safety glasses and gloves — to protect against hot oil and debris
- Jack or ramps (optional) — helpful for tilting the mower to fully drain oil from hard-to-reach drain plugs
Safety Precautions Before Starting
Performing an oil change safely protects both you and your equipment. Follow these critical steps before you begin:
- Warm the engine slightly: Run your mower for 2–3 minutes to warm the oil. Warm oil flows more easily and carries away more contaminants, but let the engine cool for 5–10 minutes before draining so you don’t burn yourself on hot oil.
- Turn off the engine and disconnect the spark plug wires: This prevents accidental starting while you work. Remove the wires from both spark plugs.
- Work on level ground: Park your mower on a flat, level surface so oil drains completely and evenly.
- Wear protective gear: Used oil can be hot and irritating. Wear safety glasses, work gloves, and old clothes you don’t mind getting dirty.
- Plan for used oil disposal: Check your local regulations for proper disposal. Many auto parts stores and recycling centers accept used oil for free or a small fee. Never pour used oil down drains, into soil, or into waterways.
Step 1: Locate the Oil Drain Plug and Remove It
The oil drain plug is usually located on the underside of the engine or crankcase, at the lowest point. On most residential riding mowers, you’ll find it on the back or side of the engine block.
- Consult your manual: If you’re unsure where the drain plug is, your mower’s manual will show you a diagram of its exact location. The manual also specifies the wrench size needed.
- Position your drain pan: Place your oil drain pan directly under the plug to catch all draining oil.
- Remove the plug: Using the appropriate wrench, slowly turn the drain plug counterclockwise. Once it’s loose enough, carefully unscrew it by hand. If oil is still very hot, use a rag to protect your hand.
- Let the oil drain completely: Allow old oil to drain into the pan for at least 10–15 minutes. Some oil will cling to internal engine surfaces, so letting it drain fully ensures you remove as much old oil as possible.
- Wipe the drain plug: Before reinstalling, wipe the plug clean with a rag to remove any debris or old gasket material. A clean plug creates a better seal.
Step 2: Replace the Oil Filter (If Your Mower Has One)
Not all residential riding mowers have replaceable spin-on oil filters. Check your manual to see if yours does. If it does, replacing the filter along with the oil keeps your engine cleaner and extends engine life.
- Locate the filter: On mowers with filters, they’re typically mounted on the side of the engine. Consult your manual if you can’t find it.
- Position the drain pan: Even though most of the oil has drained, some residual oil will come out when you remove the filter. Keep your drain pan positioned underneath.
- Remove the old filter: Use an oil filter wrench to turn the filter counterclockwise. Once it’s loose, carefully unscrew it by hand. Expect a small amount of oil to drip out.
- Clean the filter mounting surface: Wipe the mounting surface on the engine with a clean rag to remove any old rubber gasket material or debris. A clean surface ensures the new filter seals properly.
- Install the new filter: Hand-screw the new filter onto the mounting surface until the rubber gasket makes contact with the engine. Then turn it an additional 3/4 turn (not a full turn) to tighten it. Do not use the filter wrench to tighten; hand-tightening is sufficient and prevents over-tightening.
Step 3: Reinstall the Oil Drain Plug
Now that old oil has drained and (if applicable) the filter is replaced, it’s time to seal the engine:
- Install the drain plug: Screw the drain plug back into the hole by hand first, then use your wrench to tighten it. Turn it clockwise until snug—do not over-tighten, as this can strip the threads or crack the plug.
- Wipe up spills: Before moving on, wipe any spilled oil from the engine block and surrounding area with a rag.
Step 4: Add New Oil and Check the Level
Adding the correct amount of fresh oil is crucial for engine health and performance.
- Know your mower’s oil capacity: Most residential riding mowers require 1.5 to 2 quarts of oil, but this varies by model. Check your owner’s manual for the exact capacity. Your manual will also specify the recommended oil grade for your climate.
- Choose the right oil grade: SAE 10W-30 and SAE 10W-40 are the most common grades for residential mowers. The first number (10W) indicates the oil’s viscosity in cold temperatures; the second number (30 or 40) indicates viscosity at operating temperature. Some mowers in warmer climates may use SAE 30 (non-detergent); others in very cold climates may require SAE 5W-30. Always follow your manual’s recommendation.
- Decide between synthetic and conventional: Conventional oil is the standard and typically less expensive. Synthetic oil offers better protection in extreme temperatures and lasts longer between changes. Many modern mowers can use either; check your manual for any restrictions. Mixing the two is generally acceptable if necessary, though it’s not ideal.
- Add oil slowly: Remove the oil filler cap (usually clearly marked on top of the engine) and pour in new oil slowly. Start with about 1.5 quarts, then check the level before adding the full amount.
- Check the dipstick: Most riding mowers have a dipstick to measure oil level. Pull out the dipstick, wipe it clean with a rag, reinsert it fully, then pull it out again to read the level. The oil should reach the “full” mark. If it doesn’t, add a bit more oil and recheck. Do not overfill, as excess oil can damage the engine.
- Reinstall the oil filler cap: Once the level is correct, replace the cap and tighten it securely.
Step 5: Run the Engine and Verify Operation
The final step confirms that your oil change was successful and the engine is running properly:
- Reconnect the spark plug wires: Carefully push the spark plug wires back onto both spark plugs until they click into place.
- Start the engine: Turn on the ignition and start the mower. Let it run for 1–2 minutes at idle.
- Check for leaks: While the engine is running, look around the drain plug and oil filter for any signs of leaking. Stop the engine immediately if you see oil dripping.
- Turn off the engine and recheck the oil level: After running, wait 2–3 minutes for the oil to settle. Pull out the dipstick again, wipe it, reinsert it fully, and check the level one more time. It should still be at the full mark. If it’s low, add a small amount of oil and recheck.
Oil Change Intervals and Maintenance Schedule
Knowing how often to change your mower’s oil keeps your engine in top condition. Most manufacturers recommend an oil change every 50 to 100 operating hours, or at least once per season (annually). If you use your mower frequently, you may need to change the oil twice a season. Refer to your owner’s manual for the specific interval recommended for your model. Keeping track of your oil change schedule in a maintenance log helps prevent accidentally skipping changes.
Model-Specific Considerations
Zero-turn mowers: Zero-turn radius mowers follow the same oil change procedure as traditional riding mowers, though their dual-engine designs may require checking and changing oil in two separate locations. Consult your manual for details.
Older mowers with no dipstick: If your mower lacks a dipstick, use the oil filler cap as a gauge. Fill the oil until it reaches the bottom of the filler hole when the mower is on level ground.
Mowers without oil filters: Many budget-friendly or older riding mowers do not have replaceable spin-on filters. If yours doesn’t, simply drain and refill the oil according to the steps above, and skip the filter replacement step.
Frequently Asked Questions
How often should I change my riding mower’s oil?
Most manufacturers recommend an oil change every 50 to 100 operating hours or at least once per season. If you mow frequently, consider changing oil twice a season. Always check your owner’s manual for the specific interval for your model.
What type of oil should I use in my riding mower?
The most common grades are SAE 10W-30 and SAE 10W-40, suitable for most climates and seasons. Warmer regions may use SAE 30, while very cold climates may require SAE 5W-30. Always consult your mower’s manual for the manufacturer’s recommendation, as using the wrong grade can affect engine performance and lifespan.
Can I use synthetic oil in my riding mower?
Most modern riding mowers can use synthetic oil, which offers better temperature protection and longer intervals between changes. However, some older mowers may be designed for conventional oil only. Check your owner’s manual to confirm whether synthetic is acceptable. If your manual doesn’t specify, conventional oil is the safe default.
What should I do with the old oil after draining it?
Never pour used oil down drains, into soil, or into waterways. Instead, place it in a sealed container and take it to a local auto parts store, quick-lube facility, or recycling center that accepts used oil. Many accept it for free or charge a small fee. Some communities also hold hazardous-waste collection days where you can drop off used oil at no charge.