How to Charge a Lawn Mower Battery: Quick Answer
To charge a lawn mower battery safely: disconnect it from the mower, inspect and clean the terminals, connect the charger with correct polarity (positive to positive, negative to negative), set the appropriate voltage and amperage for your battery type, allow adequate charging time (4–8 hours for lead-acid; 30 minutes–2 hours for lithium-ion with fast chargers), then disconnect the charger and reconnect the battery. Always consult your mower and charger manufacturer’s instructions for your specific battery model.
Understanding Your Lawn Mower Battery Type
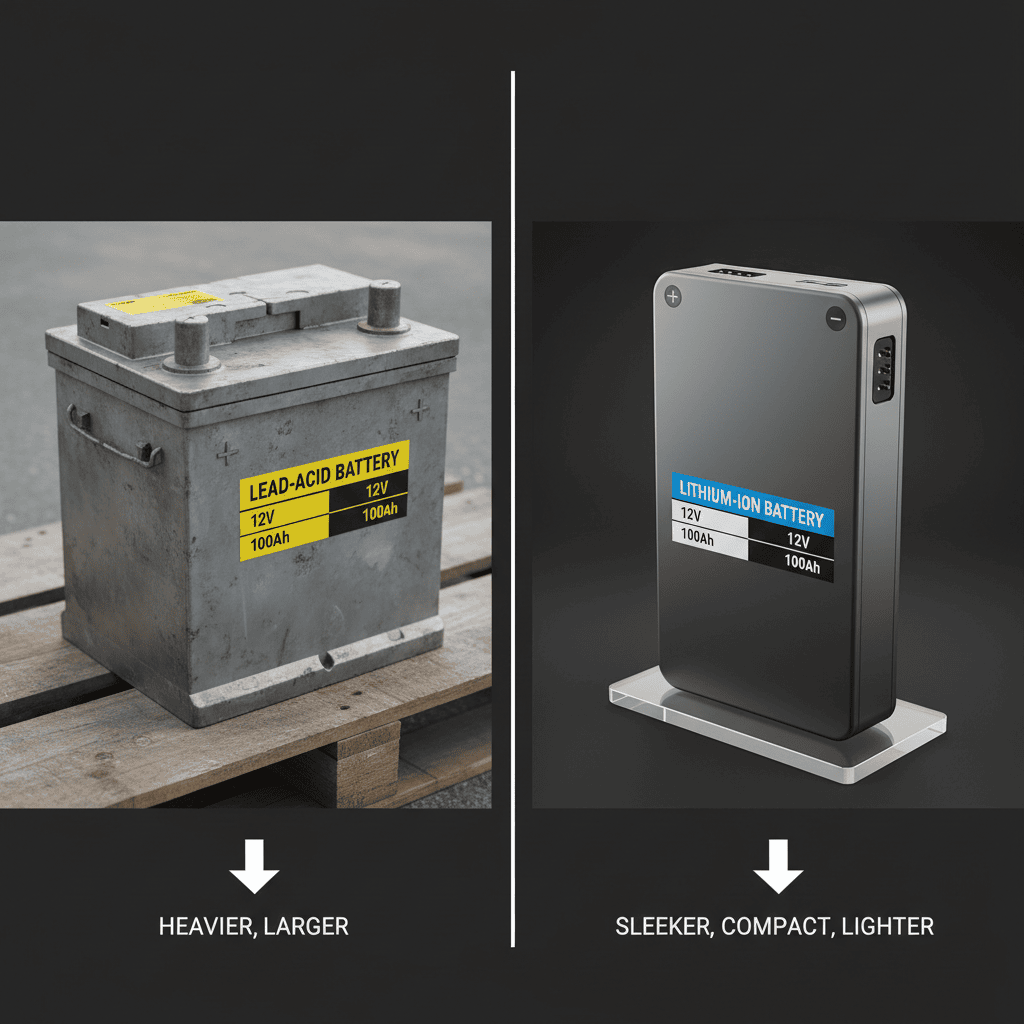
Before charging, identify your battery type because lead-acid and lithium-ion batteries have fundamentally different charging requirements and cannot use interchangeable chargers.
Lead-Acid Batteries are the traditional choice for many residential and commercial mowers. These batteries contain lead plates submerged in sulfuric acid electrolyte and are more forgiving of overcharging if a charger has a regulator. They typically weigh 30–50 pounds and cost $100–$200 to replace. Lead-acid batteries are marked with 12V or 24V ratings.
Lithium-Ion Batteries are increasingly common in modern mowers, especially cordless models. These batteries use lithium compounds and are significantly lighter (5–15 pounds), have no memory effect, and offer faster charging times. However, they require specialized chargers with built-in battery management systems to prevent damage. Lithium-ion batteries are sensitive to overcharging and deep discharge.
Check your mower’s manual or examine the battery itself—most batteries have a label clearly stating the type, voltage (12V, 24V, 36V, 48V), and ampere-hour (Ah) rating. The Ah rating indicates capacity; higher ratings mean longer runtime.
Pre-Charging Preparation and Safety
Proper preparation prevents accidents and extends battery life.
Safety Equipment: Wear safety glasses to protect against acid splatter (lead-acid batteries) and work gloves to prevent contamination. Ensure you’re working in a well-ventilated area, ideally outdoors or in a garage with doors open, as batteries can emit hydrogen gas during charging.
Disconnect the Battery: Always remove the battery from the mower before charging. Most batteries have a cable connector or bolt terminals. For bolt terminals, use the correct wrench size—typically 8mm or 10mm. Disconnect the negative terminal first, then the positive. This prevents accidental shorts.
Inspect and Clean Terminals: Battery terminals accumulate white, blue, or green corrosion (lead sulfate or copper oxide) that impedes electrical contact. Mix one tablespoon of baking soda with one cup of water. Dip an old toothbrush in the solution and scrub both the battery terminals and the cable connectors. Rinse with distilled water and dry thoroughly with a clean cloth. Corroded terminals can reduce charging efficiency by 30–50%.
Check Charger Compatibility: Before connecting anything, verify the charger’s voltage matches your battery. A 12V charger on a 24V battery will charge extremely slowly or not at all; a 24V charger on a 12V battery will damage it instantly. Check both the charger and battery labels.
Step-by-Step: Charging a Lead-Acid Battery
Lead-acid batteries tolerate a range of charging methods, making them relatively forgiving.
- Select the Right Charger: Use either a dedicated lawn mower charger or a general-purpose automotive battery charger rated for your voltage. Trickle chargers (2–10 amps) charge slowly but safely for overnight charging. Standard chargers (20–40 amps) charge faster but require monitoring. Fast chargers (50+ amps) charge in 1–2 hours but generate heat and stress the battery.
- Set Voltage and Amperage: For a 12V battery, set the charger to 12V. For 24V systems, use 24V. Start with the lowest amperage setting (typically 2–5 amps) unless the charger is automated. Most lead-acid mower batteries are 4–12 Ah; a 10-amp charger will fully charge a 10 Ah battery in roughly 1 hour plus a 10% overage for efficiency losses (about 1.1 hours). For conservative charging, use an amperage equal to or less than 10% of the Ah rating (a 10 Ah battery: 1 amp minimum, 10 amps maximum).
- Connect Terminals Correctly: Connect the positive (red) charger clamp to the positive (+) battery terminal first. Then connect the negative (black) clamp to the negative (−) terminal. This order prevents sparks. If you reverse the polarity, stop immediately and disconnect before damage occurs.
- Monitor Charging: Most chargers have indicator lights: red means charging, green means complete. Do not leave a lead-acid battery charging unattended for more than 12 hours. Many modern chargers auto-shut off when full.
- Charging Duration: Expect 4–8 hours for a standard charge with a typical 10-amp charger. A trickle charger may take 12–24 hours. Do not fully drain a lead-acid battery regularly; this shortens lifespan. Aim to recharge when the battery is at 50% capacity.
- Disconnect Properly: Remove the negative (black) clamp first, then the positive (red). This reverses the connection sequence and minimizes spark risk.
Step-by-Step: Charging a Lithium-Ion Battery
Lithium-ion batteries require a specialized charger with integrated battery management electronics.
- Use the Manufacturer’s Charger: Never use a lead-acid charger on a lithium-ion battery. Only use the charger that came with the mower or a replacement explicitly rated for lithium-ion. Chargers contain microchips that monitor cell voltage, temperature, and charge state to prevent overcharging, which would damage cells permanently or create fire risk.
- Check Temperature: Lithium-ion batteries charge most efficiently between 50°F and 80°F (10°C to 26°C). Charging in freezing temperatures reduces charge acceptance; charging in extreme heat accelerates degradation. If the battery is cold, allow it to warm to room temperature before charging.
- Connect the Charger: Most modern lithium-ion lawn mower batteries have a proprietary connector (not exposed terminals), so polarity reversal is impossible. Simply plug the charger into the battery’s port. Some integrated systems charge the battery while it’s in the mower; others require removal.
- Monitor Charging Lights: Lithium-ion chargers typically display: blinking light (charging), solid light (complete), or red light (error/incompatible battery). Charging typically takes 30 minutes to 2 hours depending on charger wattage and battery capacity.
- Avoid Overcharging: Modern lithium chargers stop automatically when the battery reaches 100%. Do not leave a fully charged lithium battery in the charger for extended periods (more than 24 hours), as this degrades cells. Disconnect immediately after charging completes.
- Storage Charge: Store lithium-ion batteries at 40–60% charge. A fully charged battery stored for months degrades faster than one stored at partial charge.
Charging Time and Indicators Explained
Lead-Acid Charging Times: A standard 12V lawn mower battery (typically 4–12 Ah) charges in 4–8 hours with a 10-amp charger. If your charger is 5 amps, double the time (8–16 hours). Trickle chargers (2 amps) require 24–48 hours. The formula: Ah ÷ Charger Amps × 1.2 (accounting for efficiency) = Approximate Hours.
Lithium-Ion Charging Times: Modern fast chargers (40–60W) fully charge a 5 Ah battery in 30–60 minutes. Standard chargers (20–30W) take 1–2 hours. Older or basic chargers may take 4+ hours. Check your charger’s wattage rating on the label.
Charger Indicators: Most chargers use color-coded lights. Red or amber means actively charging. Green or blue means complete. Some chargers pulse the light during charging and hold steady when done. Refer to your charger’s manual for exact meanings—they vary by brand.
Overcharging Risks: Lead-acid batteries can tolerate mild overcharging if the charger has a regulator, but prolonged overcharging causes water loss from the acid, damaging plates. Lithium-ion batteries are far more sensitive; overcharging can cause swelling, leakage, or fire. Always use chargers with automatic shutoff.
Common Charging Problems and Solutions
Battery Won’t Charge
- Corroded Terminals: The most common culprit. Clean terminals with baking soda solution and a brush. If corrosion returns within weeks, it indicates an internal battery fault or improper storage.
- Dead Battery: A battery deeply discharged (below 10V for 12V systems) may not accept charge. Some chargers have a recovery mode for dead batteries. If recovery fails after 30 minutes, the battery is likely damaged beyond repair.
- Charger Malfunction: Test the charger with a different battery if possible. If the charger doesn’t respond (no lights, no fan noise), it may be faulty. Check that it’s plugged in and the outlet works.
- Incompatible Charger: Verify voltage matches exactly. A 24V charger cannot charge a 12V battery and vice versa.
Charger Getting Hot
- Some heat is normal, but excessive heat (too hot to touch) indicates a problem. Turn off the charger immediately. Causes include a shorted battery (replace it), undersized charger for the battery capacity, or a faulty charger. Allow the charger to cool before investigating.
Battery Charges But Dies Quickly
- This suggests a weak or failing battery rather than a charging problem. If a fully charged battery loses 50% capacity within an hour of use, the battery is near end-of-life and should be replaced. Sulfation in lead-acid batteries (caused by prolonged undercharging or storage in a discharged state) is irreversible.
Swollen or Leaking Battery
- Stop using the battery immediately. Swelling indicates internal pressure (gas buildup in lead-acid or cell damage in lithium-ion) and poses a fire or explosion hazard. Do not attempt to charge. Dispose of it properly at a recycling center or battery retailer.
Battery Maintenance for Long-Term Performance
Charging Frequency: Charge the battery after each use or when it reaches 50% capacity. Frequent, partial discharges extend overall lifespan compared to occasional deep discharges. If your mower is used seasonally, charge the battery monthly during storage.
Off-Season Storage: Before storing for winter or extended periods, charge the battery to 80% (not 100% for lithium-ion; 50–80% is ideal). Store in a cool, dry place (50–70°F is optimal). Avoid extreme cold or heat. For lead-acid batteries, disconnect them from the mower to prevent parasitic drain from the mower’s electrical system. Check and charge monthly if stored longer than three months.
Temperature Effects: Cold weather reduces battery capacity by 30–50% because chemical reactions slow at low temperatures. A fully charged battery in winter may only deliver 50–70% of its rated capacity. Performance returns to normal once the battery warms. Heat accelerates battery degradation; avoid storing batteries in direct sunlight or hot vehicles. Lithium-ion batteries are especially sensitive to heat.
Preventing Deep Discharge: Avoid completely draining either battery type. Deep discharge damages lead-acid plates and reduces lithium-ion cycle count. If the mower stops mid-use, charge it immediately rather than leaving it drained for days.
Cleaning and Inspection: Inspect battery terminals and connectors every few months. Clean corrosion with baking soda solution. Tighten any loose bolts on terminal posts. For lead-acid batteries, check water level if applicable (older models only); topped-off acid batteries should have water just above the plates.
Frequently Asked Questions
Can I charge a lithium-ion lawn mower battery with a lead-acid charger?
No. Lithium-ion and lead-acid chargers are not interchangeable and will damage the battery if mismatched. Lead-acid chargers lack the sophisticated battery management circuitry that lithium-ion systems require. Using the wrong charger can cause overcharging, cell damage, or fire hazard. Always use the manufacturer’s recommended charger.
How do I know if my lawn mower battery is dead?
A dead battery won’t turn on the mower at all—no clicks, no sounds. A weak battery may produce a slow cranking sound but won’t start the engine. Use a multimeter to check voltage: a 12V battery should read 12V or higher when fully charged (ideally 12.6–12.8V). A reading below 11V indicates a dead battery. If the battery won’t accept charge after 30 minutes on a charger, it’s dead and needs replacement.
Is it safe to charge a lawn mower battery indoors?
Lead-acid batteries release hydrogen gas during charging, which is explosive in enclosed, poorly ventilated spaces. Charge outdoors or in a garage with doors and windows open. Lithium-ion batteries are safer indoors but should still be charged in ventilated areas away from flammable materials. Never charge a battery in a basement, bedroom, or car interior.
What’s the difference between a trickle charger and a fast charger?
A trickle charger delivers 2–10 amps and fully charges a battery in 12–24 hours. It’s gentle, ideal for maintenance, and safe for unattended charging. A fast charger delivers 40–60+ amps and charges in 1–2 hours but generates heat and stresses the battery. Use trickle chargers for routine maintenance; fast chargers when you need the mower urgently. Do not use fast chargers daily, as this shortens battery lifespan.