Direct Answer: How to Replace Trimmer Line
To replace trimmer line, first disconnect the spark plug wire (gas models) or unplug the trimmer (electric), then let the engine cool for 15 minutes. Access the spool by twisting the spool cap counterclockwise or pressing the release tabs, depending on your model. Remove old line debris, thread new line through the eyelets on the spool, wind it tightly in the correct direction (usually counterclockwise when viewed from above), and reinstall the spool cap. The exact process varies by feed type—bump feed, manual feed, or fixed spool—but these core steps apply universally.
Understanding Your Trimmer Type and Feed Mechanism
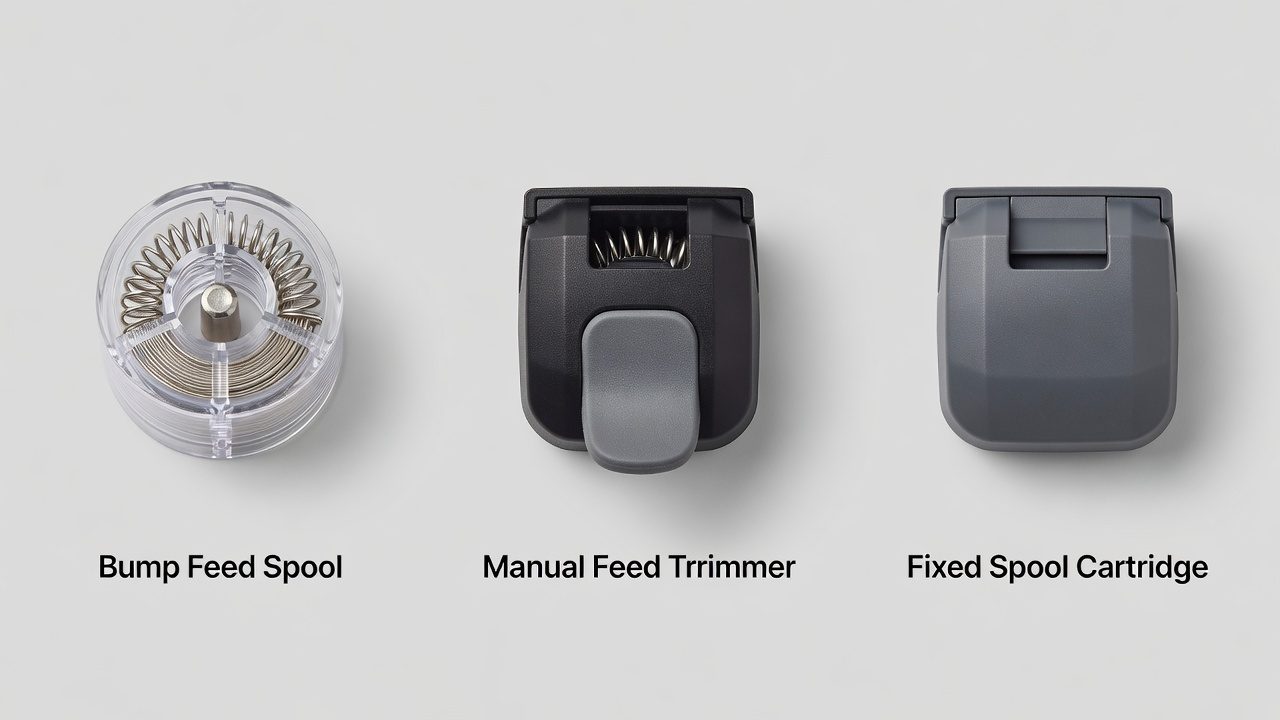
String trimmers use three primary feed systems, each requiring a slightly different replacement approach. Identifying your trimmer type is the first step to a successful line replacement.
Bump Feed Trimmers are the most common residential models. They automatically advance new line when you tap the spool against the ground. The spool is removable, making line replacement straightforward. When you bump the head, a spring-loaded mechanism feeds line from the spool.
Manual Feed Trimmers require you to manually advance the line by hand or using a small tab. These are often found on older models or commercial-grade equipment. Line replacement follows the same winding process but with more control over line length.
Fixed Spool Trimmers have a permanent spool that cannot be removed. These typically use pre-wound line cartridges that slide into the trimmer head, or require you to thread line directly through fixed eyelets without removing the spool itself.
Gas vs. Electric Differences: Gas-powered trimmers require cooling time and spark plug wire disconnection before maintenance. Electric models are simpler—just unplug them. The actual line replacement process is identical; the difference is primarily in safety preparation.
Tools and Materials You’ll Need
Gather these items before starting:
- Replacement trimmer line in the correct diameter for your model (typically 0.065″, 0.080″, or 0.105 inches)
- Your trimmer’s user manual (for specific spool capacity and recommended line type)
- Screwdriver or wrench (some spool caps require tools; most twist by hand)
- Small needle or wire (helpful for cleaning eyelets on the spool)
- Work gloves (optional but recommended)
- Clean cloth or paper towels (for cleaning the spool and trimmer head)
Most replacement line comes in spools of 50–100 feet. Check your trimmer’s manual for the exact line diameter and recommended length—using the wrong diameter can affect cutting performance and may cause feeding problems.
Safety Precautions Before You Start
- Disconnect the spark plug wire (gas models) or unplug the trimmer (electric models) to prevent accidental starting.
- Allow the engine to cool for at least 15 minutes if the trimmer has been recently used. The cutting head and spool can retain significant heat.
- Work on a flat, stable surface with good lighting to avoid dropping small parts.
- Wear safety glasses when removing old line debris; small pieces can become projectiles.
- Never attempt maintenance while the engine is running or warm.
How to Replace Line on Bump Feed Trimmers (Most Common)
Bump feed trimmers account for the majority of residential string trimmer sales. Follow these steps:
Step 1: Remove the Spool Cap
Locate the spool cap at the bottom of the trimmer head. Most models require a counterclockwise twist (check your manual if unsure). Some models have release tabs you press inward while twisting. Apply firm, steady pressure—avoid over-forcing, as the plastic can crack.
Step 2: Remove the Old Spool
The spool should pull straight out. If it resists, check for a small retaining pin or clip that must be removed first. Set the old spool aside and examine the trimmer head for any remaining line fragments. Use a small needle to clear the eyelets (the holes where line threads through).
Step 3: Measure and Prepare New Line
Cut a piece of trimmer line approximately 20–30 feet long, depending on your spool capacity (consult your manual). If the line came wound on a card, unwind enough to work with comfortably.
Step 4: Thread the Line Through the Eyelets
Most bump feed spools have two eyelets, one on each side. Insert one end of the line into the first eyelet and push it through until roughly equal lengths hang out both sides. The exact threading pattern depends on your spool design—your manual should show a diagram. If you don’t have the manual, take a photo of the empty spool and search online for your trimmer model to find the threading guide.
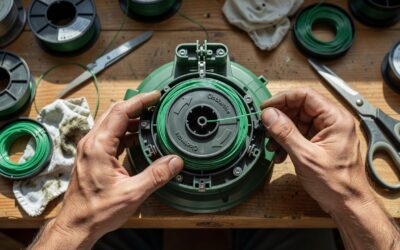
Step 5: Wind the Line Onto the Spool
This is the critical step. Most bump feed spools wind counterclockwise when viewed from above (the direction the spool rotates during operation). Wind the line tightly and evenly, keeping tension as you wrap. Leave about 4–6 inches of line hanging free on each side—this becomes your cutting line when the spool is reinstalled.
Winding direction matters: If you wind in the wrong direction, the automatic advance mechanism won’t feed line properly. Check your manual or the spool itself for directional arrows.
Step 6: Reinstall the Spool and Cap
Insert the loaded spool back into the trimmer head, ensuring any retaining pins or clips are in place. Align the spool with the housing and twist the cap clockwise until snug. Do not over-tighten—hand-tight is sufficient. The line should protrude equally from both sides of the head.
Step 7: Trim Excess Line
Using a utility knife or the built-in cutting edge on the trimmer head guard, trim the protruding line to the correct cutting length (usually 4–5 inches per side for most models). Refer to your manual for the exact length.
How to Replace Line on Manual Feed Trimmers
Manual feed trimmers give you precise control over line length but require more hands-on threading:
Key Differences
- The spool removal process is identical to bump feed.
- Instead of two eyelets, manual feed spools typically have one central eyelet or a more complex threading path.
- You manually advance line by pushing a button or lifting a tab as needed during use.
Threading Process
Thread a single length of line (typically 15–20 feet) through the eyelet as shown in your manual. Wind it in the correct direction (usually counterclockwise) with consistent tension. Leave 6–8 inches of free line, as you’ll adjust this by hand during operation. Some manual feed models require you to thread line through a fixed guide before winding on the spool—your manual will specify this.
After reinstalling the spool, test the line advancement by activating the manual feed control. The line should extend smoothly without jamming.
How to Replace Line on Fixed Spool Trimmers
Fixed spool trimmers don’t have removable spools, so the replacement process differs:
Pre-Wound Cartridge Method
Many fixed spool models use disposable, pre-wound cartridges. Simply locate the cartridge release (usually a small clip or button), remove the old cartridge, and slide in a new one. This is the quickest replacement method and eliminates winding errors.
Direct Threading Method
Some fixed spool models allow you to thread new line directly through the fixed eyelets without removing the spool. Consult your manual for the exact path. You’ll need to feed line from a separate spool or ball while the trimmer head remains stationary, which is more time-consuming but works well for field repairs.
When to Replace the Entire Spool
If your fixed spool cracks or the eyelets become damaged, you may need to replace the entire trimmer head assembly rather than just the line. Fixed spools typically last 3–5 years with regular use.
Testing and Troubleshooting
After Installation, Check These Points
- Line symmetry: Both sides of the cutting head should have equal line length.
- Smooth rotation: Spin the spool by hand—it should turn freely without catching or jamming.
- Secure cap: The spool cap should be snug but not over-tightened. You should not be able to twist it by hand once secured.
Common Issues and Solutions
Line won’t feed (bump feed models): The line was likely wound in the wrong direction. Remove the spool, flip the winding direction, and reinstall. Also check that the line is wound tightly—loose wraps won’t advance properly.
Line breaks repeatedly: The line diameter may be too thin for your trimmer, or you’re hitting hard objects (rocks, curbs, metal). Use the correct line diameter for your model and avoid dense debris. Also inspect the cutting head for burrs or cracks that could nick the line.
Trimmer head vibrates or wobbles: The spool may not be seated correctly in the housing. Remove the cap and reseat the spool, ensuring it sits flush against the base. If the problem persists, the spool or housing may be cracked.
Line protrusion is uneven: The spool is twisted inside the housing. Remove and reinstall it, ensuring it’s fully seated before tightening the cap.
Difficulty twisting the spool cap: The cap threads may be cross-threaded or the plastic may be damaged. Try backing off slowly and realigning. If the problem persists, the cap may need replacement.
Tips for Easier Line Replacement
- Replace line at the start of the season, not mid-way through. A fresh spool gives you maximum line for the year.
- Store spare pre-wound spools if your trimmer model allows it. Some models let you load multiple spools ahead of time, speeding up swaps in the field.
- Keep your user manual accessible in a waterproof pouch near your trimmer storage. Photos and diagrams are invaluable for threading reference.
- Mark the correct winding direction on your spool cap with a marker or paint pen if the factory marking has worn away.
- Use the line diameter recommended by your manufacturer. Thinner line (0.065″) cuts well on light grass; thicker line (0.105″) handles brush and weeds better but requires more engine power.
- Wind line evenly in tight coils to maximize the amount you can fit on the spool. Loose, sloppy winding wastes space.
- On bump feed models, test the bump mechanism after replacement by gently tapping the head against the ground at an angle (not straight down) to ensure line advances smoothly.
Line Replacement Frequency and Storage
Most homeowners replace trimmer line once per season or every 20–30 hours of operation. If you use your trimmer frequently (weekly or more), you may replace line mid-season. Store unused line in a cool, dry place—excessive heat or moisture can degrade the plastic over time. Trimmer line typically lasts 2–3 years in storage before becoming brittle.
Frequently Asked Questions
What trimmer line diameter should I use?
Use the diameter recommended by your trimmer’s manufacturer, typically found on the spool housing or in the manual. Common sizes are 0.065″ (light grass), 0.080″ (general purpose), and 0.105″ (heavy brush). Using the wrong diameter can reduce cutting efficiency or cause feeding problems. If you’ve lost your manual, search online for your trimmer model number to find the specification.
Can I use any brand of trimmer line?
Any trimmer line of the correct diameter will work mechanically, though the cutting performance and durability may vary. Premium-grade lines often last longer and cut more cleanly, while budget options are more economical for light residential use. Check customer reviews for your trimmer model to see which brands work well.
Why does my trimmer line keep breaking?
Line breaks for several reasons: hitting hard objects (rocks, metal), using line that’s too thin for your trimmer’s power, winding the line too loosely so it doesn’t feed properly, or operating at high RPMs for extended periods. Inspect your cutting area for debris before trimming, use the recommended line diameter, and ensure the line is wound tightly on the spool.
How do I know if I’m winding the line in the correct direction?
Check your trimmer’s manual for a directional arrow on the spool or in the instructions. Most bump feed spools wind counterclockwise when viewed from above. If you wind it backwards, the automatic advance mechanism won’t feed line during operation. When in doubt, test the trimmer after installation—if the line doesn’t feed when you tap the head, unwind and reverse the direction.
Can I replace trimmer line on a fixed spool model?
Yes. If your trimmer uses pre-wound cartridges, simply swap out the old one for a new cartridge—no winding required. If it uses direct threading, you can thread new line through the fixed eyelets, though it’s more involved than bump feed spool replacement. Some fixed spool models require replacement of the entire trimmer head if the spool cracks.