Direct Answer: How to Sharpen a Chainsaw Chain
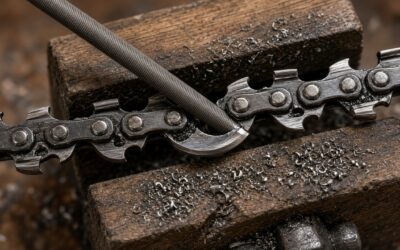
Sharpening a chainsaw chain restores the cutting edge on each cutter tooth and resets the depth gauges (rakers) so they work together properly. The standard manual method involves clamping the guide bar securely, selecting a round file that matches your chain’s pitch, and filing each cutter tooth at the factory angle (typically 25–35 degrees) using 4–6 firm forward strokes per tooth. File every other cutter until you return to your starting point, then rotate the saw 180 degrees and repeat for the opposite-facing cutters. Finally, lower the depth gauges using a depth gauge tool and flat file, and check for any burrs. Electric sharpeners and 12V bar-mounted attachments offer faster alternatives but require care to avoid overheating the teeth.
Why Chainsaw Chains Become Dull and How They Cut
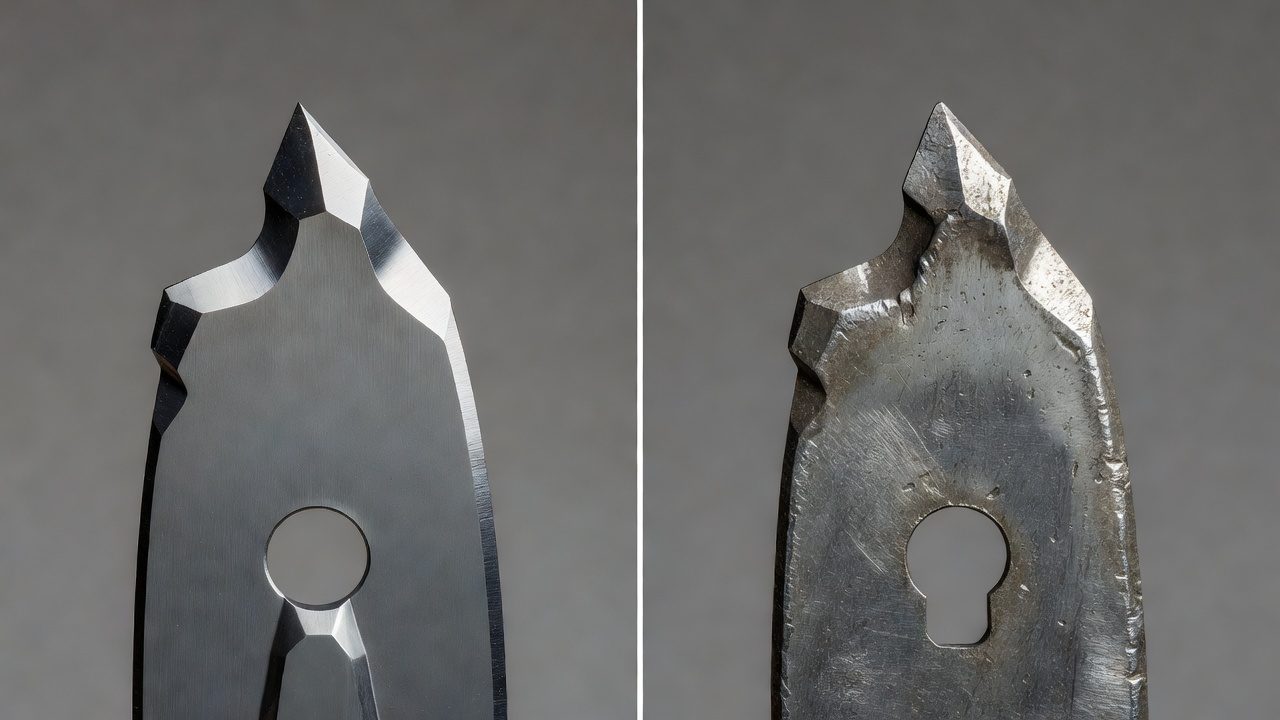
A chainsaw chain consists of two main cutting components: the cutter teeth (the sharp edges that slice through wood) and the depth gauges or rakers (small posts that control how deep each cutter bites into the wood). When you cut, the cutter teeth do the work, but the depth gauges regulate the chip size and prevent the teeth from grabbing too aggressively. As the chain cuts, both components wear down. The cutter edges become rounded and blunt, and the depth gauges flatten slightly, causing the chain to cut slower, pull to one side, or produce fine sawdust instead of chips.
A dull chain is not a problem with the guide bar or the engine; it is specifically the cutter teeth that have lost their edge. You can tell a chain is dull when the saw requires excessive pressure to cut, pulls sideways, or bounces or chatters during cutting. Once you recognize these signs, sharpening restores both the tooth edge and the proper depth gauge height so the chain cuts cleanly and efficiently again.
Key Factors to Consider Before Sharpening
Identify Your Chain Pitch and File Diameter
The first step is determining which round file diameter your chain needs. Chain pitch—the distance between drive links—directly determines the file size. Common combinations are:
- 3/8 inch low-profile pitch: Use a 5/32 inch round file
- 3/8 inch standard pitch: Use a 5/32 inch round file
- .404 inch pitch: Use a 7/32 inch round file
- 1/4 inch pitch: Use a 4/32 inch round file
Check your chainsaw manual or the side of the guide bar for the pitch marking. Using an incorrect file size will not give you the proper cutting angle and will result in a poorly sharpened chain. If you cannot find the pitch, count the number of drive links (the bottom teeth that ride in the guide bar groove) in one inch and use that measurement as your pitch.
Understand the Filing Angle
The factory top plate angle—the angle at which the cutter’s leading edge is filed—is typically between 25 and 35 degrees, depending on the chain design and manufacturer. Standard chains often run 30 degrees, while some specialized or aggressive chains may use 25 degrees. A file guide (a clamp-on or built-in tool that holds the round file at the correct angle) ensures you maintain this angle throughout sharpening. If you do not have a guide, maintaining the correct angle becomes much harder and results in uneven cutting.
Choose Your Sharpening Method
You have three main options: hand filing with a round file and guide, an electric bench grinder, or a 12V bar-mounted sharpening attachment. Hand filing is the most accessible for homeowners and is forgiving if you make a mistake. Electric bench grinders are faster but risk overheating the teeth and damaging the hardness of the steel if you are not careful. 12V attachments are a middle ground—faster than hand filing but less risk than a bench grinder—though they are less precise and more expensive. For beginners, hand filing is the recommended starting point.
Account for Chain Type
Skip-tooth chains (which have one or more missing teeth to reduce vibration) and low-kickback chains (which have reduced depth gauges for safety) require adjusted filing patterns. Skip-tooth chains may need fewer strokes per tooth because of their design, and low-kickback chains often need shallower depth gauges. Consult your chainsaw manual or the chain packaging to confirm if you own a specialty chain.
Step-by-Step: Manual Hand Filing of the Cutters
Step 1: Secure the Chainsaw
Clamp the guide bar firmly in a bench vise, table clamp, or chainsaw sharpening vice so the bar cannot move during filing. The bar should be horizontal and stable. Never attempt to file a chain while holding the chainsaw in your hands; the saw will shift, and you will not maintain a consistent angle. If you do not have a vise, ask a friend to hold the saw steady on a workbench.
Step 2: Install the Round File and Guide
Insert the round file (of the correct diameter for your chain pitch) into your file guide. Clamp the file guide onto the guide bar so the file sits inside the first cutter tooth you will file. The guide should position the file at the factory angle (typically 30 degrees for standard chains). Tighten the guide so it does not shift during filing.
Step 3: Mark Your Starting Cutter
Use a marker or piece of tape to mark the first cutter tooth you file. This reference point helps you know when you have filed all the cutters and prevents you from accidentally filing the same tooth twice or missing one. Start with any cutter, but many people choose one facing them or on a particular side of the bar.
Step 4: File the First Set of Cutters
Slide the file guide and file into position so the round file sits inside the first cutter tooth. Holding the file guide steady with one hand and the file handle with the other, push the file forward in smooth, firm strokes. Do not saw back and forth; file only on the forward stroke and lift the file on the return. Apply steady pressure but do not force the file. Complete 4 to 6 forward strokes (or until the edge becomes sharp and shiny). The exact number depends on how dull the tooth is; if the tooth is very dull, you may need more strokes.
After filing the first tooth, advance the file guide to the next tooth in the same direction (skip every other tooth). Repeat the same number and pressure of strokes. Continue until you return to your marked starting tooth. At this point, you have filed every other cutter on one side of the chain.
Step 5: Flip the Saw and File the Opposite Cutters
Rotate the chainsaw 180 degrees in the vise so the cutters facing the opposite direction are now on top. Repeat the filing process, starting at a marked tooth and filing every other cutter with the same number of firm forward strokes. This ensures both sets of cutters are sharpened evenly and the chain will cut straight without pulling to one side.
Step 6: Check for Burrs and Smooth Rough Edges
After filing all the cutters, run your gloved thumb lightly across the back (non-cutting side) of each tooth to feel for small burrs or rough spots. If you detect burrs, use a small flat file or honing stone to remove them. A burr on the back of a cutter can affect cutting performance and should be smoothed away.
Lowering the Depth Gauges (Rakers)
Why Depth Gauges Matter
The depth gauge (also called a raker) is a small post in front of each cutter tooth that limits how deep the cutter can bite into the wood. When you file the cutter teeth, you remove metal from the top of the tooth, making it taller relative to the depth gauge. If the depth gauges are not lowered to match the new cutter height, the cutters cannot bite properly and the chain will not cut effectively. This step is often overlooked by beginners but is essential for a properly sharpened chain.
Check Depth Gauge Height
A standard depth gauge clearance is approximately 0.025 inches below the top of the cutter for most standard chains. Specialty chains (skip-tooth, low-kickback, or ripping chains) may require different clearances; check your chainsaw manual. To measure the depth gauge, place a depth gauge tool (a flat metal template with notches) on the chain so the cutter tooth sits in the notch and the depth gauge rests in the adjacent slot. If the depth gauge is higher than the top of the template, it needs to be filed down.
Lower High Depth Gauges
For each depth gauge that sits higher than the template, clamp a flat file to it (or hold the file steady) and make light forward strokes until the top of the depth gauge just touches the template. Work carefully; you only need to remove a small amount of metal. Once all depth gauges are at the correct height, remove the template and visually confirm they sit just below the top of the cutter teeth.
Electric and Bench Sharpening Alternatives
Bench Grinder Method
An electric bench grinder with a small grinding wheel can sharpen a chain faster than hand filing. Install a fine-grit grinding wheel (typically 60–80 grit), secure the chainsaw, and carefully bring each cutter tooth to the spinning wheel. The grinder removes metal quickly, so you must work lightly and watch for heat. If the tooth turns blue or discolors, it is overheating and losing hardness, which shortens chain life. Bench grinders also require more precision to maintain the correct angle; an incorrect angle will result in an uneven or poorly sharpened chain. This method is best left to experienced users or professionals.
12V Bar-Mounted Sharpening Attachments
Some manufacturers offer 12V sharpening heads that mount directly to the guide bar and rotate a small grinding wheel across each tooth. These are faster than hand filing and more forgiving than a bench grinder, but they are also more expensive and less precise than a file guide. They work reasonably well for regular maintenance sharpening but may not achieve the same edge quality as careful hand filing. They are a good option if you sharpen frequently and want to speed up the process.
Professional Sharpening Services
If you do not have the tools or confidence to sharpen by hand, local saw shops and equipment rental centers often offer sharpening services. They use specialized equipment and trained technicians to restore your chain accurately. This is often the best choice if you own multiple chains or sharpen infrequently.
When to Replace the Chain Instead of Sharpening
Signs a Chain Is Beyond Sharpening
A chain has a finite service life. After repeated sharpening, the cutter teeth become so short that sharpening is no longer effective or safe. If the cutters are filed down to the point where the depth gauges sit well above the tooth tops (even after filing), the chain cannot bite properly and should be replaced. Additionally, if you notice cracks, missing teeth, bent links, or excessive rust, replacement is safer than repair.
Measure Remaining Cutter Height
Most chains can be sharpened 8–12 times before the cutters become too short. Once the cutter is filed down so far that the top sits at or below the top of the depth gauge (even after lowering the gauge), the chain should be replaced. Check your chainsaw manual for the minimum cutter height specification.
Choose a Replacement Chain
When ordering a replacement, you need the pitch, gauge (thickness), and drive link count. The pitch and gauge are printed on your original chain or guide bar. The drive link count is the number of teeth along the bottom of the chain that ride in the guide bar groove; count them to confirm the length. Match all three measurements exactly to ensure the new chain fits and works safely on your saw.
Frequently Asked Questions
How often should I sharpen my chainsaw chain?
Sharpen your chain whenever it becomes dull, which typically happens after a few hours of regular cutting or after cutting through dirt, sand, or rocks. A dull chain is a sign it is time to sharpen, not a schedule. Many users sharpen every few weeks during heavy use or once or twice a year for occasional users. Some people sharpen before each major project to ensure the cleanest cut and fastest work.
Can I sharpen a chain without a file guide?
Technically yes, but it is much harder and the results are often uneven. A file guide holds the round file at the correct angle so you maintain consistency across all teeth. Without one, you must eyeball the angle, and small mistakes compound across the chain. If you do not have a guide, consider purchasing one (they are inexpensive) or taking the chain to a professional. Hand filing without a guide is a skill that requires practice and is not recommended for beginners.
What is the difference between pitch and gauge?
Pitch is the distance between drive links (the bottom teeth that ride in the guide bar groove). Gauge is the thickness of the chain links. Both must match your chainsaw’s guide bar; using the wrong pitch or gauge will cause the chain to not fit, fit loosely, or run unsafely. Always check your chainsaw manual for the correct pitch and gauge.
Is it normal for the chain to pull to one side after sharpening?
If the chain pulls to one side immediately after sharpening, it usually means one set of cutters (left or right facing) is sharper than the other, or you filed one set with more strokes than the other. File the duller side one or two more times to even out the sharpness. If the pull persists after re-sharpening, the chain may have a bent or damaged tooth, or the guide bar may be worn; inspect both and consider replacement if damage is found.
Summary and Best Practices
Sharpening a chainsaw chain is a straightforward process when you follow these steps: identify your chain pitch and select the correct file diameter, secure the saw firmly in a vise, use a file guide to maintain the factory angle, file each cutter with consistent pressure and stroke count, file every other cutter then flip and repeat, lower the depth gauges to the correct height, and check for burrs. Hand filing with a round file and guide is the most accessible method for homeowners. If you prefer speed over hands-on work, a 12V attachment or professional sharpening service are viable alternatives. Keep a sharp chain on your saw, and you will notice faster cutting, less vibration, less wear on the engine, and a safer, more enjoyable cutting experience.