Direct Answer: How to Winterize a Lawn Mower
Winterize a gas-powered lawn mower by stabilizing the fuel (or draining the tank completely), changing the oil, inspecting and replacing the spark plug if needed, cleaning or replacing the air filter, and storing it in a dry, temperature-controlled location away from direct sunlight. Electric mowers require minimal prep—charge the battery fully, clean the deck, and store indoors. Fuel stabilization is the highest-impact step for gas mowers, preventing varnish buildup that clogs carburetors during dormant months.
Why Winterize Your Lawn Mower?
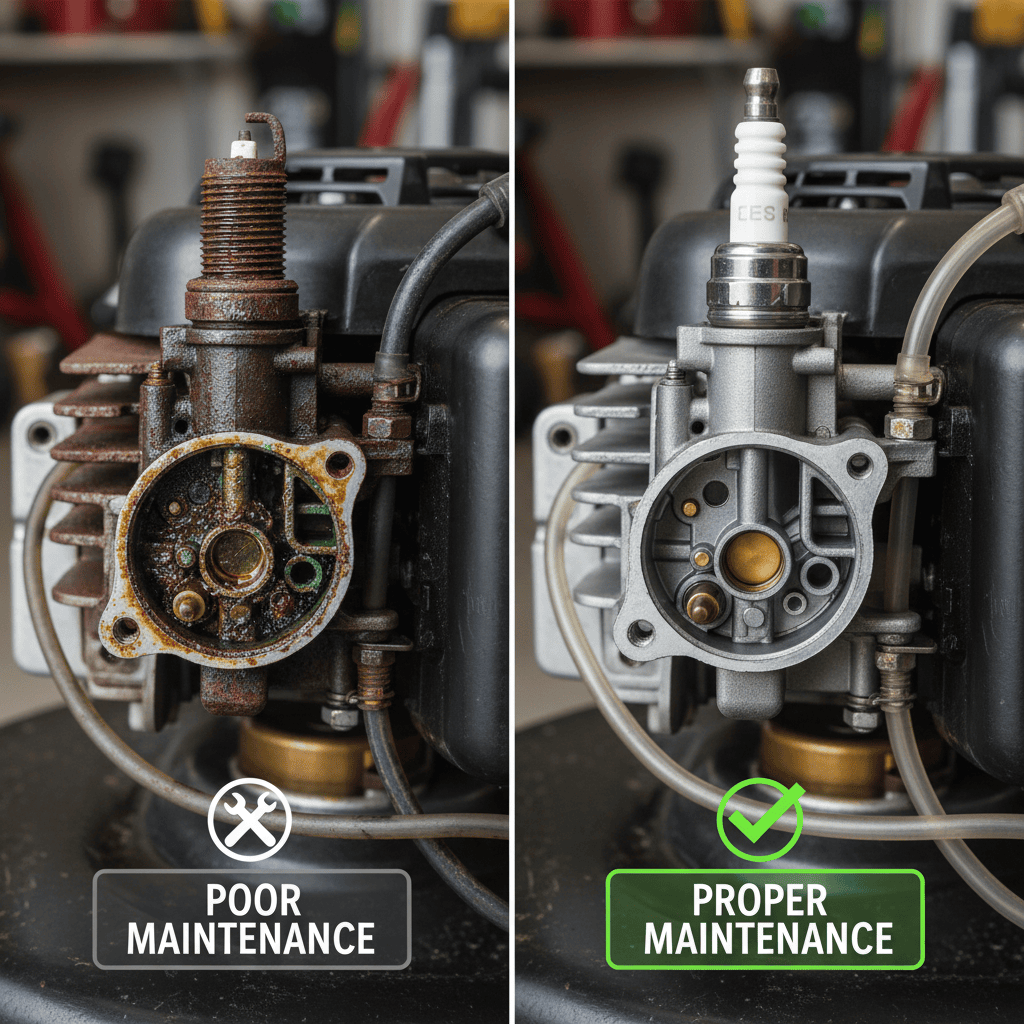
Skipping winterization creates costly problems. Unstabilized gasoline left in the tank breaks down over months, forming varnish and gum deposits that clog the carburetor and fuel lines. This prevents the engine from starting in spring and can require professional repairs or complete engine replacement. Old oil contains acids and moisture that corrode internal engine components. Spark plugs corrode, air filters clog with debris, and metal blades rust without protection. A mower left in an unheated, damp space becomes a rusting hulk by spring. Proper winterization takes 1-2 hours and costs $20-50 in supplies, but saves hundreds in repair bills.
Gas vs. Electric Mowers: Different Winterization Needs
The winterization process differs significantly based on mower type:
Gas Mowers require the most prep. Fuel degrades in storage, oil accumulates moisture, and carburetors can clog. All gas mowers—push, riding, or zero-turn—follow the same core winterization steps.
Electric Mowers (cordless and plug-in models) need far less maintenance. Since they don’t store fuel, there’s no risk of carburetor clogging or fuel varnish. Battery charge management is the primary concern, not fuel or oil. If your mower is electric, skip the fuel and oil sections below and proceed directly to battery and deck cleaning guidance.
Pre-Winterization Checklist: Assess Your Mower’s Condition
Before storing your mower, inspect it for existing issues:
- Check the spark plug: Remove and visually inspect. If it’s black with carbon buildup, corroded, or has a gap larger than 0.03 inches, replace it.
- Inspect the air filter: A clogged or dirty filter should be cleaned or replaced before storage.
- Examine the blade: Look for dents, chips, or uneven wear. A dull or damaged blade should be sharpened or replaced.
- Review the deck underside: Remove dried grass and mud buildup. A clean deck prevents rust and allows proper airflow.
- Check the oil level: Ensure the oil is at the recommended level (consult your manual). Dark, dirty oil indicates it’s time for a change.
- Test the fuel: If fuel has been sitting more than 30 days, it’s likely degraded and should be drained or treated with stabilizer.
Step-by-Step Winterization for Gas Mowers
Step 1: Decide on Fuel Treatment
You have two approaches: drain the fuel completely or stabilize it. Fuel stabilizers are easier and recommended by most manufacturers. Add a fuel stabilizer (like Sta-Bil or similar) to the tank according to package directions, typically a 1:50 ratio. Run the engine for 5-10 minutes to circulate the treated fuel through the carburetor. This prevents varnish and gum formation and allows you to drain the fuel in spring without risk of clogged lines.
Complete fuel drain is more thorough but requires more work. Turn off the mower, let it cool, and locate the fuel valve (usually near the bottom of the tank). Place a container beneath the valve, open it, and allow fuel to drain completely. Some mowers have a drain plug on the carburetor bowl as well—consult your manual. This eliminates all fuel but doesn’t protect the carburetor itself. Many professionals combine both methods: stabilize the fuel, then drain the tank after the season ends.
Step 2: Change the Oil
Oil becomes contaminated with moisture and particles during the mowing season. Storing the mower with old oil accelerates corrosion. Drain the old oil while the engine is still slightly warm (but cool enough to touch safely). Locate the drain plug on the engine block, remove it, and let oil drain into a container for 5-10 minutes. Replace the drain plug, then refill with fresh oil at the viscosity specified in your manual (typically SAE 30 for warm climates or 10W-30 for cold climates). Check the level with the dipstick and run the engine briefly to circulate the new oil.
Step 3: Inspect and Replace the Spark Plug
A corroded spark plug won’t fire reliably in spring. Remove the spark plug wire and unscrew the old plug with a socket wrench. Inspect the electrode gap (the space between the center and ground electrode). If it’s burned, black with carbon, or corroded, replace it with a new plug of the same type and gap specification (typically 0.028-0.032 inches—check your manual). Install the new plug, reconnect the wire, and ensure it clicks into place.
Step 4: Clean or Replace the Air Filter
A clogged air filter starves the engine of oxygen and can trap moisture in the carburetor during storage. For foam filters, remove the filter, wash it in warm soapy water, dry thoroughly, and reinstall. For paper filters, tap gently on the ground to dislodge dust, or replace with a new filter if it’s heavily soiled. A clean filter allows the engine to breathe during storage and improves spring start reliability.
Step 5: Clean and Inspect the Blade
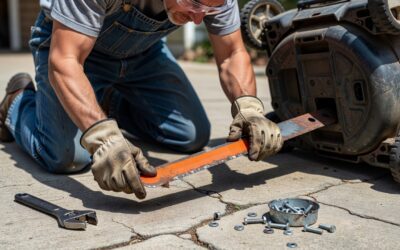
A rusty, dull blade is dangerous and damages grass in spring. With the mower off and spark plug wire disconnected (safety first), tip the mower or access the underside. Use a scraper or wire brush to remove dried grass and mud from the blade and deck. Inspect the blade for dents or chips. If it’s dull, sharpen it with a metal file, maintaining the blade’s original angle, or replace it if damaged. A balanced blade is critical—use a blade balancer to ensure each end weighs equally, or take it to a shop. Reinstall and tighten the bolt securely.
Step 6: Clean the Mower Deck
Grass, clippings, and mud trap moisture against metal surfaces, promoting rust. Tip the mower (again, spark plug wire disconnected) and scrape the underside of the deck clean. Use a wire brush to remove stubborn buildup. Pay special attention to the blade area. Wipe the deck dry with a rag. A clean deck is less likely to rust and starts the season in better condition.
Storage Conditions and Location
Where and how you store the mower matters as much as how you prep it:
- Choose a dry location: An unheated shed, garage, or storage building is ideal. Avoid damp basements or outdoor areas. Moisture accelerates rust.
- Control temperature: Ideally, store between 50-85°F. A heated garage is excellent; an unheated shed in a cold climate is acceptable if the mower is dry. Extreme cold doesn’t harm the mower directly but can increase fuel viscosity. Extreme humidity is worse than cold.
- Protect from light: Keep the mower away from direct sunlight. UV exposure degrades rubber and plastic components.
- Cover the mower: Use a breathable cover or tarp to protect from dust and debris. Avoid sealing the mower in plastic, which can trap moisture and promote rust.
- Position the mower: Store on a level surface. Avoid leaning or tilting the mower, which can cause fuel or oil leaks.
Winterization for Electric Mowers
Electric mower prep is simpler:
- Fully charge the battery before storing. A fully charged battery maintains optimal health during dormancy. Some batteries self-discharge slowly; check the battery weekly and top up if needed.
- Store the battery indoors in a cool, dry place (50-70°F is ideal). Cold reduces battery efficiency; heat can damage lithium cells.
- Clean the deck thoroughly to prevent rust on exposed metal parts.
- Inspect the blades and sharpen if needed (same process as gas mowers).
- Check power cords (if plug-in) for damage and store safely.
Spring Start-Up After Winter Storage
Before using your mower in spring:
- Inspect the mower visually for damage, rust, or loose bolts.
- Check the oil level and top up if needed.
- For gas mowers with stabilized fuel, start the engine and let it run for a few minutes to clear the fuel system. If the mower doesn’t start, the carburetor may be clogged despite stabilizer—consider professional cleaning.
- For electric mowers, charge the battery fully and test the motor and blades briefly in a safe area.
- Sharpen or inspect the blade one more time.
- Check all bolts and fasteners are tight.
Frequently Asked Questions
Should I drain the fuel or use a stabilizer?
Both approaches work. Fuel stabilizers are convenient and recommended by most manufacturers—you don’t need to drain anything, and the treated fuel protects the carburetor. Complete fuel drain is more thorough but requires more effort. Many mower owners do both: stabilize the fuel, run it through the system, then drain the tank in late fall for extra protection. Check your mower’s manual for the manufacturer’s recommendation.
How long can a mower sit without winterization?
Unstabilized gasoline degrades in as little as 30 days, especially in warm climates. By 90 days, varnish buildup is likely. In cold, dry storage, untreated fuel lasts longer but still risks carburetor clogging by spring. Winterizing after 2-3 weeks of inactivity (late fall) is the safest approach.
Can I store a gas mower outdoors in a shed?
Yes, if the shed is dry and relatively insulated. An unheated shed works fine in most climates, but avoid extremely damp areas or exposure to the elements. Cover the mower to protect from dust and pests. In very wet or humid climates, a heated garage or climate-controlled storage is better. Always ensure fuel and oil won’t leak onto the shed floor.
Do I need to winterize an electric mower?
Electric mowers require minimal winterization. The key steps are fully charging the battery before storage, storing it indoors in a cool place, and cleaning the deck. You don’t need to drain fuel or change oil. Check the battery monthly during storage and recharge if needed. Proper battery care is more important than any mechanical prep.