Direct Answer: How to Replace a Lawn Mower Pull String
To replace a lawn mower pull string, locate the recoil assembly (typically on the engine housing), remove the cover, extract the old frayed cord, and thread new starter rope through the pulley system. Wind the rope tightly around the recoil drum in the correct rotational direction, reattach the handle, reassemble the housing, and test the pull tension. For most gas push mowers, this repair takes 30–60 minutes; riding and zero-turn designs may require additional disassembly steps.
Understanding Your Mower Type and Recoil System
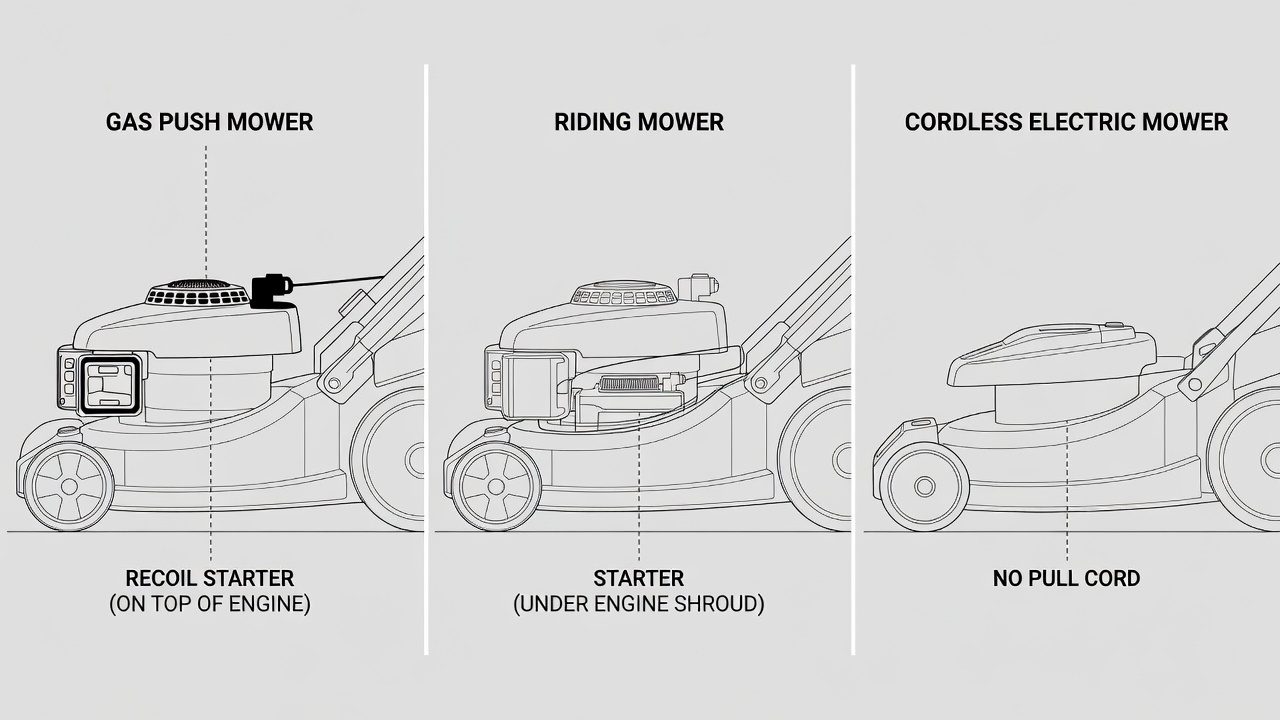
Before you begin, identify your lawn mower category, as recoil assembly designs vary significantly:
- Gas Push Mowers: Most common; recoil starter typically mounted on top or side of the engine. Most accessible for DIY repair.
- Riding and Zero-Turn Mowers: Recoil systems often located under the seat or engine shroud; may require removal of larger panels.
- Electric Mowers: Cordless and corded models rarely use pull-cord starters; check your manual if uncertain.
A recoil starter works by storing mechanical energy in a wound spring. When you pull the cord, the spring releases, spinning the engine flywheel to initiate ignition. Over time, constant pulling, UV exposure, and friction cause the nylon or polyester cord to fray, bind, or snap entirely. Replacing the cord restores smooth pulling action and engine startup reliability.
When to DIY vs. Call a Professional: If the recoil drum or spring is visibly damaged, rusted, or if you lack mechanical confidence, professional service is safer. Most small-engine repair shops charge $40–$80 for pull-string replacement and complete the job within 1–2 hours.
Tools and Materials You’ll Need
Essential Tools:
- Socket set or wrench set (size depends on your mower)
- Screwdriver (Phillips and flathead)
- Pliers or adjustable wrench
- Small bowl or container (to organize fasteners)
- Work gloves (for handling spring tension)
Replacement Materials:
- Starter Rope: Use 3/16-inch (4.7 mm) diameter commercial starter cord or high-quality paracord. Avoid thin string or twine; they break quickly. Approximately 6–8 feet of rope is typical, though your mower manual specifies exact length.
- Handle Grip (optional): If the grip is cracked or worn, replacement plastic or foam handles are available at hardware stores for $5–$15.
Where to Source Materials: Home Depot, Lowe’s, Amazon, and specialty small-engine retailers stock starter rope kits ($8–$25) that include pre-measured cord and sometimes handle grips. Buying a kit saves time and ensures correct diameter and length.
Safety Precautions Before Starting
Critical steps to prevent injury:
- Disconnect the Spark Plug: Remove the spark plug wire from the spark plug to prevent accidental engine ignition while the recoil mechanism is exposed.
- Drain Fuel (optional but recommended): If you’ll be tilting or inverting the mower, drain the fuel tank or tip the mower carefully to avoid spills.
- Work on a flat, stable surface: Use a workbench or flat ground; never work with the mower suspended.
- Wear gloves: Recoil springs are under tension and can pinch fingers. Leather work gloves protect against sharp edges and spring snap-back.
- Take a photo of the assembly: Before disassembling, photograph the recoil housing and fastener positions as a reassembly reference.
Accessing and Removing the Recoil Assembly
For Gas Push Mowers (most common):
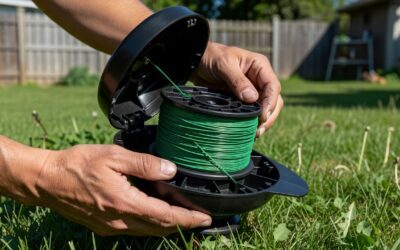
- Locate the recoil starter on the engine. It is usually a plastic or metal housing with a pull handle attached via cord.
- Identify all fasteners (typically 3–6 bolts or screws) holding the housing cover to the engine.
- Use the appropriate wrench or screwdriver to remove each fastener. Place them in a labeled container so you do not lose them.
- Gently lift the housing cover away from the engine, taking care not to disturb the recoil spring beneath.
- If the spring is under visible tension (coiled tightly), support the cover carefully; sudden release can cause the spring to unwind violently.
For Riding Mowers: You may need to remove the seat, engine shroud, or hood first. Consult your owner’s manual for specific steps, as designs vary widely by manufacturer.
Removing the Old Pull String and Assessing Damage
Once the housing is open:
- Inspect the old cord. Look for fraying, cracks, or brittle sections. Note where it is attached to the handle (usually tied or knotted) and where it wraps around the recoil drum.
- Disconnect the handle. Untie or cut the old cord at the handle grip. If the handle is removable, gently pry or unscrew it.
- Unwind the old cord from the drum. Slowly rotate the drum by hand (or use pliers on the drum axle) to release tension and unwrap the frayed cord completely. Be cautious: if the spring is taut, it may spin suddenly.
- Remove the cord from the housing. Pull the old cord free from any guides or channels.
- Check the drum and spring. If the drum is cracked, the spring is rusted or broken, or the axle is bent, professional replacement is advisable. If everything looks intact, proceed with new cord installation.
- Clean the assembly (optional). Wipe out dust and debris with a dry cloth. A clean assembly ensures smooth cord movement.
Threading and Installing the New Cord
Step-by-step installation:
- Identify the entry point and pulley. Most recoil systems have a pulley or guide through which the cord passes. Locate this opening in the housing.
- Measure and cut the new rope. Cut a length slightly longer than the old cord (typically 6–8 feet). Seal the cut ends by briefly passing them over a lighter flame to melt the nylon slightly; this prevents fraying and makes threading easier.
- Thread the rope through the pulley. Feed one end of the new cord through the pulley hole, pulling it into the recoil chamber until it reaches the drum.
- Attach the cord to the drum. Most drums have a small hole or notch where the cord anchors. Insert the rope end into this attachment point and secure it tightly with a knot (typically a simple overhand knot, then a second knot to lock it). Ensure the knot is large enough that it cannot slip back through the hole.
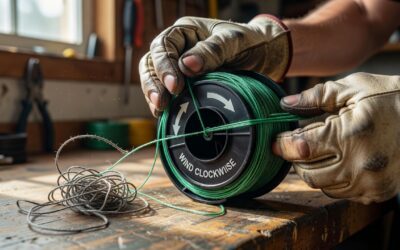
- Verify direction. Check your owner’s manual or photos of the original setup to confirm the correct winding direction. Most systems wind clockwise when viewed from above, but this varies by manufacturer.
- Begin winding. Slowly rotate the drum by hand or using pliers on the axle, winding the rope around the drum in tight, evenly spaced loops. As you wind, guide the rope so each wrap lies flat and parallel to the previous one, with no overlaps or twists.
Winding and Tensioning the Recoil Spring
This is the most critical step. Proper tension ensures smooth pulling and reliable cord retraction:
- Wind the drum approximately 4–6 rotations (consult your manual for exact count). Each rotation should be slow and controlled.
- After winding, leave the cord slack on the final wrap. Do not pull it tight yet.
- Rotate the drum one additional half-turn. This pre-tensions the spring without over-winding.
- Hold the drum in place and thread the free end of the rope through the exit channel or guide in the housing. This route guides the cord toward the handle.
- Test tension by hand. Gently pull on the free end of the cord. It should pull smoothly with moderate resistance, not too tight (which causes the spring to snap back violently) and not too loose (which prevents retraction). If resistance feels wrong, unwind one rotation and re-tension.
Common mistake: Over-winding causes the spring to bind, making the pull cord impossible to draw. Under-winding leaves excess cord that retracts poorly. The goal is balanced tension—firm but not strained.
Reattaching the Handle and Housing
- Thread the free end of the rope through the handle grip. If using a replacement handle, insert the cord through the central hole.
- Tie the handle knot. Create a secure knot (often a figure-eight or double overhand knot) at the end of the rope so it cannot slide back through the handle. Leave 1–2 inches of cord extending beyond the knot for a comfortable grip, then cut any excess.
- Seal the final cut end. Briefly flame the rope end to prevent fraying.
- Position the cord in the housing groove. Ensure the rope sits properly in any guides or channels so it does not bind during pulling or retraction.
- Reinstall the housing cover. Align the cover with the engine mounting points and insert all fasteners. Tighten in a cross or star pattern (like tightening wheel lugs) to ensure even pressure and prevent warping.
- Reconnect the spark plug wire. Reattach the spark plug cable to complete the reassembly.
Testing Your Work and Troubleshooting
Initial testing:
- Perform a dry pull test. Before starting the engine, pull the cord handle 5–10 times. The pull should be smooth, with consistent resistance, and the cord should retract fully after each pull.
- Listen and feel for binding. If the cord catches, sticks, or makes grinding noises, stop and reopen the housing to check the winding and guides.
- Start the engine. Once the dry pull feels correct, attempt to start the mower normally. The engine should turn over smoothly.
Common issues and fixes:
| Problem | Likely Cause | Solution |
|---|---|---|
| Cord pulls hard or won’t retract | Over-wound spring or binding in guides | Reopen housing; unwind one rotation to reduce tension. Verify the rope sits in the guide channel smoothly. |
| Cord pulls too easily; feels loose | Under-wound spring | Reopen housing; add one additional rotation to the drum for more spring tension. |
| Cord snaps during pull | Rope too thin, poorly sealed cut ends, or damaged recoil drum | Replace with thicker (3/16-inch) commercial starter cord. Inspect the drum for cracks. |
| Cord does not fully retract after pulling | Spring tension too low or rope tangled | Increase spring tension. Ensure rope winds evenly with no twists or overlaps. |
| Engine does not start after reassembly | Spark plug wire disconnected or cord pulling does not turn flywheel | Recheck spark plug connection. Verify the rope is properly attached to the drum and spring is wound in the correct direction. |
When to Seek Professional Help
Contact a certified small-engine repair technician if:
- The recoil spring is rusted, cracked, or broken
- The drum is cracked or the axle is bent
- The housing threads are stripped and fasteners will not tighten
- You feel uncomfortable working with spring tension or disassembling the mechanism
- The mower is still under warranty and opening the recoil housing would void it (check your manual)
Professional repair typically costs $40–$80 and takes 1–2 hours. This is often worth the cost if parts are damaged or if the repair is outside your comfort level.
Frequently Asked Questions
What size starter rope should I use?
Most gas push mowers use 3/16-inch (4.7 mm) diameter rope. Some riding mowers may use slightly thicker rope. Check your owner’s manual or measure the old cord with a ruler. Using the wrong diameter can cause the rope to slip or bind in the drum attachment.
Can I use regular paracord instead of commercial starter rope?
High-quality paracord can work temporarily, but commercial starter rope is superior. Starter rope is specifically treated for flexibility, UV resistance, and durability under repeated pulling. Paracord may fray, harden in sunlight, or slip in the drum attachment. A commercial starter rope kit costs $8–$25 and lasts significantly longer.
How often do lawn mower pull strings need replacing?
Under normal use (weekly mowing during the growing season), a pull string typically lasts 3–5 years before fraying. Heavy use, UV exposure, or storage in direct sunlight shortens this lifespan. Inspect the cord at the start of each season; replace it if you see visible fraying, cracks, or brittleness.
What should I do if the recoil spring suddenly unwinds while I’m working?
Recoil springs are under significant tension and can snap back violently if released unexpectedly. Always wear gloves and be prepared for sudden movement. If the spring unwinds, step back immediately and do not attempt to re-engage it by hand. Close the housing and contact a professional to safely re-wind and secure the spring.