How Do You Remove a Lawn Mower Blade?
To remove a lawn mower blade, first disconnect the spark plug wire for safety. Secure the mower on a flat surface, then tilt it to access the blade. Use a wrench or socket to loosen the bolt securing the blade (often requiring a block of wood to hold the blade still). Once the bolt is removed, carefully take off the blade. Always wear gloves and ensure the mower is stable to prevent injury.
Why Remove a Lawn Mower Blade?
Removing the blade is a fundamental part of lawn mower maintenance. The primary reasons include:
- Sharpening: A sharp blade cuts grass cleanly, promoting lawn health. Dull blades tear grass, making it susceptible to disease. Most blades need sharpening every 20-25 hours of use or at least once per mowing season.
- Replacement: Blades can become bent, cracked, or excessively worn from hitting rocks or debris. A damaged blade can cause dangerous vibrations and poor cut quality.
- Cleaning: Removing the blade allows you to thoroughly clean the underside of the mower deck, preventing grass buildup that can cause corrosion and reduce cutting efficiency.
Essential Safety Precautions Before You Begin
Safety is paramount when working with mower blades. Follow these critical steps:
- Disconnect the Spark Plug Wire: This is the most important first step. It prevents the engine from accidentally starting while you are working near the blade.
- Wear Personal Protective Equipment (PPE): Always wear heavy-duty work gloves to protect your hands from sharp edges. Safety glasses are also recommended to shield your eyes from debris.
- Work on a Flat, Stable Surface: Park the mower on a level driveway or garage floor. Engage the parking brake if it’s a riding mower.
- Secure the Mower: For push mowers, ensure the wheels are chocked. For riding mowers, lower the deck to its lowest setting or use jack stands for stability if lifting the front.
Step-by-Step Guide to Removing the Blade
1. Prepare the Lawn Mower
Ensure the fuel tank is less than 1/4 full or the fuel valve (if equipped) is off to prevent leaks. Disconnect the spark plug wire as mentioned above.
2. Access the Blade
For a push mower, carefully tilt the mower onto its side, with the air filter and carburetor side facing up. This prevents oil and fuel from leaking into the air filter. For a riding mower, you will need to safely lift the front of the mower using a jack and secure it on jack stands, then lower the deck for access, or remove the deck entirely following the manufacturer’s instructions.
3. Loosen the Blade Bolt
The blade is held by a central bolt. To loosen it:
- Use the correct size socket or wrench (common sizes are 15/16″ or 1″, but check your manual).
- Place a block of wood between the blade and the mower deck to prevent the blade from spinning.
- Turn the bolt counterclockwise to loosen. It may be very tight. A breaker bar can provide extra leverage.
4. Remove the Blade and Hardware
Once the bolt is loose, remove it by hand. Note the order of any washers, spacers, or brackets—take a photo for reference during reinstallation. Carefully lift the blade straight off the bolt. Be mindful of sharp edges.
Key Considerations for Different Mower Types
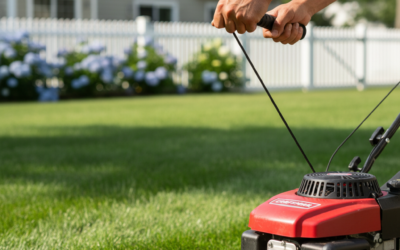
- Push Mowers: The process is straightforward as described. Always tilt with the air filter side up.
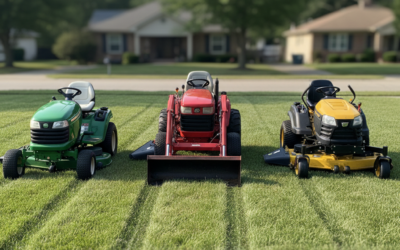
- Riding Mowers & Zero-Turns: Access is more complex. You may need to remove the mower deck. Consult your owner’s manual for the specific procedure. Some models have a blade brake clutch that requires special tools to remove the blade.
- Blade Types: Standard, mulching, and bagging blades are removed the same way. However, some mulching blades have a specific orientation (look for “Grass Side” markings).
What to Do After Removing the Blade
Inspect the Blade
Examine the blade for:
- Damage: Look for bends, cracks, or deep nicks. If damaged, replace it.
- Wear: If the cutting edges are rounded or the blade is significantly thinner than the opposite side, it needs replacement.
Sharpen or Replace
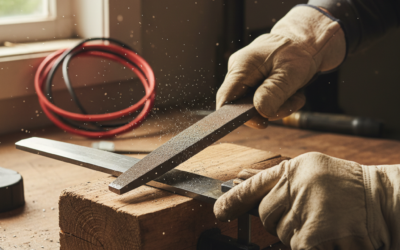
To Sharpen: Use a metal file or bench grinder, maintaining the original 30-degree bevel angle. Balance the blade after sharpening using a blade balancer to prevent mower vibration.
To Replace: Purchase a new blade that matches the exact dimensions and part number for your mower model.
Reinstall the Blade
Place the blade back on the bolt in the correct orientation (usually with the “Grass Side” or “Down” marking facing the ground). Reinstall any washers or brackets in the reverse order of removal. Hand-tighten the bolt, then use the block of wood and wrench to torque it to the manufacturer’s specification (typically 35-50 ft-lbs). Reconnect the spark plug wire.
Frequently Asked Questions
What tools do I need to remove a lawn mower blade?
You will typically need a socket wrench or breaker bar with the correct socket size (check your owner’s manual), a block of wood to hold the blade, and work gloves. A torque wrench is recommended for proper reinstallation.
Which way do I turn the bolt to remove the blade?
On most lawn mowers, the blade bolt is a standard right-hand thread. Turn it counterclockwise to loosen and remove it. Always verify this, as some older or specific models may use a left-hand thread.
How do I know if my lawn mower blade needs to be replaced instead of sharpened?
Replace the blade if it is bent, cracked, has deep nicks that cannot be filed out, or if one side is worn significantly thinner than the other. If the blade is worn down to the lift wing or the center hole is elongated, it must be replaced.
Can I remove the blade without tilting the mower?
For most walk-behind mowers, tilting is necessary to access the blade bolt. For riding mowers, you may be able to access it by removing the mower deck. Never attempt to work under a mower that is not properly supported.