Quick Answer: How to Change Honda Lawn Mower Oil
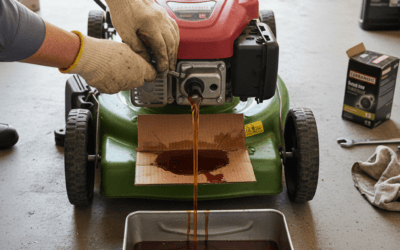
To change Honda lawn mower oil: (1) Cool the engine for 15 minutes and place the mower on level ground, (2) Locate and remove the drain plug, (3) Drain old oil into a container, (4) Reinstall the drain plug, (5) Add recommended oil (SAE 30 or 10W-30) to the correct capacity level, (6) Check the dipstick, and (7) Run the engine briefly to circulate new oil. Most Honda mowers need oil changes every 50–100 hours of operation or annually, whichever comes first.
Safety Preparation Before Draining Oil
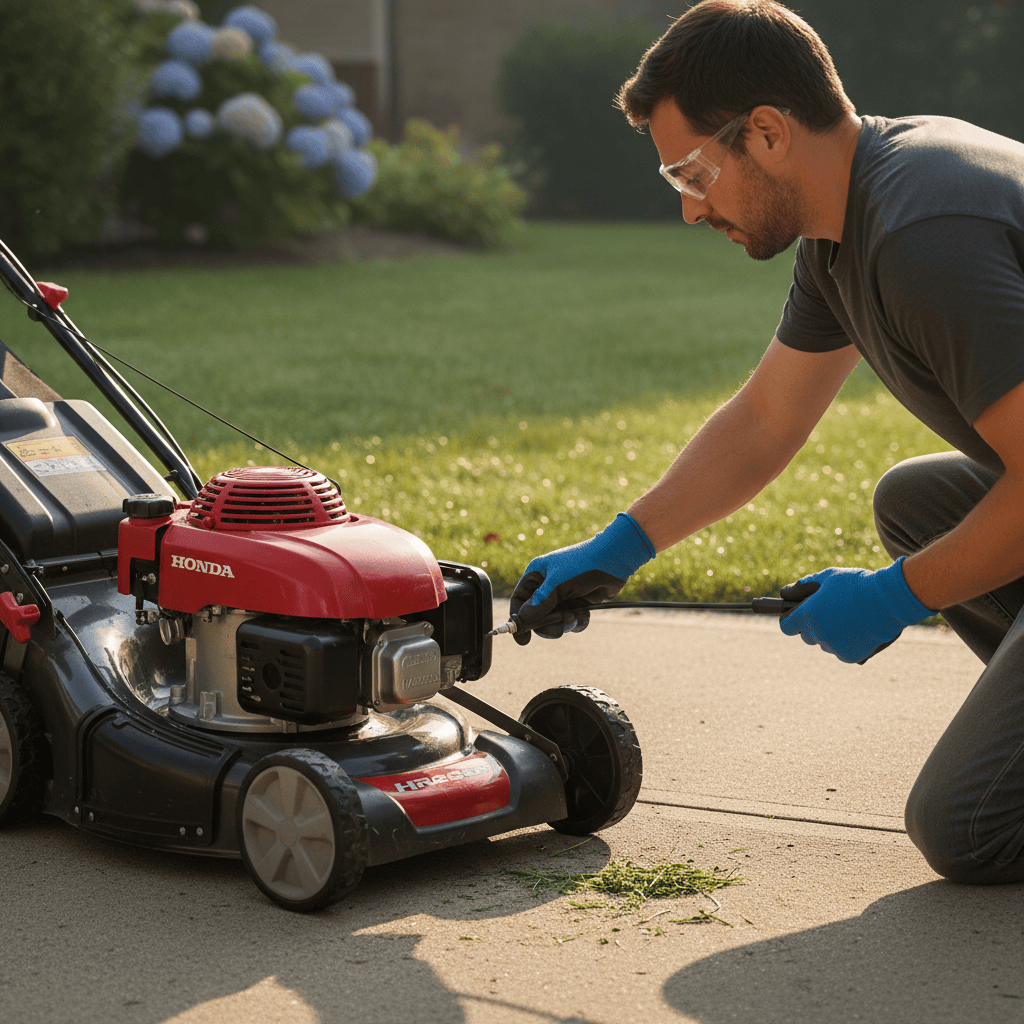
Before starting an oil change, proper preparation prevents burns, injuries, and mess. The first critical step is allowing the engine to cool completely.
Let the Engine Cool
Always wait at least 15 minutes after running the mower before draining oil. The engine, oil, and drain plug become extremely hot during operation—hot enough to cause severe burns. Warm oil drains more freely than cold oil, so you don’t need the engine hot; you just need it warm enough after cooling slightly.
Position the Mower Safely
Place your mower on a level, flat surface in a well-ventilated area. For push mowers, work on a driveway or in the yard away from foot traffic. For riding mowers, use a garage or open area. Never attempt an oil change on a slope—uneven surfaces prevent accurate dipstick readings and can cause oil to drain unevenly from the crankcase.
Disconnect the Spark Plug Wire
As an added safety measure, disconnect the spark plug wire before working on the mower. This prevents accidental engine starting if the engine is bumped or if someone else tries to start it during maintenance. Simply pull the wire cap straight off the spark plug.
Locating and Draining Old Oil
The drain plug location varies slightly between push and riding mowers, but the process is essentially the same.
Where to Find the Drain Plug
On push mowers: The drain plug is typically located on the bottom or side of the engine block, near the base. You may need to tip the mower slightly to access it—check your owner’s manual for the correct tipping direction to avoid oil entering the carburetor or air filter.
On riding mowers: The drain plug is usually found underneath the engine, accessible from below. You may need to get under the mower or use a hydraulic jack (safely supported by jack stands) to reach it comfortably.
Tools You’ll Need
- Socket wrench or adjustable wrench (size depends on your drain plug—typically 17mm or 5/8-inch)
- Oil drain pan or container (at least 2–3 quart capacity)
- Rags or paper towels
- Dipstick (usually attached to the mower; some models have separate dipsticks)
- Oil filter wrench (if your model has a replaceable filter)
Draining the Oil
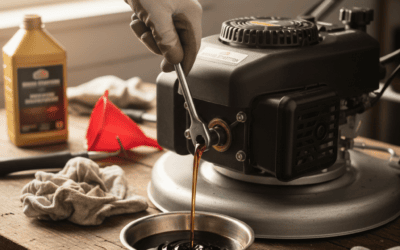
Place your drain pan directly beneath the drain plug. Using your wrench, slowly turn the drain plug counterclockwise until it loosens by hand. Be careful—residual warmth may still cause minor discomfort. Once hand-tight, carefully unscrew it completely and set it aside on a clean rag (avoid losing it in the grass or soil).
Allow the oil to drain completely into the pan. Tilt the mower slightly if needed to ensure all old oil drains out. This typically takes 5–10 minutes. While draining, wipe the drain plug with a clean rag to remove debris.
Choosing the Right Oil Type and Capacity
Using the correct oil is essential for engine longevity and performance. Honda mowers are engineered for specific oil viscosities.
Oil Viscosity: SAE 30 vs. 10W-30
SAE 30 is a single-grade oil suitable for year-round use in most climates, especially warmer regions. It flows well at normal operating temperatures and provides good protection.
10W-30 is a multi-grade oil with a winter rating (10W), making it ideal for cold-start conditions in colder climates. The “10W” means it flows like a 10-weight oil when cold, then thickens to 30-weight at operating temperature. Most Honda mower owners in variable climates prefer 10W-30 for versatility.
Check your owner’s manual or the engine cover for the manufacturer’s recommendation. Some Honda mowers specify SAE 30 only; others allow either SAE 30 or 10W-30. Never use a heavier oil like 10W-40 or 15W-40 unless explicitly approved by Honda, as thicker oil can reduce cooling efficiency in small engines.
Oil Capacity by Mower Type
| Mower Type | Typical Oil Capacity |
|---|---|
| Small push mower (single-cylinder) | 0.6–0.8 quarts (600–750 mL) |
| Standard push mower (mid-size engine) | 1.0–1.5 quarts (950–1,400 mL) |
| Self-propelled push mower | 1.2–1.8 quarts (1,100–1,700 mL) |
| Riding mower (small engine) | 1.5–2.0 quarts (1,400–1,900 mL) |
| Riding mower (larger engine) | 2.0–3.5 quarts (1,900–3,300 mL) |
Always consult your specific mower’s owner’s manual for exact capacity. The manual typically lists capacity on the first few pages or in the maintenance section.
Adding New Oil and Checking Levels
Reinstall the Drain Plug
Before adding new oil, reinstall the drain plug. Thread it by hand first to avoid cross-threading, then tighten it snugly with your wrench. Do not over-tighten—drain plugs are easily stripped. Tighten until snug, then stop.
Add New Oil Slowly
Place a funnel in the oil fill cap (usually on top of the engine) and pour new oil slowly. Add oil in stages, checking the dipstick between additions to avoid overfilling. Most mowers have a fill mark on the dipstick indicating the correct level when the engine is cold and on level ground.
Check the Dipstick
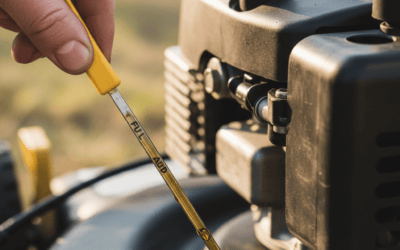
After adding oil, wipe the dipstick clean with a rag, reinsert it fully into the tube, then remove it again to read the level. The oil should reach the “Full” or upper mark on the dipstick. If it’s below the mark, add a small amount more and recheck. If you overfill, remove excess oil using the dipstick tube or a small siphon pump.
Run the Engine to Circulate Oil
Once the level is correct, reinstall the fill cap, reconnect the spark plug wire, and start the engine. Let it run for 30 seconds to 1 minute at idle to circulate the new oil throughout the engine. This helps the new oil reach all critical components and gives you an opportunity to check for leaks around the drain plug.
Stop the engine, wait 2–3 minutes, then recheck the dipstick one final time. The level may drop slightly as oil settles into different parts of the engine. Top off if needed.
Oil Filter Replacement (Where Applicable)
Not all Honda lawn mowers have replaceable oil filters. Smaller push mowers typically use sealed engines without external filters, while some larger models and most riding mowers do have filters.
Identify Whether Your Mower Has a Filter
Check your owner’s manual or visually inspect the engine. If you see a cylindrical canister or cartridge on the side or bottom of the engine, you likely have a replaceable filter. If the engine is completely sealed with no external filter housing, there’s no filter to replace.
Replacing the Filter
If your mower has a filter, replace it at the same time you change the oil:
- Position the drain pan below the filter
- Using an oil filter wrench, turn the old filter counterclockwise until it spins free by hand
- Unscrew it completely and set it aside (some oil will drip out)
- Apply a thin coat of fresh oil to the rubber gasket of the new filter
- Screw the new filter on by hand until the gasket contacts the mounting surface, then turn an additional 3/4 turn (not a full turn—hand-tight is correct)
- Proceed with adding new oil as described above
Do not use an oil filter wrench to tighten the new filter. Hand-tightening prevents over-tightening and makes removal easier next time.
Maintenance Intervals and When to Change Oil
How Often Should You Change Oil?
Honda recommends changing oil every 50–100 hours of operation or once per year, whichever comes first. For casual homeowners who mow weekly during the growing season, this typically means one oil change per year in spring or early summer. Frequent users or those in dusty conditions may need more frequent changes.
Track Your Usage Hours
Many modern Honda mowers display engine hours on the dashboard or fuel gauge. If yours does, note the hour meter reading after each oil change. If your mower lacks this feature, estimate based on mowing frequency: roughly 1 hour per mowing session for a standard lawn.
Visual Indicators That Oil Needs Changing
Even if you haven’t reached the recommended interval, change the oil sooner if:
- Oil on the dipstick appears very dark brown or black
- Oil feels gritty or sandy when rubbed between your fingers (indicating dust contamination)
- The mower runs sluggishly or doesn’t start easily
- You notice excessive exhaust smoke
Common Oil Change Mistakes to Avoid
- Over-tightening the drain plug: This strips the threads and causes future leaks. Tighten until snug, then stop.
- Overfilling with oil: Too much oil increases pressure on seals and can cause leaks or blow-by. Stick to the dipstick mark.
- Using the wrong oil viscosity: Thicker or thinner oil than recommended can reduce engine protection or cooling efficiency.
- Not letting the engine cool: Hot oil can cause burns. Always wait at least 15 minutes after running the mower.
- Forgetting to reconnect the spark plug wire: Before running the engine after an oil change, always reconnect the spark plug wire.
- Tipping the mower in the wrong direction: On push mowers, tipping toward the carburetor can flood it with oil. Check your manual for the correct direction.
Disposing of Old Oil Responsibly
Never pour old oil into the trash, storm drains, or yard. Instead:
- Take it to a local recycling center or hazardous waste facility (typically free)
- Bring it to a quick-lube shop or auto parts store—many accept used oil for free or a small fee
- Contact your municipality for proper disposal guidelines
Place used oil in a sealed container labeled “Used Oil” and keep it away from children and pets.
Frequently Asked Questions
Can I change Honda lawn mower oil without removing the spark plug wire?
Technically yes, but it’s not recommended. Disconnecting the spark plug wire is a safety precaution that prevents accidental engine starting. If someone bumps the mower or turns the key, a running engine during maintenance can cause serious injury. It takes 10 seconds to disconnect and takes minimal risk.
What happens if I use the wrong oil viscosity?
Using oil thicker than recommended (e.g., 15W-40 instead of 10W-30) reduces heat transfer from the engine to the oil, causing overheating and increased wear. Using oil thinner than recommended (e.g., SAE 20) may not provide adequate film strength at operating temperature, leading to metal-on-metal contact and accelerated wear. Always follow Honda’s specification.
Why does my mower leak oil after an oil change?
The most common causes are: (1) the drain plug is over-tightened or cross-threaded, (2) the drain plug wasn’t fully tightened after refilling, (3) you overfilled the crankcase, or (4) the new oil filter (if applicable) wasn’t hand-tightened correctly. Check all three and correct as needed. If leaking persists, the engine gasket may be deteriorating—consult a service technician.
Do I need to warm up the engine before my first mow after an oil change?
Yes. Run the engine at idle for 30 seconds to 2 minutes to allow new oil to circulate throughout the engine and reach all critical components before putting the mower under load. This helps distribute the fresh oil evenly and ensures proper lubrication from the start.
Summary
Changing oil in a Honda lawn mower is a straightforward maintenance task that takes 20–30 minutes and protects your engine’s longevity. The key steps—cooling the engine, draining old oil, selecting the correct oil type and capacity, refilling carefully, and checking the dipstick—follow a logical sequence. By following this guide and consulting your owner’s manual for model-specific details, you’ll keep your Honda mower running smoothly for years to come. Regular oil changes every 50–100 hours or annually are one of the simplest and most effective investments in mower reliability.