How to Install Trimmer Line: Quick Answer
To install trimmer line, first identify your trimmer head type—bump-feed, automatic advance, or fixed spool. For bump-feed heads (most common), cut 15–20 feet of line, thread it through the eyelet, wrap it around the spool following the directional arrows, and secure the end. For automatic heads, insert pre-cut line into the feed hole and let the mechanism pull it through. For fixed spools, wind line around the spool in the correct direction, then thread the ends through eyelets. Always match line diameter to your trimmer’s specification (typically 0.065″ to 0.130″) and prepare the correct length—usually 16–18 inches per side for dual-line heads.
Understanding Your Trimmer Head Type
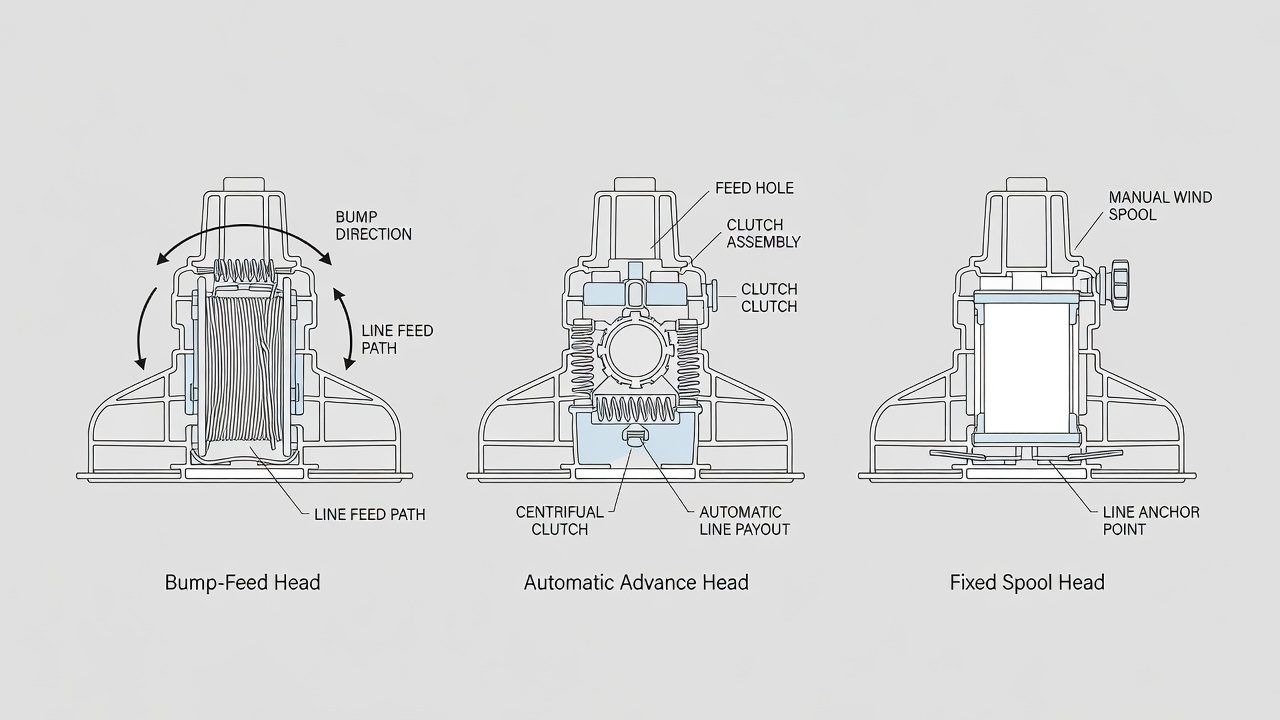
Before you attempt to install trimmer line, you need to identify which type of trimmer head your equipment uses. The three main designs—bump-feed, automatic advance, and fixed spool—each require different installation methods. Using the wrong method can result in tangled line, improper feeding, or damage to the trimmer head.
Bump-Feed Heads
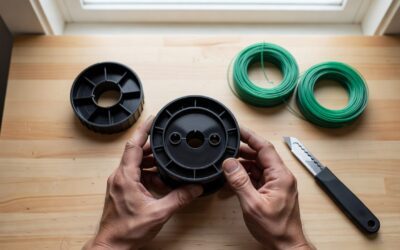
Bump-feed heads are the most common type found on residential string trimmers. These heads have a spool inside that holds the line, and you advance new line by tapping or “bumping” the bottom of the head against the ground during use. The line feeds out in small increments each time you bump it. Installation requires manually winding line around the spool and threading it through eyelets.
Automatic Advance Heads
Automatic advance heads simplify line replacement by automatically feeding out new line as the existing line wears down. You insert a pre-cut piece of line into a feed hole, and the head’s internal mechanism pulls it through. These heads are less common on residential trimmers but offer convenience for frequent users.
Fixed Spool Heads
Fixed spool heads feature a stationary spool with two line strands that you wind manually. These are often found on professional-grade or heavy-duty trimmers. The line doesn’t advance automatically; instead, you manually pull out and cut new line as needed, then rewind the spool for the next use.
Selecting the Right Trimmer Line
Choosing the correct line is critical for safe operation and proper trimmer performance. Using the wrong diameter or length can cause the line to break prematurely, tangle, or fail to feed properly.
Line Diameter
Trimmer line diameters typically range from 0.065 inches to 0.130 inches. Your trimmer’s manual will specify the correct diameter for your model. Common sizes include 0.080″, 0.095″, and 0.110″. Using a line that’s too thin may cause it to break under load, while a line that’s too thick can stress the trimmer’s motor and head. If your manual is unavailable, check the existing line diameter by measuring it with calipers or a ruler, or contact the manufacturer with your trimmer model number.
Line Length
The amount of line you prepare depends on your trimmer head type. For dual-line bump-feed heads, the standard is 16–18 inches of line per side. This typically requires cutting a single strand of 30–40 feet total, which you’ll wind onto the spool in two separate sections. Some trimmers use single-line configurations, which require only 16–18 feet total. Always consult your trimmer’s manual for the manufacturer’s recommended length.
Line Material and Quality
Most trimmer lines are made from nylon, which is durable and resistant to wear. Premium lines may include additives for improved cutting efficiency or longevity. For residential use, standard nylon line is sufficient. Professional or commercial-grade lines offer extended durability if you use your trimmer frequently.
How to Install Line in Bump-Feed Heads (Most Common)
Bump-feed heads account for the majority of residential string trimmers. Follow these steps to install line correctly.
Step 1: Prepare Your Materials
- Cut a length of trimmer line according to your manual’s specifications (typically 30–40 feet for a dual-line head).
- Locate the eyelet or eyelets on the trimmer head—these are the holes through which the line feeds.
- Inspect the spool inside the head for directional arrows indicating the proper winding direction.
Step 2: Remove the Trimmer Head (If Necessary)
Some trimmer designs allow you to access the spool without removing the head, while others require removal. Check your manual. If removal is needed, typically you’ll unscrew the head counterclockwise from the trimmer shaft or press release tabs on the head’s sides.
Step 3: Access the Spool
Once the head is accessible, you may need to remove a cap or cover to expose the spool. Many bump-feed heads have a removable cover held in place by tabs or screws. Gently pry or unscrew this cover to reveal the spool beneath.
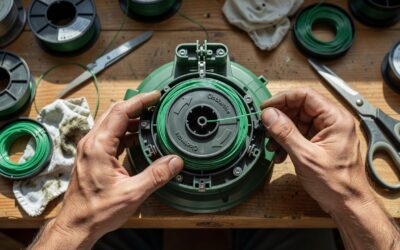
Step 4: Insert and Wind the Line
- Find the line insertion slot or starting point on the spool—this is often marked with an arrow or groove.
- Insert one end of your prepared line into this slot, leaving enough length to reach through an eyelet.
- Wind the line around the spool in the direction indicated by the arrows. The direction matters: winding against the arrows will prevent proper line feed during use.
- Wind the line evenly and tightly, avoiding overlaps. Keep tension on the line as you wind to ensure it sits snugly on the spool.
- Wind until you’ve used approximately half your prepared line, then secure the first section.
Step 5: Load the Second Line Section (Dual-Line Heads)
- Most bump-feed heads have two spool sections for dual-line operation. Locate the second starting slot.
- Insert the opposite end of your line into the second slot and wind it around its section of the spool, following the same directional arrows.
- Wind until you reach the spool’s edge, leaving enough line to thread through the second eyelet.
Step 6: Thread the Line Through Eyelets
- With both line sections wound on the spool, locate the eyelets on the trimmer head’s exterior.
- Pull the end of the first line section and thread it through the first eyelet.
- Pull the end of the second line section and thread it through the second eyelet.
- Ensure the line is taut and properly positioned in each eyelet.
Step 7: Secure the Line Ends
Many bump-feed heads have retention slots or grooves where you place the line ends to keep them from unwinding. Insert each line end into its designated slot. Some designs require you to simply hold the line ends while you replace the head cover. The cover itself may have tabs or notches that keep the line in place.
Step 8: Reassemble the Head
- Replace the spool cover, ensuring it seats properly and any tabs or screws are fully tightened.
- If you removed the entire head from the trimmer, screw it back on clockwise until snug. Do not over-tighten, as this can crack the head.
- Verify that the line exits the eyelets freely and isn’t pinched or twisted.
How to Install Line in Automatic Advance Heads
Automatic advance heads streamline the installation process by eliminating manual winding.
Step 1: Prepare Pre-Cut Line
Cut a length of line according to your trimmer’s manual—typically 20–30 feet for automatic heads. The exact length may be marked inside the head or in your documentation.
Step 2: Locate the Feed Hole
Automatic advance heads feature a prominent feed hole, usually on the top or side of the head. This is where you insert new line. The hole may have a retaining ring or cap.
Step 3: Insert the Line
- Remove any cap or retaining ring from the feed hole.
- Insert one end of your pre-cut line into the feed hole.
- The head’s internal mechanism will begin pulling the line through automatically.
- Continue feeding the line into the hole until the entire length is consumed or the mechanism stops.
Step 4: Verify Proper Feed
Once the line is loaded, check that it exits the eyelets evenly on both sides. Some automatic heads have a manual advance option if the line doesn’t feed completely. Consult your manual for your specific head’s procedure.
Step 5: Trim Excess Line
If line extends beyond the eyelets, use a utility knife or scissors to trim it to the appropriate length (typically 16–18 inches per side).
How to Install Line in Fixed Spool Heads
Fixed spool heads require manual winding and are common on professional or multi-line designs.
Step 1: Prepare Your Line
Cut two equal lengths of line—typically 20–25 feet each for a dual-line spool. Fixed spool heads usually accommodate two separate line strands.
Step 2: Identify Winding Direction
Examine the spool for directional arrows or markings indicating the correct winding direction. Winding in the wrong direction will result in line tangling during use.
Step 3: Wind the First Line Section
- Locate the starting groove or slot on one half of the spool.
- Insert one end of the first line section into this slot.
- Wind the line evenly around the spool section, maintaining consistent tension.
- Wind until the spool is full or until you’ve used the prepared length.
- Leave enough line (typically 16–18 inches) unwound to thread through an eyelet.
Step 4: Wind the Second Line Section
- Using your second prepared line section, locate the starting groove for the second spool half.
- Insert the end into the slot and wind in the same direction, following the directional arrows.
- Again, leave 16–18 inches unwound.
Step 5: Thread the Line Through Eyelets
- Pull each unwound line end and thread it through an eyelet on the trimmer head.
- Ensure both lines are taut and properly positioned.
Step 6: Secure the Line Ends
Most fixed spool heads have retention slots or clips. Place each line end into its designated slot to prevent unwinding. Some designs use knots or loops to secure the line ends.
Common Installation Mistakes to Avoid
Winding in the Wrong Direction
This is the most common error with bump-feed and fixed spool heads. If you wind the line against the directional arrows, the line won’t feed properly during use and may tangle or wrap around the head. Always double-check the arrows before winding.
Using the Wrong Line Diameter
Installing line that’s too thick can strain your trimmer’s motor and prevent proper feeding. Line that’s too thin may snap under cutting stress. Always verify the correct diameter in your trimmer’s manual.
Overlapping Line on the Spool
If you wind the line carelessly and create overlaps or crossovers on the spool, the line will tangle when it unwinds. Wind slowly and carefully, keeping each wrap flat against the previous one.
Not Leaving Enough Line for the Eyelets
If you wind too much line onto the spool, you won’t have enough left to thread through the eyelets. Conversely, if you leave too much, the excess may wrap around the spool head during operation. Follow your manual’s recommendations for length.
Under-Tightening the Head Cover or Reassembly
If the head cover isn’t snug or the head isn’t properly reattached to the trimmer shaft, the line may slip out during use or the head may detach. Tighten securely but avoid over-tightening, which can crack plastic components.
Failing to Match Line Diameter to Head Design
Some trimmer heads have eyelets or slots designed for specific line diameters. Using incompatible line can cause it to slip out of eyelets or jam in feed holes. Always verify compatibility.
Testing Your Installation Before Use
Visual Inspection
Before operating your trimmer, visually verify that both line ends are properly seated in the eyelets and that no line is pinched, twisted, or overlapping on the spool. The line should extend evenly from both eyelets.
Manual Rotation Test
With your trimmer unplugged or safely disabled, manually rotate the trimmer head by hand (if accessible). The line should rotate smoothly without catching or binding. If you feel resistance or hear grinding sounds, stop and recheck your installation.
Tap Test (Bump-Feed Heads)
For bump-feed heads, gently tap the bottom of the head against a soft surface like grass or a rubber mat. A small amount of new line should feed out. If nothing happens or if the line slips back in, recheck your line winding and retention mechanism.
Operational Test
Start your trimmer at low speed and observe line behavior. The line should feed smoothly and spin without wrapping. If the line tangles or doesn’t rotate properly, stop immediately, disconnect the power, and recheck your installation.
Frequently Asked Questions
What if my trimmer line keeps breaking during use?
Frequent line breakage can result from several issues: using line that’s too thin for your trimmer’s power, improper winding that creates weak points, hitting hard objects like rocks or pavement, or using a line diameter incompatible with your trimmer head’s eyelets. First, verify you’re using the correct diameter specified in your manual. Second, rewind your line carefully, ensuring no overlaps or kinks. Finally, avoid cutting near hard surfaces. If breakage continues after these steps, the issue may be with your trimmer head’s eyelets—contact the manufacturer.
Can I use a different line diameter than my manual specifies?
Using a non-specified diameter is not recommended. Line that’s too thin may break under the stress of cutting, while line that’s too thick can strain the trimmer’s motor, prevent proper feeding, or jam in the head’s eyelets. Some trimmers have a tolerance range (e.g., 0.080″ to 0.095″), which your manual will indicate. Always operate within this range for safety and performance.
Why does my trimmer line wrap around the head after installation?
Line wrapping typically occurs when the line is wound in the wrong direction, not secured properly in retention slots, or not seated correctly in the eyelets. Verify that you wound the line following the directional arrows on the spool. Ensure the line ends are fully inserted into any retention slots or grooves. Check that the head cover is tightened securely so it holds the line in place. If wrapping persists, the eyelets may be damaged or misaligned—inspect them for cracks or deformation.
How often should I replace or reload my trimmer line?
The frequency depends on how often you use your trimmer. For occasional residential use (a few times per month), you may reload line once or twice per season. Heavy users might reload weekly or more frequently. Signs that it’s time to reload include noticeably shorter line, reduced cutting efficiency, frequent line breakage, or visible fraying at the line ends. Always keep spare line on hand so you’re ready when you need it.
Is there a video or visual guide specific to my trimmer brand?
Most major trimmer manufacturers (Stihl, Husqvarna, Ryobi, DeWalt, etc.) provide detailed video guides on their websites or YouTube channels. Search for your specific trimmer model number combined with “install trimmer line” to find brand-specific guidance. Your trimmer’s manual also typically includes step-by-step photos or diagrams. If you’re still uncertain, contact the manufacturer’s customer service for personalized assistance.