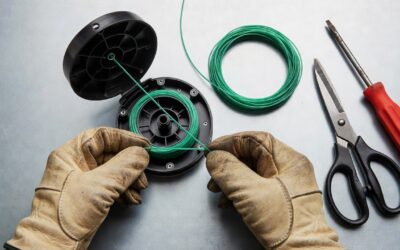
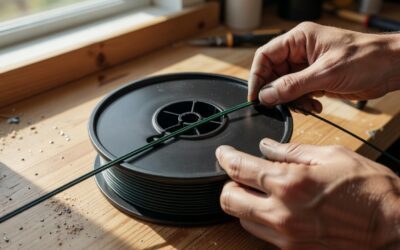
Quick Answer: How to Change Weed Eater String
To change weed eater string, first turn off and unplug your trimmer, then access the trimmer head by removing the spool cover or unscrewing the head assembly. Remove the old line, measure out15-20 feet of new trimmer line, thread it through the eyelets or wind it around the spool according to your trimmer model, and reassemble the head. The exact procedure varies between bump-feed and fixed-line designs, but these core steps apply to most string trimmers.
Understanding Your String Trimmer Type
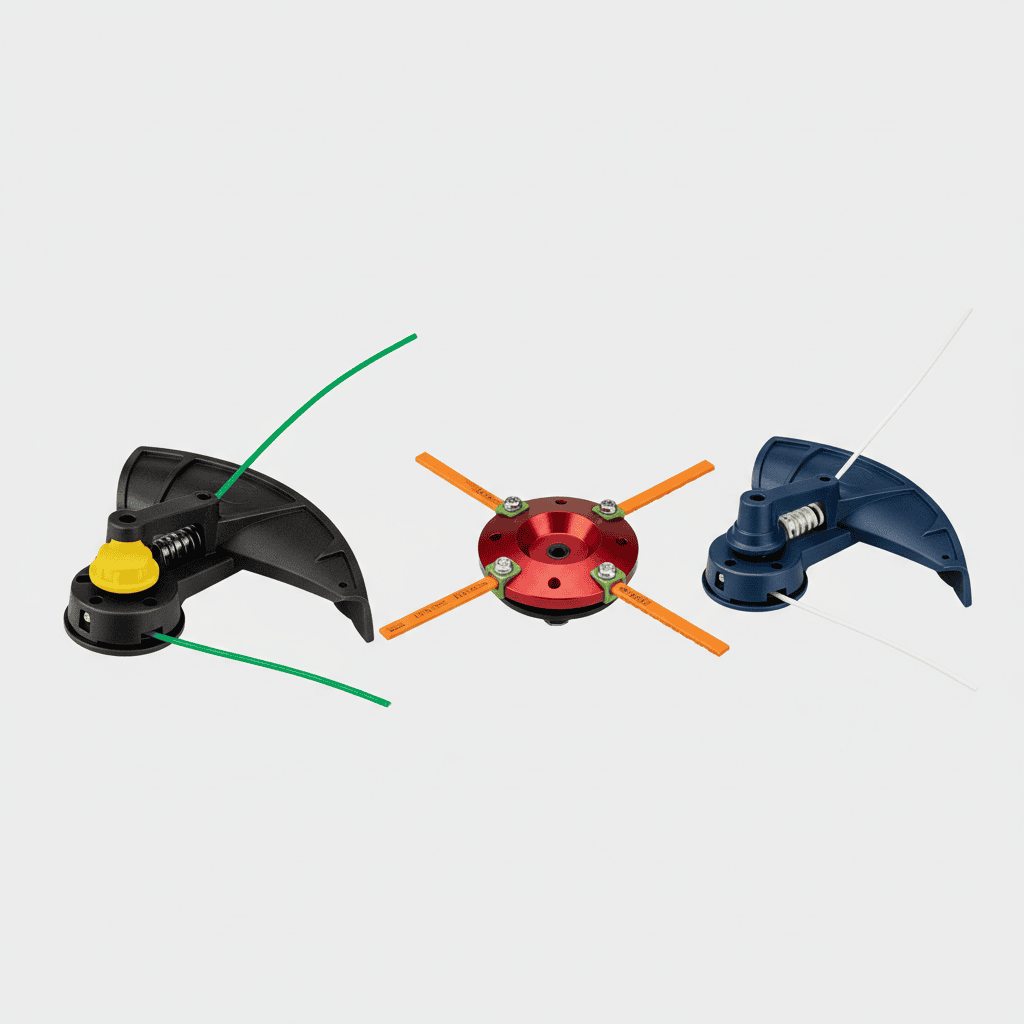
Before you begin, identify which type of trimmer head you have, as the replacement process differs between designs:
- Bump-Feed Trimmers: The most common design features a single or dual spool that automatically feeds line when you tap the head on the ground. Line threads through eyelets on the side.
- Fixed-Line Trimmers: These require manual line installation and winding. The line doesn’t feed automatically; you replace it at fixed intervals.
- Dual-Line Trimmers: Feature two cutting lines running parallel, typically wound on a single spool with a divider.
Check your trimmer’s manual or examine the head design to determine which type you own. The replacement process for bump-feed trimmers is most common and will be covered in detail below.
Tools and Materials You’ll Need
Gather these items before starting:
- Replacement trimmer line in the correct gauge (typically .080″ to .095″ for most residential trimmers)
- Screwdriver (usually Phillips head) to remove the spool cover
- Pliers (optional, for stubborn covers)
- Tape measure to measure correct line length
- Scissors or trimmer line cutter to cut new line to length
- Cloth or small brush to clean the spool area
Purchase replacement line rated for your specific trimmer model. Most residential trimmers use .080″ to .095″ diameter line; check your manual or trimmer head for specifications. Pre-packaged spools (typically 20-30 feet) are widely available at hardware stores and online retailers.
Step 1: Safety First—Prepare Your Trimmer
Before touching any part of the trimmer head:
- Unplug the trimmer from the electrical outlet (or remove the battery for cordless models)
- Allow the motor to stop completely and cool for 2-3 minutes
- Wear work gloves to protect your hands from sharp line and metal edges
- Work on a flat, stable surface with good lighting
Never attempt to change trimmer line while the unit is plugged in or running. This is critical for your safety.
Step 2: Access the Trimmer Head
Most bump-feed trimmers have a removable spool cover held by one or two screws:
- Locate the screw(s) on the center of the trimmer head (typically one screw for single-line, two for dual-line models)
- Using a Phillips head screwdriver, carefully unscrew the cover by turning counterclockwise
- Set the screw(s) aside in a safe place where they won’t roll away
- Gently pull the spool cover straight out
Some models have a snap-off cover instead of screws—press the release tabs and pull firmly. If the cover is stuck, apply gentle side-to-side pressure or spray a small amount of penetrating oil around the edges.
Step 3: Remove the Old String
Once the spool is exposed:
- Pull out any remaining trimmer line from the spool and eyelets
- Use pliers if line is wound tightly; twist and pull to loosen it
- Clean the spool area with a dry cloth or small brush to remove grass, dirt, and line fragments
- Check the spool and eyelets for damage—cracks or sharp edges indicate wear that may require head replacement
Properly cleaning the spool ensures new line feeds smoothly and prevents jamming.
Step 4: Install New String (Bump-Feed Models)
This is the most common trimmer type:
- Measure and cut: Cut a piece of trimmer line approximately 15-20 feet long. Standard residential trimmer length is usually around 17feet, but check your manual.
- Locate the eyelet: Look for a small notch or slot on the side of the spool—this is where the line starts.
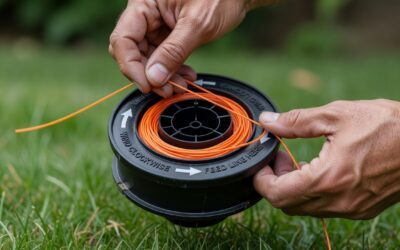
- Thread the line: Insert one end of the line into the starting eyelet and pull it through so about 6-8 inches extends on each side of the spool.
- Wind the line: Following the directional arrows on the spool (usually molded into the plastic), wind the line tightly and evenly around the spool. Wind in one direction only—typically counterclockwise for most models. Keep tension even; loose winding causes feeding problems.
- Guide through eyelets: As you wind, feed the line through the eyelets on opposite sides of the head. This creates a guided path for cutting.
- Secure the ends: When the spool is full, insert the line ends into the small slots or notches designed to hold them. This prevents unwinding while reassembling.
The key to successful installation is even, tight winding. Slack line will jam; over-tight line may break during feeding.
Step 5: Install New String (Fixed-Line and Dual-Line Models)
For trimmers without automatic feed:
- Cut the line: Measure and cut two pieces of line, each approximately 8-10 feet (adjust based on your model—check the manual).
- Locate guide posts: Most fixed-line spools have two posts or guides where line is inserted.
- Insert and wind: Insert one end of the first line segment into the guide post and wind tightly around the spool, following any directional markings.
- Repeat for second line: Insert and wind the second line segment in the same manner, ensuring both sides have equal length.
- Secure ends: Most designs have slots to trap line ends; insert them firmly to prevent unraveling.
Equal line length on both sides is essential for balanced cutting and proper trimmer operation.
Step 6: Reassemble and Test
With new line installed:
- Carefully align the spool cover with the trimmer head, ensuring the line passes through the eyelets correctly
- Press the cover firmly into place until it seats completely
- Reinstall and tighten the screw(s) securely—use firm pressure but avoid over-tightening, which can crack the plastic cover
- Check that both line ends protrude equally from the eyelets
- Plug in the trimmer (or install the battery) and run it briefly in a safe location with no obstacles to verify proper line feeding
Proper reassembly is critical; loose covers can separate during operation, creating a safety hazard.
Troubleshooting Common Issues
| Problem | Likely Cause | Solution |
|---|---|---|
| Line not feeding | Incorrect winding direction; line too loose | Rewind line following directional arrows; ensure tight, even winding |
| Line breaking immediately after starting | Line twisted or pinched during installation; line too tight | Remove and reinstall line with slight less tension; verify eyelets are clear of debris |
| Trimmer head won’t close | Line not seated properly in slots; cover misaligned | Pull line ends into retaining slots firmly; ensure cover is oriented correctly |
| Uneven line length on dual-line trimmer | Line measured or wound unevenly | Remove and remeasure both segments; rewind ensuring equal wraps on each side |
| Line popping out of eyelets | Line not guided through during winding | Reinstall, ensuring line passes through eyelets as you wind |
Maintenance Tips to Extend String Life
Proper maintenance reduces how often you need to change trimmer line:
- Avoid hard objects: Keep the trimmer away from rocks, concrete, and gravel, which wear line faster than grass.
- Maintain proper tension: Don’t over-tighten line during installation; excessive tension causes premature breakage.
- Clean the spool regularly: Before installing new line, remove grass and debris to prevent jamming.
- Store properly: Keep your trimmer in a dry location. Moisture can affect line performance.
- Use the correct gauge: Using line thicker than recommended increases wear on the head’s eyelets and can jam the feed mechanism.
- Check for head damage: Cracked or warped heads prevent proper line feeding and should be replaced, not just refilled.
When to Replace the Trimmer Head
If you notice any of these issues, the head itself may need replacement rather than just new line:
- Visible cracks or chunks missing from the spool or cover
- Bent or broken eyelets that snag line
- Damaged threading posts that won’t hold line securely
- Persistent jamming even with new line installed correctly
Trimmer head replacement is relatively inexpensive and often simpler than troubleshooting an old, worn head.
Frequently Asked Questions
How often should I change weed eater string?
String replacement frequency depends on usage. Light residential use might require replacement1-2 times per season, while heavy commercial use could require monthly changes. Replace string whenever it becomes noticeably shorter, breaks repeatedly, or is visibly frayed at the cutting edges.
Can I use any trimmer line, or does it need to match my specific trimmer model?
You must match the line diameter (gauge) to your trimmer; using the wrong size prevents proper feeding and can damage the head. The gauge is typically marked on the spool cover or in your manual (.080″, .095″, .104″, etc.). The line material—usually nylon—is fairly universal across brands, but diameter is critical.
Why is my trimmer line breaking as soon as I start the trimmer?
Common causes include: line wound too tightly, line twisted or pinched during installation, debris in the eyelets, or damaged eyelets that create sharp edges. Remove the line and reinstall it with slightly less tension, and thoroughly clean the eyelet area. If breaking continues, the head may need replacement.
How long should the cutting line be on each side of a dual-line trimmer?
Both sides should extend equally from the eyelets—typically 3-4 inches on each side is standard. Check your specific trimmer’s manual for exact specifications, as some models require different lengths. Uneven lines create unbalanced cutting and vibration.