Quick Answer: How to Replace Trimmer Line
To replace trimmer line, first disconnect power or remove the battery for safety. Locate and remove the spool head at the trimmer’s base by unclipping or unscrewing it. Remove the old line, then wind new replacement line into the spool grooves (typically 15–20 feet per side), thread the line ends through the eyelets, and reassemble the head. The exact process varies by trimmer design—bump-feed spools, fixed spools, and semi-automatic systems each have slightly different procedures—so always consult your manual for model-specific details.
Safety First: Before You Start
Before touching any part of your trimmer’s cutting head, safety must come first. String trimmers are powerful tools, and improper handling during maintenance can lead to injury or equipment damage.
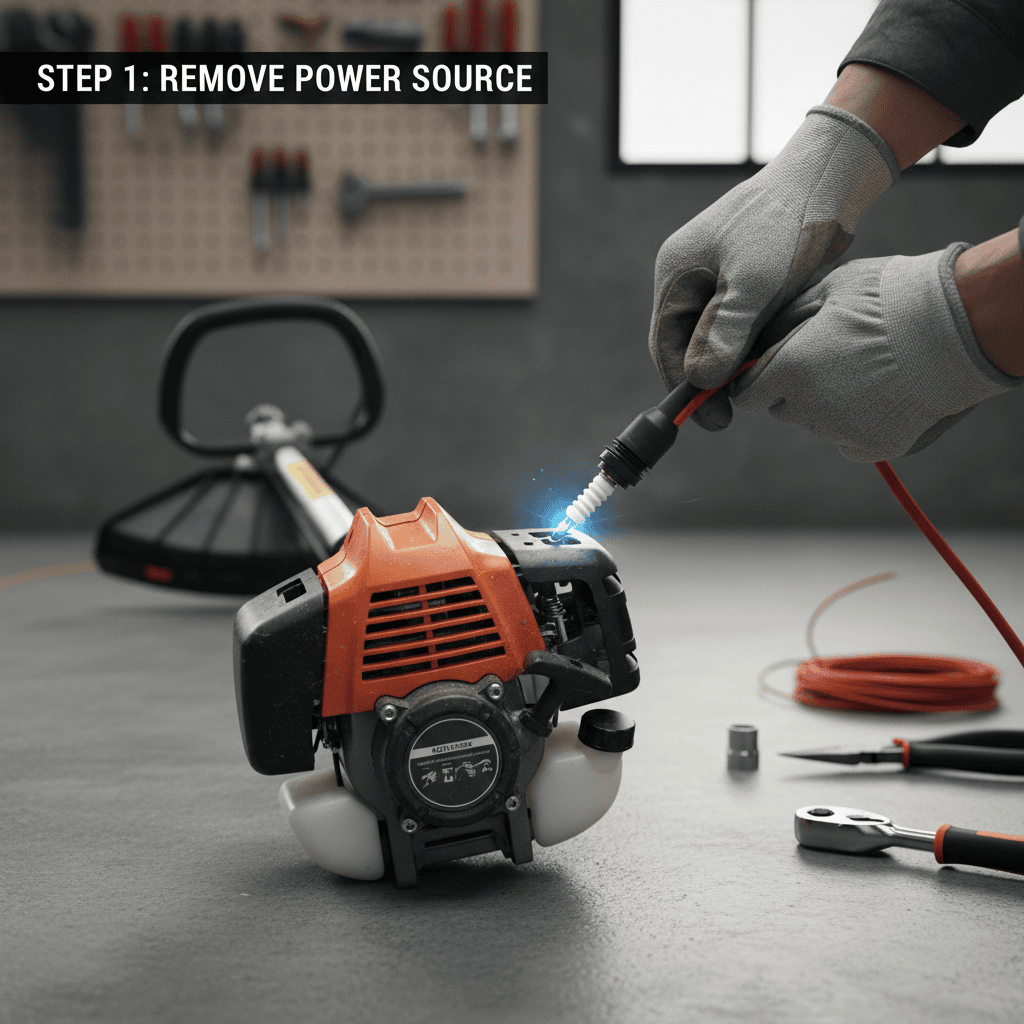
- Disconnect power immediately: For gas trimmers, remove the spark plug wire. For corded electric models, unplug from the outlet. For battery-powered trimmers, remove or fully discharge the battery. Never work on a trimmer that could accidentally start.
- Wear protective gear: Use work gloves to protect your hands from cuts on broken line or sharp spool edges. Safety glasses are recommended in case line fragments or spring clips release unexpectedly.
- Work on a clean, flat surface: Place your trimmer on a stable workbench or table. This prevents the spool head from rotating unexpectedly and keeps small parts from rolling away.
- Allow time for cooling: If you’ve just finished trimming, wait 5–10 minutes for gas or electric engines to cool before disassembling the head.
Understanding Your Trimmer Type
String trimmers come in several designs, and each requires a slightly different line replacement approach. Identifying your trimmer type ensures you follow the correct procedure.
Bump-Feed Spools (Most Common)
Bump-feed spools are the industry standard for homeowner trimmers. These have a spring-loaded spool that automatically advances line when you tap the head on the ground. The spool sits inside a fixed housing and typically holds line wound on both sides. This design is user-friendly and found on most DeWalt, Ryobi, Husqvarna, and Echo consumer models.
Fixed or Manual-Advance Spools
Fixed spools require manual line advancement and are common on commercial-grade trimmers. The line is wound onto a stationary spool, and you must manually pull or thread new line as the old line wears. These are less common on residential models but offer durability for heavy use.
Semi-Automatic or Automatic Feed Systems
Premium trimmers feature semi-automatic heads that advance line during operation without requiring a bump or manual adjustment. These systems are more complex and often use pre-wound cartridges or spools that differ from standard designs. If your trimmer has this feature, the manufacturer’s manual is essential.
How to identify your type: Look at your trimmer’s cutting head. If it has a visible knob or dial on top, it’s likely a bump-feed. If you see a sealed housing or cartridge system, check your manual for the specific design.
Tools and Materials You’ll Need
Gather these items before starting to avoid interruptions:
- Replacement trimmer line: Purchase the correct diameter for your model. Common sizes are 0.065″ (1.6 mm), 0.080″ (2.0 mm), and 0.095″ (2.4 mm). Check your trimmer’s manual or the spool housing for the specification. Most lines come in bulk spools (50–100 feet) or pre-cut segments.
- Work gloves: Protects hands from sharp line and metal edges.
- Flathead or Phillips screwdriver: For removing spool head fasteners (model-dependent).
- Needle-nose pliers: Useful for removing old line fragments and manipulating spring clips or retention tabs.
- Your trimmer’s manual: This is the single most valuable resource. It shows exact spool design and winding patterns specific to your model.
- Small container or towel: To hold small springs, clips, or fasteners that might otherwise be lost.
Line selection: All replacement trimmer line is nylon-based, but diameter matters significantly. Using the wrong gauge can cause the line to break prematurely, jam in the spool, or fail to cut effectively. When in doubt, buy a small amount from your trimmer’s manufacturer or a local dealer who can confirm the correct size.
Step-by-Step Replacement for Bump-Feed Spools
Bump-feed spools are found on the majority of consumer string trimmers. If this matches your trimmer, follow these steps:
Step 1: Prepare and Secure Your Trimmer
- Disconnect power (remove spark plug wire for gas, unplug corded electric, or remove battery for cordless models).
- Place the trimmer on a clean, flat work surface with the cutting head facing up.
- If your trimmer has a stand or handle, stabilize it so the head cannot rotate unexpectedly.
Step 2: Remove the Spool Head
- Locate the spool head at the base of the trimmer shaft. Most models have a large plastic cap or knob covering the spool.
- Look for a screw or clip mechanism. Some heads twist counterclockwise to remove; others have a single screw or quick-release button.
- Remove fasteners carefully and place them in a small container so they don’t get lost.
- Gently pull the spool head away from the trimmer shaft. Note the direction the spool faces—this matters for reassembly.
Step 3: Remove Old Line and Inspect the Spool
- Pull out any remaining line from the spool grooves. Most bump-feed spools have two separate grooves—one for each line side.
- Remove any tangled or broken line fragments. Use pliers if necessary.
- Inspect the spool for cracks, worn grooves, or debris. If the spool is damaged, it will need replacement (usually a $10–$20 part available from the manufacturer).
- Clean out dust and grass clippings from the spool housing and grooves.
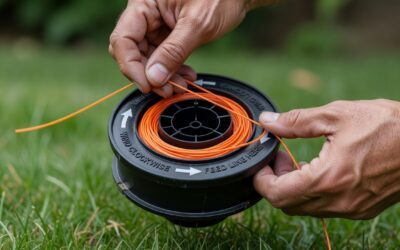
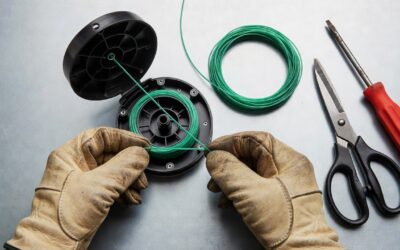
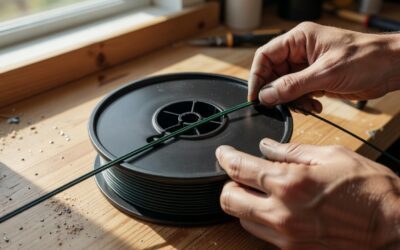
Step 4: Wind New Line onto the Spool
- Cut a section of replacement line—typically 15–20 feet total (7.5–10 feet per side, depending on spool size). Your manual will specify the exact length.
- Locate the anchor notch or slot on the spool. This is where you begin winding. Some spools have a small hole or slot for line insertion.
- Insert one end of the line into the anchor notch and hold it firmly. Begin winding the line into the first groove in the direction indicated by arrows on the spool (usually clockwise for one side, counterclockwise for the other, or both the same direction—check your manual).
- Wind the line tightly and evenly, ensuring it sits snugly in the groove without overlapping. Apply slight tension with your fingers to keep the line neat.
- When you reach the end of the first side (typically 7.5–10 feet), leave about 4–6 inches of line free and move to the second groove.
- Repeat the winding process for the second side, maintaining the same tension and pattern.
Step 5: Thread Line Through Eyelets
- Locate the eyelets (small holes or notches) at the edge of the spool head. These guide the line out to the cutting area.
- Thread one end of the line through the first eyelet, leaving 4–6 inches extending beyond it.
- Thread the second line end through the second eyelet in the same manner.
- Some spools have small clips or notches that hold the line ends in place—secure them according to your manual’s instructions.
Step 6: Reassemble the Spool Head
- Align the spool head with the trimmer shaft, ensuring the line eyelets point downward (or toward the cutting position, depending on your trimmer’s orientation).
- Carefully slide the spool head back onto the shaft, making sure the line doesn’t twist or jam between the spool and shaft.
- Secure the head by twisting clockwise or replacing fasteners, depending on your model. Tighten firmly but do not overtighten, as this can crack the plastic housing.
- Verify that the spool head spins freely and the line extends evenly from both eyelets.
Step 7: Trim Excess Line
- Once the head is secured, you should have 4–6 inches of line extending from each eyelet.
- Using scissors or a utility knife, carefully trim each line end to approximately 2–3 inches. This is the cutting length that will do the actual trimming work.
- Some bump-feed systems activate line advance automatically; others require a test bump on the ground to feed fresh line when the current line wears down.
Variations for Other Trimmer Designs
Fixed or Manual-Advance Spools
If your trimmer has a fixed spool (common on commercial models), the process differs:
- Remove the spool head following your manual’s instructions.
- The spool itself may be fixed to the shaft or removable. If removable, pull it straight out.
- Remove old line and clean the spool thoroughly.
- Wind new line in a tight spiral around the spool, following the grooves or guides provided.
- Leave the line ends long (6–12 inches) and thread them through the eyelets.
- Reassemble and manually advance the line by pulling or rotating the spool head as needed during operation. Consult your manual for the specific advancement method.
Pre-Wound Cartridge Systems
Some premium trimmers use sealed cartridges or pre-wound spools:
- Locate the cartridge release mechanism (usually a button or tab on the cutting head).
- Press or pull to release the spent cartridge.
- Insert a new pre-wound cartridge, aligning it with the housing guides.
- Snap or click the cartridge into place until it locks.
- No winding or threading is required—the cartridge is ready to use immediately.
This design is convenient but cartridges are more expensive than bulk line. Check prices before assuming this system is cost-effective for your usage.
Common Mistakes to Avoid
Using the Wrong Line Diameter
Installing line that’s too thin will break easily; line that’s too thick won’t fit in the spool grooves or eyelets, or may jam during operation. Always confirm the correct diameter before purchasing replacement line.
Winding Line Too Loosely
Loose line tangles, doesn’t advance properly, and wastes space on the spool. Wind evenly and maintain consistent tension throughout. If the line is loose after several uses, the spool is worn and should be replaced.
Overlapping Line Windings
If line overlaps on itself in the groove, it will jam or tangle. Keep each wrap separate and nested tightly together without crossing over the previous wrap.
Loading Too Much Line
Excess line causes the spool to become unbalanced, leading to vibration and poor performance. Stick to your manual’s recommended length (typically 15–20 feet total).
Threading Line Through Eyelets Incorrectly
The line must extend cleanly through the eyelets and be secured or held in place by grooves or clips. If the line hangs loosely or isn’t properly seated, it won’t cut effectively and may slip back into the spool.
Forgetting to Disconnect Power
This is the most dangerous mistake. Always disconnect power before removing the spool head. An accidental start during disassembly can cause serious injury.
Troubleshooting After Replacement
Line Won’t Feed or Advance
Possible causes and solutions:
- Line is too thick for the spool eyelets. Confirm the diameter and switch to the correct gauge.
- Line is wound too tightly or overlapping. Remove and rewind more loosely.
- Spool head is assembled incorrectly. Remove and reassemble, ensuring the spool spins freely.
- For bump-feed models, tap the head firmly on the ground to activate line advance. Some models require multiple taps or a specific angle.
- Check the spring mechanism inside the spool head. If it’s broken or missing, the spool won’t function. Consult your manual or contact the manufacturer for replacement parts.
Line Keeps Breaking During Use
Possible causes and solutions:
- Line diameter is too thin for your trimmer type. Switch to a thicker gauge recommended for your model.
- Line is old or low-quality. Nylon degrades over time, especially if exposed to UV light or moisture. Use fresh, manufacturer-recommended line.
- Spool head is damaged, causing the line to catch or pinch. Inspect for cracks or worn grooves and replace the spool if necessary.
- Eyelets are cracked or burr; these can cut the line as it exits. Smooth any rough edges with fine sandpaper, or replace the spool head.
- The line was wound too tightly, creating internal stress. Rewind more loosely with even tension.
Spool Head Doesn’t Spin or Is Stuck
Possible causes and solutions:
- Line is caught between the spool and shaft. Remove the head, carefully free the line, and reassemble.
- Spool head fasteners are over-tightened. Remove and reinstall, tightening only until snug.
- Debris or dried grass is inside the spool housing. Clean thoroughly with a dry cloth or soft brush.
- Spool is damaged or warped. If the head still doesn’t spin after cleaning, the spool needs replacement.
Uneven Line Length or Line Pulling Back into Spool
Possible causes and solutions:
- Line isn’t properly threaded through the eyelets or secured by retaining clips. Remove and rethread, ensuring the line sits firmly in the eyelet guides.
- Spool tension spring is weak or broken. This prevents the spool from maintaining line extension. Contact the manufacturer for a replacement spring.
- Line windings are uneven or one side is much shorter than the other. Rewind both sides with equal length and tension.
Frequently Asked Questions
How often should I replace trimmer line?
This depends on usage. Light residential use (30 minutes per week) may require line replacement every 4–6 weeks. Frequent or heavy use may deplete line every 1–2 weeks. Watch for thinning line or visible fraying—these are signs to reload or replace the spool. Always keep spare line on hand so you’re never caught without supplies mid-season.
Can I use any brand of replacement line, or must it match my trimmer’s brand?
As long as the diameter matches your trimmer’s specification, aftermarket line works fine. No-name or generic brands are often significantly cheaper than OEM (original equipment manufacturer) line and perform identically. However, always verify the diameter is correct—mixing sizes will cause problems. When switching to a new brand, buy a small amount first to confirm compatibility before buying in bulk.
What’s the best way to store trimmer line?
Store bulk line spools in a cool, dry place away from direct sunlight. UV exposure and heat degrade nylon over time, making it brittle. An airtight container or sealed bag in a garage or shed is ideal. Properly stored line lasts 1–2 years before noticeable degradation. If line has been stored for several years and feels dry or stiff, replace it with fresh stock.
Why does my line keep tangling inside the spool after I load it?
Tangling usually results from uneven winding, overlapping line, or winding in the wrong direction. Follow your manual’s winding pattern exactly, keep tension consistent, and ensure each wrap sits neatly in its groove without crossing previous wraps. If tangling persists even with correct winding, the spool grooves may be worn or damaged and the spool should be replaced.
When to Seek Professional Help
Line replacement is a straightforward maintenance task for most home users. However, consider professional service or manufacturer support if:
- Your trimmer has an unusual or complex spool design not clearly explained in the manual. Manufacturers’ customer service lines can often provide video guidance or detailed instructions.
- The spool head is cracked, warped, or damaged and your attempts to load line fail. Replacement spool heads typically cost $10–$30 and are available from the manufacturer or local dealers.
- Internal springs or advance mechanisms are broken or missing. These require disassembly beyond typical line replacement and may need professional service or parts replacement.
- Your trimmer is under warranty and is malfunctioning after line replacement. Attempting repairs yourself may void the warranty. Contact the manufacturer first.
- You’re uncomfortable working with power tools or have limited experience. A local lawn equipment dealer can replace line quickly (often for $5–$10 in labor) if you provide the correct line type and diameter.
Most DIY users successfully replace trimmer line after their first attempt. Keep your manual accessible, work methodically through each step, and don’t rush. With practice, the entire process takes 10–15 minutes.