Direct Answer: How to Replace Trimmer Line
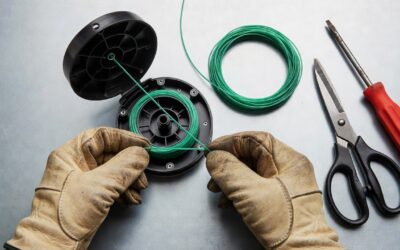
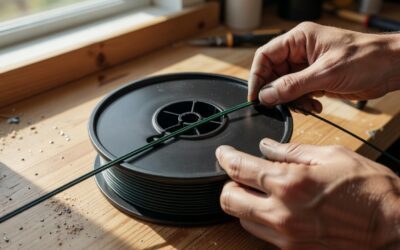
To replace trimmer line, access your trimmer head by twisting or unclipping the cap, remove the old line spool, and inspect the eyelet holes or channels where line feeds through. Thread new line of the correct diameter (typically .080–.105 inch) through the eyelets in the direction indicated by arrows on the spool, wind it evenly and firmly onto the spool, leave 4–6 inches of line extending from each hole, and reassemble the head. Most replacements take under 10 minutes and require only the trimmer and replacement line.
Understanding Your Trimmer Head Type
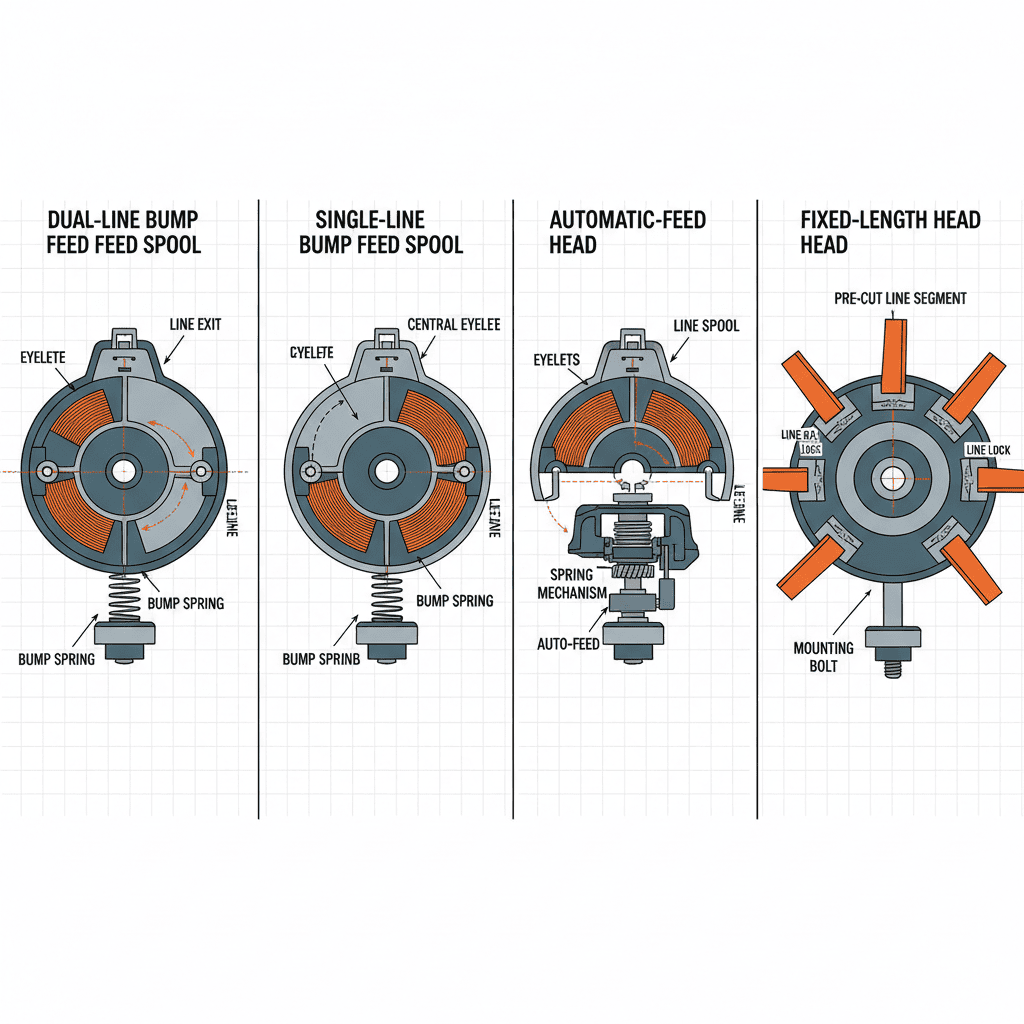
Before you begin, identify which type of trimmer head you have. This determines the exact replacement method.
Dual-Line Trimmers (Most Common)
Dual-line trimmers feature two separate lines that extend from opposite sides of the spool. Each line spins independently, doubling cutting width and efficiency. Most corded electric, battery-powered, and gas-powered consumer trimmers use this design. The spool typically holds 30–50 feet of line total, split between both sides.
Single-Line Trimmers
Single-line trimmers use one line that extends from a single eyelet. These are less common in residential settings but appear on some lightweight electric models and commercial equipment. Replacement is simpler since you only thread and wind one line.
Automatic-Feed Trimmers
Automatic-feed (or bump-feed) trimmers release fresh line by tapping the trimmer head on the ground during use. The spool has a spring-loaded mechanism that advances line automatically. Replacement involves the same threading process, but you must ensure the mechanism engages correctly after reassembly.
Fixed-Length Trimmers
Some commercial and specialty trimmers have fixed line lengths with no spool. These require cutting and installing pre-measured line segments, and replacement steps differ significantly from spool-based systems.
Tools and Materials You’ll Need
- Replacement trimmer line – Match the diameter to your trimmer model (see compatibility chart below). Purchase from the manufacturer or a hardware store. Common diameters: .080″, .095″, .105″
- Your trimmer – Consult your manual if unsure of line diameter
- Scissors or line cutter – To trim line to proper length
- Flathead screwdriver (optional) – Some trimmer heads use screws instead of clips
- Your trimmer’s manual – Reference for eyelet direction and line length specifications
Choosing the Correct Line Diameter
| Line Diameter | Common Trimmer Type | Best For |
|---|---|---|
| .080″ (2.0 mm) | Lightweight electric | Light grass, thin weeds |
| .095″ (2.4 mm) | Mid-range battery & corded electric | General residential use |
| .105″ (2.7 mm) | Gas-powered & commercial | Heavy brush, thick weeds |
Tip: Using line thicker than your trimmer is rated for stresses the motor and voids warranties. Using thinner line wears out faster and cuts less efficiently.
How to Replace Trimmer Line: General Steps
Step 1: Prepare and Disconnect
Unplug corded trimmers or remove the battery from battery-powered models. For gas trimmers, ensure the engine is cool and disconnect the spark plug wire. Never work on a live trimmer. Lay the trimmer on a flat surface with the head facing up.
Step 2: Access the Trimmer Head
Most trimmer heads use one of two fastening methods:
- Clockwise-twist cap: Grip the trimmer head firmly with one hand. Turn the cap counterclockwise (left) by hand or with a flathead screwdriver until it loosens. Continue turning until the cap, spool, and spring separate.
- Clip-release head: Locate small tabs or clips on the trimmer head side. Push or pull these tabs inward to release the head cover. Lift the cover straight up to expose the spool.
Caution: The spool may contain a spring or retaining clip. Work slowly to avoid losing small parts. Keep components in order so reassembly is straightforward.
Step 3: Remove the Old Line Spool
Lift the spool straight up and out of the head housing. Inspect the spool for damage, cracks, or stripped threads. If damaged, you may need to replace the entire head assembly. Discard remaining old line. Wipe the head housing with a dry cloth to remove grass clippings and debris.
Step 4: Measure and Cut New Line
Consult your trimmer manual for the recommended line length per side. Typical lengths for dual-line trimmers are 15–20 feet per side (30–40 feet total). Cut your line to the specified length using scissors or a utility knife. Cutting a bit extra is safer than cutting short—you can always trim excess after installation.
Step 5: Thread the Line Through Eyelets
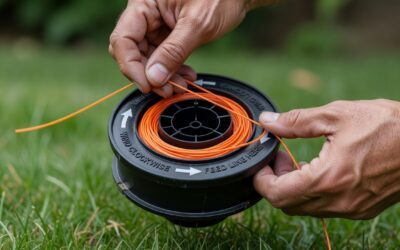
The spool has one or two eyelets (small holes) where line feeds through and exits the head. Look for arrows or directional marks on the spool indicating which direction to thread.
- For dual-line trimmers: Insert one end of your line into the first eyelet and pull it all the way through until roughly equal lengths hang from both sides (for a single long piece) or thread separate lines through each eyelet if using two separate pieces.
- For single-line trimmers: Thread the line through the single eyelet, centering it so equal lengths extend on both sides.
The line should feed smoothly without kinks. If the line catches, rethread it carefully.
Step 6: Wind the Line Onto the Spool
This is the most critical step. Improper winding causes line jams and feeding problems.
- Hold the spool in one hand and the line in the other.
- Wind the line evenly and firmly around the spool in the direction indicated by arrows (usually counterclockwise when viewed from above).
- Keep tension on the line as you wind to prevent loose coils.
- Wind in neat, overlapping rows—avoid crossing or overlapping lines on the same row.
- Leave 4–6 inches of line extending from the eyelets. Do not wind the line all the way through the eyelets; this prevents proper line feed.
Common mistake: Winding too loosely causes the line to slip during operation. Winding too tightly can damage the spool or make the line difficult to feed. Find a firm, consistent tension.
Step 7: Insert the Spool and Secure the Head
Lower the spool back into the head housing, aligning the line ends through the eyelets. Ensure the line extends evenly on both sides (4–6 inches each for dual-line trimmers). Reattach the head cap by twisting clockwise until snug or clicking the clip fasteners back into place. Do not over-tighten; hand-tight is sufficient.
Step 8: Test the Line Feed
Reconnect the trimmer (plug in, reinsert battery, or reconnect spark plug wire). Hold the trimmer away from your body and turn it on for 1–2 seconds. The line should spin freely without catching. Tap the trimmer head gently on the ground (for bump-feed models) to verify the line feeds correctly. If the line doesn’t feed or catches, stop immediately and repeat steps 5–7.
Dual-Line Trimmer Replacement (Detailed Walkthrough)
Most residential users work with dual-line trimmers, so here’s a detailed breakdown specific to this design.
Two-Piece vs. Single-Piece Line Configuration
You can purchase trimmer line as a single continuous spool or in pre-packaged two-piece kits. Single-piece (also called one-line configuration) is more economical; you cut it in half and wind each half into a separate chamber on the spool. Two-piece kits come pre-measured for your trimmer model.
Threading for Dual-Line Spools
Dual-line spools have two separate chambers or eyelet pairs. Each chamber holds one line independently.
- Cut your line to the specified length (typically 15–20 feet per side).
- Insert the first line into the first eyelet and wind it into the first chamber, leaving 4–6 inches extending.
- Insert the second line into the second eyelet and wind it into the second chamber, leaving 4–6 inches extending.
- Ensure both lines are wound in the same direction (both clockwise or both counterclockwise, as indicated by spool arrows).
- Both extended line ends should be roughly equal in length for balanced cutting.
Pro tip: If your extended line ends are unequal, tap the trimmer head gently on the ground a few times. For bump-feed trimmers, this allows the trimmer’s advance mechanism to equalize the line lengths automatically.
Line Length and Spool Capacity
Overfilling the spool causes the head to jam or prevents proper line feeding. Underfilling means you’ll need to replace line sooner. Standard dual-line trimmers hold 30–50 feet total (15–25 feet per side). Check your manual for exact capacity. A helpful guide: if the spool feels packed tight and you can barely close the head, you’ve likely wound too much line.
Single-Line and Automatic-Feed Trimmer Replacement
Single-Line Trimmer Process
Single-line replacement is simpler than dual-line:
- Remove the trimmer head as described in Step 2 above.
- Remove the spool and cut a single piece of line to the specified length (typically 25–30 feet for single-line models).
- Thread the line through the single eyelet, centering it so equal lengths extend on both sides.
- Wind the entire line onto the spool in one continuous spiral, following the directional arrows.
- Leave 4–6 inches extending from the eyelet.
- Reassemble and test.
Automatic-Feed Trimmer Considerations
Automatic-feed trimmers include a spring-loaded advance mechanism that feeds fresh line when you tap the head on the ground. The replacement process is identical to manual-feed trimmers, but you must verify that the advance mechanism engages after reassembly.
After replacement: Turn on the trimmer and tap the head gently on the ground 2–3 times. You should hear or feel a small click or movement as the mechanism advances fresh line. If nothing happens, the spring may have loosened or the mechanism may have disengaged during reassembly. Open the head again and ensure the spring is properly seated.
Troubleshooting Common Replacement Problems
Line Won’t Feed or Extend
Cause: Line wound too tightly, wound in the wrong direction, or not extending past the eyelets.
Fix: Remove the spool and rewind, ensuring firm but not excessive tension. Verify the winding direction matches the directional arrows on the spool. Ensure 4–6 inches of line extends from each eyelet.
Line Keeps Breaking or Fraying
Cause: Wrong line diameter for your trimmer, line too old (brittles over time), or debris inside the trimmer head jamming the line.
Fix: Confirm you’re using the correct diameter for your model. Replace line every 2–3 years even if unused, as UV exposure and temperature fluctuations degrade nylon. Clean the trimmer head interior with a dry cloth and remove any grass or dirt before replacing line.
Trimmer Head Wobbles or Won’t Spin
Cause: Head cap not tightened sufficiently, spool not seated properly, or spring not engaged.
Fix: Tighten the head cap by hand until snug (do not use tools or over-tighten). Verify the spool sits flat in the housing and the spring (if present) is properly positioned. Retest.
Extended Line Ends Are Unequal
Cause: Line not centered in the eyelet during threading, or spool not wound evenly.
Fix: For bump-feed trimmers, tap the head on the ground a few times to allow the advance mechanism to equalize the lines. For manual-feed trimmers, remove the spool, rewind carefully, and ensure equal lengths extend from each eyelet before reassembling.
Trimmer Head Jams During Operation
Cause: Too much line wound onto the spool, line crossing over itself, or debris caught in the head.
Fix: Turn off and unplug immediately. Open the head, inspect for jams, and remove any grass or debris. Rewind the line using slightly less than the spool’s rated capacity. If jamming persists, the spool may be damaged and need replacement.
Maintenance Tips to Extend Trimmer Line Life
Avoid Common Line Wear Causes
- Contact with hard surfaces: Avoid striking rocks, concrete, fences, or metal objects. These cause line to fray, split, or break prematurely. Trim only grass and soft weeds.
- Overloading: Using your trimmer on thick brush, vines, or wet grass strains the line and motor. For heavy-duty work, upgrade to a gas trimmer or use a string trimmer designed for brush cutting.
- Wet conditions: Trim when grass is dry. Wet grass wraps around the line and housing, causing jamming and accelerated wear.
- UV exposure: Store your trimmer indoors or under cover. UV rays degrade nylon over time, making old line brittle even if unused.
Typical Replacement Frequency
Most residential users replace trimmer line every 3–6 months with regular weekly use (30–60 minutes per week). Heavy commercial use may require monthly replacement. Store spare line indoors in a cool, dry place away from direct sunlight. Unused line degrades after 2–3 years, so replace stored spools periodically.
Storage Best Practices
- Store your trimmer with the line removed (or very loosely wound) to prevent pressure on the spool and spring over time.
- Empty the fuel tank on gas trimmers before long-term storage to prevent varnish buildup.
- Keep replacement line in sealed, opaque containers away from heat and sunlight.
- Clean the trimmer head quarterly to prevent debris accumulation.
Frequently Asked Questions
What is the most common trimmer line diameter for residential use?
.095 inch (2.4 mm) is the most common diameter for mid-range battery-powered and corded electric trimmers. This size balances cutting efficiency with motor durability for typical residential lawn care. Lightweight electric trimmers often use .080 inch; gas and commercial trimmers use .105 inch or larger.
Can I use a thicker line than my trimmer specifies?
No. Using line thicker than your trimmer’s rated diameter overloads the motor, reduces cutting efficiency, and may cause the line to jam. It can void your warranty and shorten the trimmer’s lifespan. Always match the diameter specified in your manual.
How do I know if my trimmer uses automatic-feed or manual-feed line?
Automatic-feed trimmers advance line by tapping the head on the ground; you don’t manually extend or adjust line during operation. Manual-feed trimmers require you to stop and manually pull out fresh line when the current line wears short. Check your trimmer’s manual or look for a spring-loaded mechanism visible when you open the head. If you see a spring, it’s likely automatic-feed.
What should I do if I can’t find the correct line diameter for my trimmer?
Check your trimmer’s manual or the manufacturer’s website for specifications. If your trimmer is old or the manual is lost, contact the manufacturer with your trimmer’s model number. Most retailers (hardware stores, online marketplaces) filter trimmer line by trimmer brand and model, making selection easy. Avoid guessing; using the wrong diameter risks damaging your trimmer.
Final Thoughts
Replacing trimmer line is one of the easiest and most cost-effective maintenance tasks for any string trimmer. Taking 5–10 minutes to properly thread and wind new line saves you money compared to professional repair or premature trimmer replacement. By following these steps, choosing the correct line diameter, and maintaining your trimmer with regular cleaning, you’ll keep your trimmer cutting efficiently for years to come.